Custom Templates Add-on – Create a Template

This is a really basic way of creating a new template file for the Custom Template add-on. It does require some HTML/CSS, PHP, and perhaps jQuery/Javascript knowledge in order to do. Having an offline server set up such as with Xampp or DesktopServer is recommended to do the development work. This is my personal process so experienced coders may find it a little simplistic.

Basics

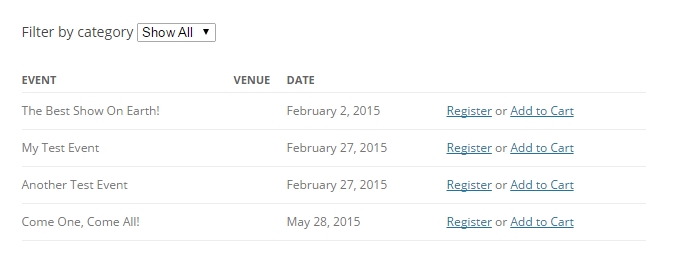
First off I want to briefly explain how the plugin works. It is a simple one file plugin that looks for template folders/files in the plugin directory or the theme that match the template_name parameter in the shortcode (e.g. [EVENT_CUSTOM_VIEW template_name=”category-filter”]) will look for the category-filter folder/file. This core file will do some some of the heavy lifting for you already, it grabs the event list details for you, and works out all the parameters such as limit, or show_recurrence. This means that your custom template for the most part should only require a structure. Sometimes though, you may need to re-query the database for additional data. Take the category-filter template I worked on, it queried the database in the template file in order to get the category details in order to output them into a “select” drop down box.

Custom Parameters

It is possible to use custom parameters in the shortcodes as well, for example [EVENT_CUSTOM_VIEW template_name=”grid” my_custom_parameter=”something”] The template will need the array $ee_attributes adding to the global list. Some of the default arrays use this and some don’t, but it can be added to any of them. Then simply get the parameter value into a variable to use, e.g.: $myvariable = $ee_attributes[‘mycustom_parameter’]; If you echo $myvariable the result will be something.

Example Template

I am going to go through a process of creating a grid like structure for the events. This isn’t a follow and copy exercise, more like a broad generalisation of what I did. I began by grabbing one of the existing templates that matches my idea broadly and copy the folder and rename it. In this case I am just using the calendar table template as it has CSS already loaded that I can hijack. I delete any files that aren’t necessary usually leaving me with just the index.php file. Opening up the index.php there are some things that need to be changed straight away. First off are the comments at the top. This isn’t vital, but useful to keep track of what the file is about. I ended up with these comments:

//Template: Grid
//Description: This template creates a grid style view of events.
//Shortcode Example: [EVENT_CUSTOM_VIEW template_name="grid-view" max_days="30" category_identifier="concerts"]. 
//Requirements: CSS skills to customize styles, HTML/PHP to restructure.
//The end of the action name (example: "action_hook_espresso_custom_template_") should match the name of the template. In this example, the last part the action name is "grid-view",

Now if you have read those comments, the last one, mentioning the action hook is our next step. You will see code like this:

add_action('action_hook_espresso_custom_template_default','espresso_custom_template_default');
function espresso_custom_template_default(){

It needs to be changed to have the correct name for your file/folder. As the template is called Grid, mine will look like this:

add_action('action_hook_espresso_custom_template_grid','espresso_custom_template_grid');
function espresso_custom_template_grid(){

If you have done that correctly, you should be able to load up the template in a page or post. Obviously it will look like the basic template you have copied from, but if it hasn’t been set up correctly you will know as you will get an empty page. Important: If you are using two words in the template name, such as grid view, the first part of the add_action needs to use a dash ( – ) instead of the space. The second part of it and the function name should use an underscore ( _ ). The folder/file name should use a dash as a replacement for the space. For example:

add_action('action_hook_espresso_custom_template_grid-view','espresso_custom_template_grid_view');
function espresso_custom_template_grid_view(){

Now it is about getting down and modifying the template itself. One thing to note is that all the data is held in an array called $events, and the template will use a foreach loop to go through each one. There is little point changing this as it is needed. As such in the template sections you will be called data like so $event->event_name ($event is a an array for one event, $events is the array of ALL the events, which is why you use the singular version here). To begin with I am going to keep it simple and create a grid structure that has the featured image and event title, both linking to the event registration page. Once that is done, its fairly simple to start adding extra details such as prices, and extra styles such as hover effects etc. I tend to get the structure thought out in another file before adding it into the template, it helps me to get the basics right before implementing it.

<div><!-- the overall surrounding div -->
<div><!-- an individual grid box -->
<a href=""><img id="" class="" src=""  /></a>
<a href=""><h2 id="" class=""></h2></a>
</div>
</div>

That’s it for now. I then replace the table that’s there with this code, being mindful that the surrounding div needs to be outside the loop, just like the

<table>

tags and the rest inside the foreach loop. Mainly I’ll be focusing where the

<tr>

tag starts and ends. To get the featured image I needed to do some magic with the PHP code. In the foreach each loop, I added

$image_url = unserialize($event->event_meta);

What this does is give me an array of that events event_meta. Meaning in the image HTML I can use that array to get the featured image. Here is my foreach loop

	<div class="">

		<?php 
		foreach ($events as $event){
			//Debug
			$this_event_id		= $event->id;
			$member_only		= !empty($event->member_only) ? $event->member_only : '';
			$externalURL 		= $event->externalURL;
			$registration_url 	= !empty($externalURL) ? $externalURL : espresso_reg_url($event->id);
			$live_button 		= '<a id="a_register_link-'.$event->id.'" href="'.$registration_url.'"><img class="buytix_button" src="'.ESPRESSO_CUSTOM_DISPLAY_PLUGINPATH.'/templates/default/register-now.png" alt="Buy Tickets"></a>';
			$open_spots 		= apply_filters('filter_hook_espresso_get_num_available_spaces', $event->id);
			
			//This line changes the button text to display "Closed" if the attendee limit is reached.
			
			$image_url = unserialize($event->event_meta);
			if ( $open_spots < 1 ) { $live_button = 'Closed';  }


			//Gets the member options, if the Members add-on is installed.
			$member_options = get_option('events_member_settings');
	
			//If enough spaces exist then show the form
			//Check to see if the Members plugin is installed.
			if ( function_exists('espresso_members_installed') && espresso_members_installed() == true && !is_user_logged_in() && ($member_only == 'Y' || $member_options['member_only_all'] == 'Y') ) {
				event_espresso_user_login();
			}else{
				?>
            <div>
                <a href="<?php echo $registration_url; ?>"><img id="" class="" src="<?php echo $image_url['event_thumbnail_url']; ?>"  /></a>
                <a href="<?php echo $registration_url; ?>"><h2 id="" class=""><?php echo $event->event_name; ?></h2></a>
            </div>
		<?php
			}// close is_user_logged_in	
		 } //close foreach ?>
	</div>

As you can see I have left some of the original code in there, but that can be removed later. This doesn’t much look like a grid, but if we change the code so that the file sees the CSS file, then add a CSS class to the inner div tag and some CSS, that will quickly change. This is the entire index.php in its rough format (honestly, it is very rough!)

<?php 
//Template: Grid View
//Description: This template creates a grid style view of events.
//Shortcode Example: [EVENT_CUSTOM_VIEW template_name="grid-view" max_days="30" category_identifier="concerts"]. 
//Requirements: CSS skills to customize styles, HTML/PHP to restructure.
//The end of the action name (example: "action_hook_espresso_custom_template_") should match the name of the template. In this example, the last part the action name is "grid-view",
 
add_action('action_hook_espresso_custom_template_grid','espresso_custom_template_grid');

function espresso_custom_template_grid(){
	//Load the css file
	wp_register_style( 'espresso_cal_table_css', ESPRESSO_CUSTOM_DISPLAY_PLUGINPATH."/templates/grid/style.css" );
	wp_enqueue_style( 'espresso_cal_table_css');
	
	//Defaults
	global $org_options, $this_event_id, $events;
	$featured_image = FALSE; //Show the featured image for each event, instead of the date, to the left of the event title.
	$temp_month = ''; //Clears the month name
	
	//Uncomment to view the data being passed to this file
	//echo '<h4>$events : ' . print_r($events,true) . ' <span style="font-size:10px;font-weight:normal;">' . __FILE__ . '<br />line no: ' . __LINE__ . '</span></h4>';
	
	?>
	<div class="">

		<?php 
		foreach ($events as $event){
			//Debug
			$this_event_id		= $event->id;
			$member_only		= !empty($event->member_only) ? $event->member_only : '';
			$externalURL 		= $event->externalURL;
			$registration_url 	= !empty($externalURL) ? $externalURL : espresso_reg_url($event->id);
			$live_button 		= '<a id="a_register_link-'.$event->id.'" href="'.$registration_url.'"><img class="buytix_button" src="'.ESPRESSO_CUSTOM_DISPLAY_PLUGINPATH.'/templates/grid/register-now.png" alt="Buy Tickets"></a>';
			$open_spots 		= apply_filters('filter_hook_espresso_get_num_available_spaces', $event->id);
			
			//This line changes the button text to display "Closed" if the attendee limit is reached.
			
			$image_url = unserialize($event->event_meta);
			if ( $open_spots < 1 ) { $live_button = 'Closed';  }


			//Gets the member options, if the Members add-on is installed.
			$member_options = get_option('events_member_settings');
	
			//If enough spaces exist then show the form
			//Check to see if the Members plugin is installed.
			if ( function_exists('espresso_members_installed') && espresso_members_installed() == true && !is_user_logged_in() && ($member_only == 'Y' || $member_options['member_only_all'] == 'Y') ) {
				event_espresso_user_login();
			}else{
				?>
            <div class="ee_grid">
                <a href="<?php echo $registration_url; ?>"><img id="" class="" src="<?php echo $image_url['event_thumbnail_url']; ?>"  /></a>
                <a href="<?php echo $registration_url; ?>"><h2 id="" class=""><?php echo $event->event_name; ?></h2></a>
            </div>
		<?php
			}// close is_user_logged_in	
		 } //close foreach ?>
	</div>
	
<?php } ?>

And the CSS

.ee_grid {
	width:188px;
	margin:10px;
	float:left;
}
.ee_grid img {
	width:188px;
	height:188px;
}

Posted in | Comments Off on Custom Templates Add-on – Create a Template

Custom Template Add-on

The Custom Template add-on provides you with an easy to use way to change the look and function of your event lists.

View quick links for this add-on –> 


Need to Buy a Support License for the Custom Template Add-on?
https://eventespresso.com/product/custom-templates/

Installation

This add-on requires Event Espresso 3.1.33 or newer. It cannot be used with old versions of Event Espresso 3.

This add-on is a plugin for WordPress and can be installed through your WP dashboard (WP-admin).

Download the latest version of the Custom Template add-on for Event Espresso 3 from your Event Espresso account.

Then login to your WordPress dashboard (WP-admin) and go to Plugins. Next, click on Add New –> Upload and browse to the plugin on your computer. Then select the zip file and begin the upload process. Wait for the plugin to upload and then click on Activate.

Setup and Configuration

You will not see any new WordPress administration menus for the add-on.

Usage

The Custom Template add-on can be used by adding a shortcode to a WordPress page or post.

This is the default template displays events in a table structure with a category filter dropdown. It is compatible with the Multiple Events Registration add-on.

  • Show the template with all of your events
    [EVENT_CUSTOM_VIEW ]
  • Show the template with all events and order by start date
    [EVENT_CUSTOM_VIEW order_by=start_date]
  • Show the template with all events and sort by ascending order (descending order is also available)
    [EVENT_CUSTOM_VIEW sort=ASC order_by=start_date]
  • Show the template with a specific number (e.g. 15 events) of events
    [EVENT_CUSTOM_VIEW limit=15]
  • Show events on the template and include expired events
    [EVENT_CUSTOM_VIEW show_expired=true]
  • Show events on the template and include secondary (waitlist) events
    [EVENT_CUSTOM_VIEW show_secondary=true]
  • Show events on the template and include deleted events
    [EVENT_CUSTOM_VIEW show_deleted=true]
  • Show events on the template and include expired events
    [EVENT_CUSTOM_VIEW show_expired=true]
  • Show events from a specific category on the template
    [EVENT_CUSTOM_VIEW category_identifier=your-event-category-identifier]
  • Show events from a specific category on the calendar and include expired events
    [EVENT_CUSTOM_VIEW category_identifier=your-event-category-identifier show_expired=true]
  • Show events from a specific month
    [EVENT_CUSTOM_VIEW month=nameofmonth]

Standard Shortcode Parameters

The following parameters are available for this add-on. You can see examples of these parameters in use in the section above.

order_by=false (order events by start date instead of title; enable by setting to start_date)
sort=ASC (set the sort order such as ASC (ascending) or DESC (descending); must be used with order_by parameter)
limit=false (set a numeric limit on the number of events to show (e.g. 15))
show_expired=false (set to true to include expired events)
show_secondary=false (set to true to include waitlist events)
show_recurrence=false (set to true to include recurring events)
show_expired=false (set to true to include expired events)
recurrence_only=false (set to true to show only recurring events)
max_day=false (show events over a period of time starting from today; uses event start date)
event_category_id=false (retrieve events from a certain category, using the event category which is a numeric value such as 123)
category_identifier=false (retrieve events from a certain category, using the event category which is a alphanumeric value such as featured-events-12345)
user_id=false (show events from a specific WordPress user; uses the numeric ID of a WP user)

Troubleshooting

The plugin will not install. Can you help?
Are you running the latest version of Event Espresso 3?

I’ve added the [EVENT_CUSTOM_VIEW] to my default event listing page and now event registration is not working.
[ESPRESSO_EVENTS] is responsible for registration checkout. It should not be replaced by any other shortcodes and it should only be used once on a site.
Restore the [ESPRESSO_EVENTS] shortcode on the events registration page (/event-registration/) and save changes. Then create a new WordPress page and add [EVENT_CUSTOM_VIEW] to it and save changes.

Documentation for additional premium templates have been relocated! Updated links are available below.

Customizations

Our support team cannot write custom coding for you. Below are some examples on customizing this add-on.
  • None at this time. Check back soon!

The Custom Template add-on has additional templates available as premium add-ons. These premium template add-ons are another way to present or display your events to your attendees/registrants. Links to these additional add-ons are available below.


Need to Buy a Support License for the Custom Template Add-on?
https://eventespresso.com/product/custom-templates/

Posted in | Comments Off on Custom Template Add-on

Understanding Your Event Espresso Account

Congratulations on downloading Event Espresso, the most powerful online event registration and ticket sales software plugin for WordPress.

We’d like to take a moment to introduce you to your Event Espresso Account. Please refer to the image below as you reference each item in your account. You can also click the image to view it in more detail.


1. Profile

By default we use your account email address to try and associate your account with your Gravatar profile. If you do not have a Gravatar profile, a default profile image will be chosen for you.

2. Account Navigation

This area can be used to quickly navigate your account and download software:

  • Quick Links – Navigate your browser to the latest software downloads, support license key(s), mobile apps page, latest news, and support posts.
  • Help & Support – Links to resources, such as the quick start guide, documentation, forum support, and community live chat.
  • Manage My Event Espresso Account – With the Edit Account Details link you can edit your account details such as your name, email address, password, etc. You can also mange your billing information, download invoices, and update your newsletter preferences. The Logout button will end your logged-in session on EventEspresso.com. You will be required to log into your account when you return to EventEspresso.com.


3. Account Details

From here you can view your current support licenses, switch your support license, and retrieve your support license key(s):

  • Account Status & Settings – You will see a message that displays your account type, the expiration date and renewal notices. 30 days before your account expires, you will receive a notice on your account that your support license is expiring, and you will be given special pricing to renew your license. You can cancel auto-renewal by clicking on the Cancel button.
  • Switch Your Support License – This section allows you to quickly upgrade or downgrade your support license.
  • Support License Key – Support license keys enable you to receive automatic upgrades for all Event Espresso products in your account. Your support license key can be added to Event Espresso through your WordPress dashboard –> Event Espresso –> General Settings page.
  • Redeem Premium Support – If you have purchased priority support, you will have a notification on your account to complete a form to start the process to get priority assistance. You will be asked for a description of how we can help you and also credentials to your website.If you have not purchased priority support, you will not see this widget area. After the issue related to your support token is resolved, or the time allotted to your support token(s) is used or expires this widget area will be removed.


4. Billing Management

This section allows you to update your billing information and download invoices.


5. Downloads & Documentation

Clicking the disk icon will download that plugin zip file that you can install on your website. You can also click the name of the file to download the file.

Clicking the note icon will link you to the documentation page about that download.


6. Recent News

You will be notified of news posted to the Event Espresso blog.


7. Subscribed Support Topics

This is an archive of the support forum discussions that you have subscribed to. You will receive an email notification from EventEspresso.com when a new comment has been posted to a discussion. You can subscribe to a topic by clicking the “Follow” button on any forum discussion page.


8. Bookmarked Support Topics

This is an archive of the support forum discussions you have bookmarked for future reference. You can subscribe to a topic by clicking the “Favorite” button on any forum discussion page.


9. My Support Topics

This is an archive of quick links to the support topics that you have created on the support forums.

Posted in | Comments Off on Understanding Your Event Espresso Account

Standard Ticket Size Tickets

This requires modifying 2 files:
in core EE tpc/dompdf/include/cpdf_adapter.cls.php on line 139, add a line so that it then reads:

"11x17"  => array(0,0,792.00, 1224.00),
	"ticket" => array(0,0,144,396)
  );

then in the ticketing add-on, in functions.php on line 244, change it to be:

$dompdf->set_paper('ticket', 'landscape');

You will have to produce a new ticketing template and css file, probably from scratch, in order to lay out the ticket to match the new size.

Posted in | Comments Off on Standard Ticket Size Tickets

EE3 S2Member Integration

The S2Member Integration is only available as a Pre-release download.

S2Member Integration allows you to choose the level of members that should receive a membership discount.

It is currently in Beta and available from the pre-release channel within your account.

Requirements

S2Member installed and activated

WP User Integration (members) add on (ver 1.9.8 or higher) installed and activated

Once you have installed and activated the S2Member integration, and the other required plugins, please setup the integration by going to Member Settings.

Two additional settings have been added to this page:

Use S2Member level threshold?: Turns the integration on or off.

S2Member threshold: Sets the minimum threshold to be applicable for discount.

How it works

The S2Member threshold setting shows numbers 1 to 4 which link to the S2Member roles. If you set the threshold to 2, a user must be S2Member level 2 or higher to see the discounted price in the event registration page.

If they are level 1 they will see the normal “non member” price.

Please note:
This will only work for S2Member levels, if a user is a subscriber, editor or any other default WordPress level they will see the “non member” pricing even though they would be logged in, as long as the S2Member Integration plugin is active.
Please note:
The price will only be different on the single registration page, not the event list.
The S2Member Integration is only available as a Pre-release download.

Posted in | Comments Off on EE3 S2Member Integration

How to Import Events

Event Espresso provides an easy way to import basic events via a CSV (spreadsheet) file.

Important

This will not allow you to import recurring events. Recurring events can be created using the Recurring Events Manager add-on.

Where to import

The Import Events button is located in the Event Overview page, below the event list itself.

Clicking this button will take you to the import screen. Here you can download a copy of the sample spreadsheet you can use to create your own and import the actual spreadsheet.

import_an_event_button

import_an_event_screen

Creating a CSV

If you examine the sample spreadsheet you will see that the first row contains all the information about what you can import:

0 This dictates whether the plugin should ignore the entire row or not, 0 = ignore, 1 = import. In general, the first row containing the field titles should be 0 and the rest should be 1
event_name The event name
event_desc The event description, basic html is allowed
address First line of the address (not venue)
address 2 Second line of the address (not venue)
city City of the address (not venue)
state State/province of the address (not venue)
country Country of the address (not venue)
zip Zip/postal code of the address (not venue)
phone Phone number of the address (not venue)
display_desc Display the event description? Use Y or N
event_identifier Add a unique event identifier
start_date Add the event start date (format = Y-m-d for example 2013-07-25)
end_date Add the event end date (format = Y-m-d for example 2013-07-25)
start_time Add the event start time (format = 10:00:00 AM)
end_time Add the event end time (format = 10:00:00 AM)
reg_limit Add the maximum number of attendees for the event, enter 999999 for unlimited
event_cost The event price, do not use currency symbols!
allow_multiple Allow group registrations? Use Y or N
additional_limit Group size, use numbers only.
send_mail Send the registration confirmation email? Use Y or N
is_active Is this an active event? Use Y or N
conf_mail Add the content of your confirmation email here, basic HTML and email tags are allowed.
registration_start Add the registration start date (format = Y-m-d for example 2013-07-25)
registration_end Add the registration end date (format = Y-m-d for example 2013-07-25)

Blank Fields

Whilst it is possible to leave some of these fields blank, it is advisable to fill out the following as an absolute minimum

0

Event_name

Event_identifier

Start_date

End_date

Is_active

Registration_start

Registration_end

Importing

Save the spreadsheet as a CSV file named events.csv. Any other name or format will fail to import!

In the Import Events page, click the Choose file button, and select the newly saved events.csv file. Then click the blue Upload File & Add Event(s) button.

You will see a message on screen confirming success or failure.

Important Information

Please note that the use of single quotation marks ( ‘ ) and returns (pressing enter to make a new line) should be avoided in the import file as these can cause errors.

Posted in | Comments Off on How to Import Events

EE3 Attendee Re-assignment Add-on

The Attendee Re-assignment add-on is only available as a Pre-release download for Event Espresso 3.

Have you ever had an attendee sign up to the wrong event? It can be difficult to get the customer to cancel the registration and re-sign up on the correct event. With the Attendee Re-assignment add-on you can easily move attendees between events.

The add-on is available from the Pre Release channel in your account page and installs like any other WordPress plugin.

After activation, you will not see any additional settings or menus.

To be able to move an attendee, go to Event Overview, find the event the attendee signed up to and click the attendee link for that event.

Find the attendee that you want to move from the attendee list and click their name.

In the individual attendee record you will see two new options.

Move to new event?: If this is not clicked the attendee will not be moved!

Available events:  This lists all the available events, and highlights the attendees current event.

attendee_reassignment_screen

In order to move an attendee, tick the Move to new event checkbox and then select an event from the event list.

Once you have selected the correct event, click the Update Record button.

Note:

An attendee can be moved as many times as you want, however the attendee can only be moved to one event at a time. If you require the attendee to be added to numerous events, they will need to register for each of those events as normal.

The Attendee Re-assignment add-on is only available as a Pre-release download.

Posted in | Comments Off on EE3 Attendee Re-assignment Add-on

Event Espresso 3.1 Filters

Filter list for Event Espresso version 3.1.X.
Please note that whilst we have tried to document all the available filters, some may not be listed here. Most filters are prefixed with filter_hook_espresso_

Admin Filters

filter_hook_espresso_admin_pages_list

espresso.php

filter_hook_espresso_personal_cb_where

admin-files/functions.php

filter_hook_espresso_question_cols_and_values

questions/insert_question.php
questions/update_question.php

filter_hook_espresso_question_data_formats

questions/insert_question.php
questions/update_question.php

filter_hook_espresso_admin_question_response

admin-reports/edit_attendee_record.php

filter_hook_espresso_event_unfiltered_description

event-management/insert_event.php
event-management/update_event.php

filter_hook_espresso_event_wp_kses_post_description

event-management/insert_event.php
event-management/update_event.php

Email Filters – Event Espresso 3.1.38 onwards

filter_hook_espresso_post_replace_shortcode_search_values

functions/email.php

filter_hook_espresso_post_replace_shortcode_replace_values

functions/email.php

filter_hook_espresso_post_prepare_email_data

functions/email.php

Event Display Filters

filter_hook_espresso_display_ical

functions/email.php
functions/ical.php
templates/event_list_display.php
templates/registration_page_display.php

filter_hook_espresso_display_featured_image

functions/main.php
templates/event_list_display.php
templates/multi_registration_page_display.php
templates/registration_page_display.php

Core Filters

filter_hook_espresso_hidden_meta

includes/admin-files/functions.php

filter_hook_espresso_event_editor_advanced_options

includes/admin-files/event-management/advanced_settings.php

Gateway Filters

None

Process Payments Filters

filter_hook_espresso_get_total_cost

gateways/process_payments.php
aim/aim_ipn.php
anz/anz_vars.php
eway_rapid3/DoDirectPayment.php
eway_rapid3/eway_rapid3_vars.php
google_checkout/google_checkout_ipn.php
ideal/ideal_vars.php
luottokunta/luottokunta_vars.php
megasoft_return.php
paypal_pro/DoDirectPayment.php
psigate/psigate_vars.php
realauth/realauth_vars.php
usaepay_onsite/DoDirectPayment.php
process-registration/payment_page.php

filter_hook_espresso_update_attendee_payment_data_in_db

gateways/process_payments.php
google_checkout\google_checkout_ipn.php
process-registration\payment_page.php

filter_hook_espresso_update_attendee_payment_data_in_db

gateways/process_payments.php
google_checkout\google_checkout_ipn.php
process-registration\payment_page.php

filter_hook_espresso_prepare_event_link

gateways/process_payments.php
aim/aim_ipn.php
anz/anz_vars.php
eway_rapid3/DoDirectPayment.php
eway_rapid3/eway_rapid3_vars.php
google_checkout/google_checkout_ipn.php
luottokunta/luottokunta_vars.php
megasoft_return.php
paypal_pro/DoDirectPayment.php
psigate/psigate_vars.php
usaepay_onsite/DoDirectPayment.php
process-registration/payment_page.php

filter_hook_espresso_transactions_get_attendee_id

gateways/process_payments.php
2checkout/init.php
aim/init.php
anz/init.php
atos/init.php
authnet/init.php
bank/init.php
beanstream/init.php
check/init.php
eway/init.php
eway_rapid3/eway_rapid3_vars.php
eway_rapid3/init.php
exact/init.php
firstdata/init.php
firstdata_e4/init.php
google_checkout/google_checkout_ipn.php
google_checkout/init.php
ideal/init.php
infusionsoft_payment/init.php
luottokunta/init.php
megasoft/init.php
moneris_hpp/init.php
mwarrior/init.php
nab/init.php
paychoice/init.php
paypal/init.php
paypal_pro/init.php
paytrace/init.php
psigate/init.php
purchase_order/init.php
qbms/init.php
quickpay/init.php
realauth/init.php
stripe/init.php
usaepay_onsite/init.php
wepay/init.php
worldpay/init.php
process-registration/payment_page.php

filter_hook_espresso_prepare_payment_data_for_gateways

gateways/process_payments.php
eway_rapid3/eway_rapid3_vars.php
google_checkout/google_checkout_ipn.php
google_checkout/init.php
ideal/ideal_vars.php
ideal/init.php
realauth/realauth_vars.php
process-registration/payment_page.php

filter_hook_espresso_thank_you_get_payment_data

2checkout/init.php
aim/init.php
anz/init.php
atos/init.php
authnet/init.php
bank/init.php
beanstream/init.php
check/init.php
eway/init.php
eway_rapid3/init.php
exact/init.php
firstdata/init.php
firstdata_e4/init.php
google_checkout/google_checkout_ipn.php
google_checkout/init.php
ideal/init.php
infusionsoft_payment/init.php
luottokunta/init.php
megasoft/init.php
moneris_hpp/init.php
mwarrior/init.php
nab/init.php
paychoice/init.php
paypal_pro/init.php
paytrace/init.php
psigate/init.php
purchase_order/init.php
qbms/init.php
quickpay/init.php
realauth/init.php
stripe/init.php
usaepay_onsite/init.php
usaepay_offsite/init.php
wepay/init.php
worldpay/init.php
process-registration/payment_page.php

Registration Process Filters

filter_hook_espresso_shopping_cart_SQL_select

templates/shopping_cart.php

filter_hook_espresso_shopping_cart_event

templates/shopping_cart.php

filter_hook_espresso_default_event_id

templates/registration_page.php

filter_hook_espresso_cart_grand_total

process-registration/add_attendees_to_db.php

filter_hook_espresso_attendee_cost

process-registration/add_attendees_to_db.php

filter_hook_espresso_form_question

functions/attendee_functions.php
functions/form_build.php

filter_hook_espresso_question_formatted_value

functions/form_build.php

filter_hook_espresso_parse_question_answer_for_price

functions/form_build.php

filter_hook_espresso_registration_id

functions/main.php
process-registrations/add_attendees_to_db.php

filter_hook_espresso_form_question_response

functions/attendee_functions.php

filter_hook_espresso_coupon_results

functions/cart.php

filter_hook_espresso_groupon_results

functions/cart.php

filter_hook_espresso_cart_modifier_strings

functions/cart.php

filter_hook_espresso_cart_coupon_events_array

functions/cart.php

filter_hook_espresso_group_price_dropdown_sql

functions/cart.php

filter_hook_espresso_orig_price_and_surcharge_sql

functions/pricing.php

Posted in | Comments Off on Event Espresso 3.1 Filters

Event Espresso 3.1 Action Hooks

Action Hook list for Event Espresso version 3.1.X.
Please note that whilst we have tried to document all the available hooks, some may not be listed here. Most action hooks are prefixed with action_hook_espresso_

Admin Hooks

action_hook_espresso_add_new_ee_submenu

functions/admin_menu.php

action_hook_espresso_display_gateway_settings

gateways/payment_gateways.php
2checkout/settings.php
Aim/settings.php
Anz/settings.php
atos/settings.php
authnet/settings.php
bank/settings.php
beanstream/settings.php
check/settings.php
eway/settings.php
eway_rapid3/settings.php
exact/settings.php
firstdata/settings.php
firstdata_e4/settings.php
google_checkout/settings.php
ideal/settings.php
infusionsoft_payment/settings.php
invoice/settings.php
luottokunta/settings.php
megasoft/settings.php
moneris_hpp/settings.php
mwarrior/settings.php
nab/settings.php
paychoice/settings.php
paypal/settings.php
paypal_pro/settings.php
paytrace/settings.php
psigate/settings.php
purchase_order/settings.php
qbms/settings.php
quickpay/settings.php
realauth/settings.php
stripe/settings.php
usaepay_offsite/settings.php
usaepay_onsite/settings.php
wepay/settings.php
worldpay/settings.php

action_hook_espresso_staff_cb

admin-files/functions.php
event-management/edit_event.php

action_hook_espresso_generate_price_mod_form_inputs

questions/new_question.php

action_hook_espresso_fem_template_settings

template_settings/index.php

action_hook_espresso_save_attendee_meta

admin-reports/edit_attendee_record.php
functions/main.php
process-registration/add_attendees_to_db.php

action_hook_espresso_attendee_mover_move

admin-reports/edit_attendee_record.php

action_hook_espresso_attendee_mover_events_list

admin-reports/edit_attendee_record.php

action_hook_espresso_attendee_admin_price_dropdown

admin-reports/edit_attendee_record.php
functions/pricing.php

action_hook_espresso_attendee_admin_price_dropdown_member

admin-reports/edit_attendee_record.php

action_hook_espresso_update_attendee_payment_status

admin-reports/enter_attendee_payments.php

action_hook_espresso_before_delete_attendee_event_list

admin-reports/event_list_attendees.php

action_hook_espresso_after_delete_attendee_event_list

admin-reports/event_list_attendees.php

action_hook_espresso_new_event_right_column_top
action_hook_espresso_new_event_right_column_bottom
action_hook_espresso_new_event_left_column_advanced_options_top

includes/event-management/add_new_event.php

action_hook_espresso_edit_event_right_column_top
action_hook_espresso_edit_event_right_column_bottom
action_hook_espresso_edit_event_left_column_advanced_options_top

includes/event-management/edit_event.php


Event Creation Hooks

action_hook_espresso_update_event_success

includes/event-management/update_event.php

action_hook_espresso_insert_event_success

includes/event-management/insert_event.php

Core Hooks

action_hook_espresso_empty_event_trash

includes/functions/admin.php

action_hook_espresso_delete_event

includes/functions/admin.php

action_hook_espresso_delete_event_success

includes/functions/admin.php

action_hook_espresso_empty_event_trash_success

includes/functions/admin.php

action_hook_espresso_registration_page_top

templates/registration_page_display.php

action_hook_espresso_registration_form_top

templates/registration_page_display.php

action_hook_espresso_registration_form_bottom

templates/registration_page_display.php

action_hook_espresso_registration_page_bottom

templates/registration_page_display.php

action_hook_espresso_update_event_meta

includes/functions/main.php

Event Display Hooks

action_hook_espresso_social_display_buttons

templates/registration_page_display.php


Gateway Hooks

action_hook_espresso_display_onsite_payment_header

gateways/gateway_display.php
aim/init.php
beanstream/init.php
eway_rapid3/init.php
firstdata/init.php
ideal/init.php
infusionsoft_payment/init.php
megasoft/init.php
nab/init.php
paychoice/init.php
paypal_pro/init.php
paytrace/init.php
qbms/init.php
stripe/init.php
usaepay_onsite/init.php

action_hook_espresso_display_onsite_payment_gateway

gateways/gateway_display.php
aim/aim_vars.php
beanstream/payment.php
eway_rapid3/eway_rapid3_vars.php
firstdata/firstdata_vars.php
ideal/init.php
infusionsoft_payment/ infusionsoft_vars.php
megasoft/payment.php
nab/nab_vars.php
paychoice/ paychoice_vars.php
paypal_pro/ paypal_pro_vars.php
paytrace/ paytrace_vars.php
qbms/ qbms_vars.php
stripe/ stripe_vars.php
usaepay_onsite/ usaepay_onsite_vars.php

action_hook_espresso_display_onsite_payment_footer

gateways/gateway_display.php
aim/init.php
beanstream/init.php
eway_rapid3/init.php
firstdata/init.php
ideal/init.php
infusionsoft_payment/init.php
megasoft/init.php
nab/init.php
paychoice/init.php
paypal_pro/init.php
paytrace/init.php
qbms/init.php
stripe/init.php
usaepay_onsite/init.php

action_hook_espresso_display_offsite_payment_header

gateways/gateway_display.php
2checkout/init.php
anz/init.php
atos/init.php
authnet/init.php
eway/init.php
exact/init.php
firstdata_e4/init.php
google_checkout/init.php
luottokunta/init.php
moneris_hpp/init.php
mwarrior/init.php
paypal/init.php
psigate/init.php
quickpay/init.php
realauth/init.php
usaepay_offsite/init.php
wepay/init.php
worldpay/init.php

action_hook_espresso_display_offsite_payment_gateway

gateways/gateway_display.php
2checkout/init.php
anz/init.php
atos/init.php
authnet/init.php
eway/init.php
exact/init.php
firstdata_e4/init.php
google_checkout/init.php
luottokunta/init.php
moneris/init.php
mwarrior/init.php
paypal/init.php
psigate/init.php
quickpay/init.php
realauth/init.php
usaepay_offsite/init.php
wepay/init.php
worldpay/init.php

action_hook_espresso_display_offsite_payment_footer

gateways/gateway_display.php
2checkout/init.php
anz/init.php
atos/init.php
authnet/init.php
eway/init.php
exact/init.php
firstdata_e4/init.php
google_checkout/init.php
luottokunta/init.php
moneris_hpp/init.php
mwarrior/init.php
paypal/init.php
psigate/init.php
quickpay/init.php
realauth/init.php
usaepay_offsite/init.php
wepay/init.php
worldpay/init.php

action_hook_espresso_display_offline_payment_header

gateways/gateway_display.php
bank/init.php
check/init.php
invoice/init.php
purchase_order/init.php

action_hook_espresso_display_offline_payment_gateway

gateways/gateway_display.php
bank/bank_payment_vars.php
check/check_payment_vars.php
invoice/invoice_vars.php
purchase_order/po_payment_vars.php

action_hook_espresso_display_finalize_payment_header

gateways/gateway_display.php

action_hook_espresso_display_offline_payment_gateway

gateways/gateway_display.php
bank/bank_payment_vars.php
check/check_payment_vars.php
invoice/invoice_vars.php
purchase_order/po_payment_vars.php

action_hook_espresso_display_offline_payment_footer

gateways/gateway_display.php
bank/init.php
check/init.php
invoice/init.php
purchase_order/init.php


Process Payments Hooks

action_hook_espresso_track_successful_sale

gateways/process_payments.php

action_hook_espresso_transaction

gateways/process_payments.php

action_hook_espresso_email_after_payment

Please note: depending on your version, these hooks may now just be a single hook in the gateways/process_payments.php and process-registration\payment_page.php files, rather than spread out amongst all the gateway files.

gateways/process_payments.php
2checkout/2checkoutpaymentprocess.php
aim/aim_ipn.php
atos/return.php
authnet/authnet_ipn.php
beanstream/return.php
eway/ewaypaymentprocess.php
eway_rapid3/DoDirectPayment.php
exact/exact_ipn.php
firstdata/Firstdata.php
firstdata_e4/e4_ipn.php
google_checkout/google_checkout_ipn.php
ideal/report.php
megasoft/return.php
moneris_hpp/moneris_hpp_ipn.php
mwarrior/mwarrior_ipn.php
nab/nabpaymentprocess.php
paychoice/do_transaction.php
paypal/paypal_ipn.php
paypal_pro/DoDirectPayment.php
paytrace/do_transaction.php
psigate/psigate_ipn.php
realauth/realauthprocesspayment.php
stripe/do_transaction.php
usaepay_onsite/DoDirectPayment.php
wepay/wepay_ipn.php
worldpay/worldpay_ipn.php
process-registration/payment_page.php

action_hook_espresso_pre_confirmation_page – version 3.1.37 onwards

includes/process-registration/payment_page.php

Registration Process Hooks

action_hook_espresso_add_to_multi_reg_cart_block

templates/shopping_cart.php

action_hook_espresso_shopping_cart_before_total

templates/shopping_cart.php

action_hook_espresso_shopping_cart_after_total

templates/shopping_cart.php

action_hook_espresso_save_attendee_data

process-registration/add_attendees_to_db.php

action_hook_espresso_save_attendee_meta

admin-reports/edit_attendee_record.php
process-registration/add_attendees_to_db.php

action_hook_espresso_get_attendee_meta_value

admin-reports/edit_attendee_record.php
functions/main.php

action_hook_espresso_zero_vlm_dscnt_in_session

event-espresso/espresso.php
functions/cart.php

action_hook_espresso_payment_overview_page_top

event-espresso/templates/payment_overview.php

action_hook_espresso_payment_overview_page_bottom

event-espresso/templates/payment_overview.php

action_hook_espresso_payment_page_top

event-espresso/templates/payment_page.php

action_hook_espresso_payment_page_bottom

event-espresso/templates/payment_page.php

action_hook_espresso_payment_page_free_event 3.1.37 onwards

event-espresso/templates/payment_page.php

action_hook_espresso_update_registration_details_by_attendee

Posted in | Comments Off on Event Espresso 3.1 Action Hooks

Custom Gateway Integration

This documentation is provided if you want to build and maintain your own integration with a payment gateway for Event Espresso 3, otherwise we offer Custom Gateway Integration services.

Looking for documentation for Event Espresso 4?
http://developer.eventespresso.com/docs/ee4-payment-method-development/

Step 1 – Add a Gateway Settings Page

When an admin clicks on the “Payment Settings” link in the Event Espresso section of the WordPress admin menu, the page that is loaded causes the execution of a number of PHP scripts that will scan the two directories wp-content/uploads/espresso/gateways and wp-content/plugins/event-espresso/gateways. Any folder that is found is checked to see if it contains a file named settings.php. All settings.php files that are found are then loaded into the PHP interpreter.

Our recommended best practice is to wrap your code that is responsible for saving and displaying the settings for your gateway in a function and to then add your function to the action hook “action_hook_espresso_display_gateway_settings”. Please see gateways/paypal/settings.php for an example.

All gateways that have been activated in the payment settings page have their my-gateway/init.php file loaded into the PHP interpreter when the WordPress action hook “plugins_loaded” is instantiated on every page load. The gateway developer can use the my-gateway/init.php file to cause other gateway files to load and can add their functions to various hooks provided by Event Espresso.

2 – Adding your gateway to the payment page

On-site Gateway?
If you are developing a payment gateway that presents the user with a form for entering the credit card information without leaving the event website, what we call an “on-site gateway”, then you will hook your function that presents the form into the action hook “action_hook_espresso_display_onsite_payment_gateway”.

For an example of an “on-site gateway” function presenting a form, see gateways/aim/aim_vars.php

Off-site Gateway?
If you are developing a payment gateway presents the user with a button that will take the user to a third party site enter the credit card information, what we call an “off-site gateway”, then you will hook your function that presents the user with the button into the action hook “action_hook_espresso_display_offsite_payment_gateway”.

For an example of an “off-site gateway” function presenting a button, see gateways/authnet/authnet_vars.php

In each case, your function will be passed a single parameter, an array, that contains information about the event, the attendee, etc. The exact information added to the array can be seen in the gateways/gateway_display.php file starting around line 50.

3 – Receiving Payment Notification Messages

Many “off-site gateways” send back a response to your Event Espresso powered website about the status of the transaction. Some gateways require a return message that they will present on their receipt page that must be free of all CSS and JavaScript. For these reasons, Event Espresso sets up a separate “Transactions” page, which can be hidden from the users navigation, and can be customized with a stripped down theme template that does not load any CSS or JavaScript.

For security reasons, the Event Espresso script that runs on this page requires that the registration id be returned in either the POST or GET variables. The success of processing the transaction also requires the script to be aware of the attendee id. For these reasons, we have provided a filter hook, “filter_hook_espresso_transactions_get_attendee_id”, which you can use to accomplish both tasks.

Some gateways allow you to specify the notification URL at the time you create the button in Step 2, allowing you to add the attendee id and registration id as GET variables in the notification URL. However, some gateways force you to specify the notification URL ahead of time in a control panel, in which case you must send back the attendee id and registration id inside of fields provided by the gateway’s API.

In either case, the function that you hook to “filter_hook_espresso_transactions_get_attendee_id” must return the attendee id, and if it is not already present, add the registration id as a field in the REQUEST array, ie, $_REQUEST['registration_id'] = $_REQUEST['REG_ID'];.

The Event Espresso script on the “Transactions” page will then take the attendee id you returned from the “filter_hook_espresso_transactions_get_attendee_id” filter hook and use it to gather information from the database about the registration as well as performing the security check against the $_REQUEST['registration_id'] that you provided.

Your function for processing the message from the gateway should be added to the filter hook “filter_hook_espresso_transactions_get_payment_data”

Your function will receive a single parameter, an array, containing fields for the attendee_id, registration_id, fname (attendee’s first name), lname (last name), etc. You can see some of the fields added in the “espresso_prepare_payment_data_for_gateways()” function in gateways/process_payments.php, and the “espresso_get_total_cost()” function in gateways/process_payments.php.

The best way to get a comprehensive list is to do a test transaction when you reach this point in development and simply do a var_dump or print_r of the array

Processing Transaction Return Values
There are four fields that your function is required to add to the array before you return it: txn_type, payment_status, txn_id, and txn_details. The “txn_type” field should be something to indicate concisely the type of transaction performed, such as “PayPal” or “Authorize.net”. The payment_status should be one of the three recognized by Event Espresso, “Incomplete”, “Pending”, or “Completed”.

How do I determine if the payment status is highly gateway specific?
The “txn_id” should be a unique identifier, sometimes provided by the gateway. The “txn_details” will be saved to the database and a log file to give the site administrator information to reference in case they need to contact the gateway provider about a problem with a transaction. So it should contain as much information as possible, while scrubbing out credit card numbers, etc, if necessary for PCI compliance.

4 – Displaying the Payment Status on the “Thank You” Page

The “Thank You” page is provided as the main destination URL for the on-site gateway forms on the payment page, and as the return URL for off-site gateways. The hooks provided by Event Espresso on the “Thank You” page are almost identical to those on the “Transactions” page, except that the “filter_hook_espresso_transactions_get_payment_data” filter is replaced by the “filter_hook_espresso_thank_you_get_payment_data” filter.

Security
The security requirements are also the same as those on the “Transactions” page. You must provide a function added to the “filter_hook_espresso_transactions_get_attendee_id” filter that returns the attendee id, and the registration id must be a field in the $_REQUEST variable.

Off-site Processing
If you are using the “Thank You” page as a return URL for an off-site gateway provider and your notification processing is being done by the “Transactions” page then there is no need for you to hook into “filter_hook_espresso_thank_you_get_payment_data” filter.

On-site Processing
If you are writing a gateway for an on-site provider, or your off-site provider does not use a separate notifications page but returns the transaction information with the user to the “Thank You” page, then you should add your processing function to the “filter_hook_espresso_thank_you_get_payment_data” filter.

Just like the filter on the “Transactions” page, your function will receive an array of information corresponding to the attendee id that you provided.

For on-site processing this information should be combined with the form POST data to make the cURL request to the gateway provider. Your function should add four fields to the array that is passed into it before returning the array: txn_type, payment_status, txn_id, and txn_details. For details, see the section in step 3, “Processing Transaction Return Values“.

Posted in | Comments Off on Custom Gateway Integration

Event Espresso