Caching plugins have become a popular way to increase the load speed of WordPress sites. While they work well for static content such as pages and blog posts, they can interfere with registrations in Event Espresso. The content from Event Espresso changes with each ticket you sell and the event information needs to be updated and correct for the next person registering. In this article, we’ll learn how to create exclusion rules or no-cache rules for Event Espresso content.
We will first need to locate the pages that we want to add to the no-cache list.
Begin by logging into your WordPress admin. Then locate Event Espresso in the admin menus and click on General Settings. Once on this page, click on Critical Pages tab. The Critical Pages are pages that Event Espresso needs to run correctly and they will all need to be added to the no-cache list.
All pages shown should have Page Status OK and Shortcode OK as shown in the screenshot below:
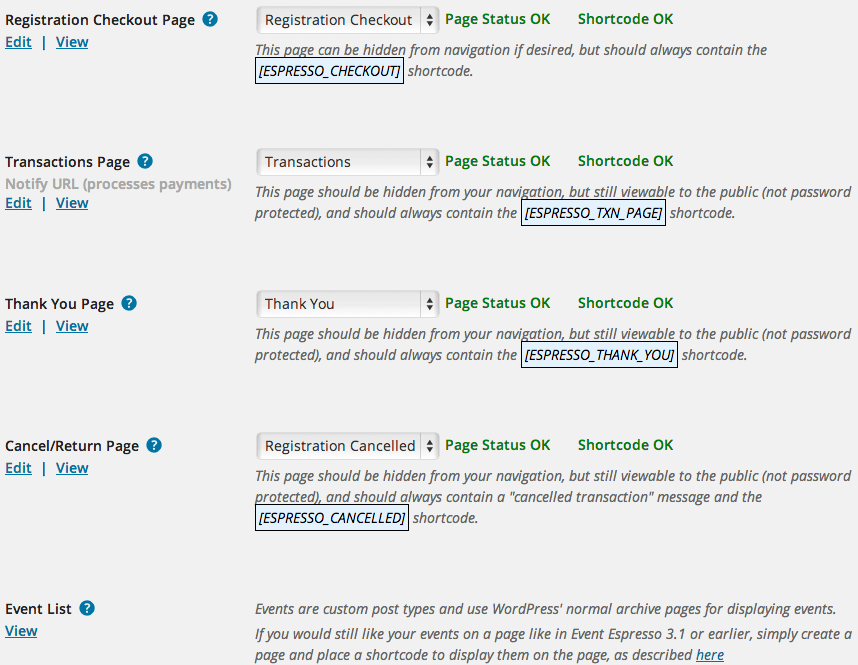
The next step is to get the slugs of each of these pages. This can be done by right clicking on each view link and opening each link in a new tab. This will load each page in your web browser so you can view the URLs. The slug is the end of the URL (part after your web domain — see examples below). On a default install of Event Espresso 4, the slugs will be:
/events/
/registration-checkout/
/transactions/
/thank-you/
/registration-cancelled/
Make note of your slugs — especially if you have customized them on your site.
On a default install of Event Espresso 3, the slugs will be:
/event-registration/
/thank-you/
/transactions/
/registration-cancelled/
Make note of your slugs — especially if you have customized them on your site.
Now to go the settings for your caching plugin and clear the cache once. Then locate the area to enter the no-cache/exclusion rules. This varies from caching plugin to caching plugin so we have listed steps for some of the popular caching plugins.
Setup no-cache/exclusion rules for Quick Cache
Login to your WordPress admin. Then locate Quick Cache in the WordPress admin menus and click on it. Scroll down the page and find the area for URI Exclusion Patterns. Add your slugs for your critical pages in Event Espresso and save changes. Then clear the cache (if your plugin doesn’t on its own).
Note: URI Exclusion Patterns is currently an option in the pro version of Quick Cache.
Setup no-cache/exclusion rules for SuperCacher
SuperCacher is a caching solution from SiteGround. Login to your WordPress admin. Then locate SuperCacher in the WordPress admin menus and click on it. One the next page and find the area for Exclude URLs From Dynamic Caching. Add your slugs for your critical pages in Event Espresso and save changes by clicking on the Update the Exclude List button:
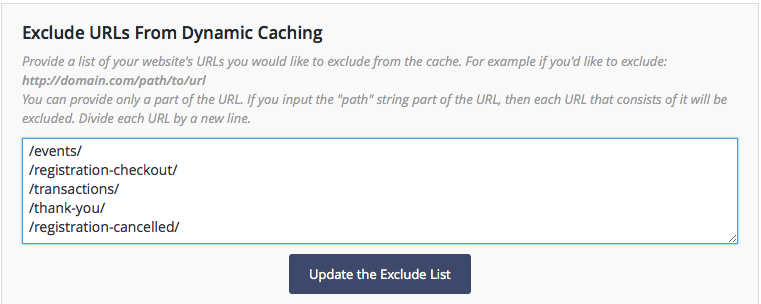
Then clear the cache by clicking on the Purge SG Cache link which appears on the admin toolbar in your WordPress Dashboard.
Setup no-cache/exclusion rules for W3 Total Cache
Login to your WordPress admin. Then locate Performance in the WordPress admin menus and click on Page Cache. Scroll down the page and find the area for Never cache the following pages:
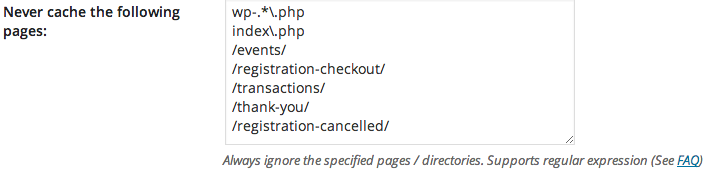
Add your slugs for your critical pages in Event Espresso and save changes. Then clear the cache (if your plugin doesn’t on its own).
You will also need to disable Object Caching and Database Caching in the W3TC settings.
Setup no-cache/exclusion rules for WP Super Cache
Login to your WordPress admin. Then locate Settings in the WordPress admin menus and click on WP Super Cache. Click on the Advanced tab and scroll down the page and find the area for Add strings here (not a filename) that forces a page not to be cached:
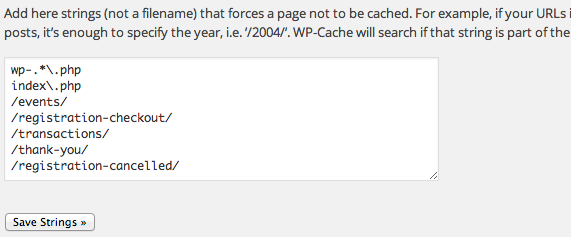
Add your slugs for your critical pages in Event Espresso and save changes. Then clear the cache (if your plugin doesn’t on its own).
Setup no-cache/exclusion rules for WP Rocket
Login to your WordPress admin. Then locate Settings in the WordPress admin menus and click on WP Rocket. Click on the Advanced Settings tab and scroll down the page and find the area for Never cache the following pages:

Add your slugs for your critical pages in Event Espresso and save changes. Then clear the cache.
Setup no-cache/exclusion rules for server level caching
Some managed WordPress hosts such as WP Engine have an internal caching system. You’ll need to reach out to your web host directly to request that no-cache rules be setup for your critical pages in Event Espresso.
Godaddy Managed WordPress Hosting
Sadly, Godaddy Managed WordPress hosting does not have a way to exclude specific pages from being served by a cache. Here is a solution that is recommended by Mendel from Godaddy:
- Login to your WP dashboard and click on Flush Cache which appears on the admin toolbar: http://cl.ly/image/2228341I1P18
- Then you sFTP into the server and rename or delete the object-cache.php file found in the wp-content folder. If you are unable to accomplish this task yourself, then please check with with the WordPress Managed hosting support team at Godaddy and ask them to delete the object-cache.php file from the /wp-content/ directory of your website
Additional Notes
Instructions on how to disable caching for Godaddy Managed Hosting:
https://eventespresso.com/topic/incompatible-with-godaddy-managed-wordpress-hosting/
From time to time, some caching files become damaged and will not clear even after clicking to clear the cache. If this happens, you can manually clear the cache by logging into your WordPress root with an SFTP or FTP client such as FileZilla or CyberDuck. Then browse to wp-content folder and remove any cache-related files (e.g. cache_ and advanced_cache). Then return to your WordPress admin and clear the cache one more time.