First install Contact Form 7 through the plugins manager within your site, navigate to Dashboard -> Plugins -> Add New and search for ‘Contact Form 7’. This first result should be Contact Forms 7 and looks like this:

Click ‘Install Now’ and activate, you’ll now have a ‘Contact’ section in your admin menu which you can use to generate contact forms.
Within the Contact section click ‘Add New’ to generate a new form:

Create a new form and add the details you want to see on that form, at a minimum we recommend name and email, although you can request any details you need and also include any additional text on the form, for example ‘Join the waiting list for this event?’ For example:

When any users submit the form you’ll receive an email with the details they submitted, however currently we don’t have any details of the event within the form, or the email so we won’t know which event they wish to sign up for but we can add those details within the ‘Mail’ tab.
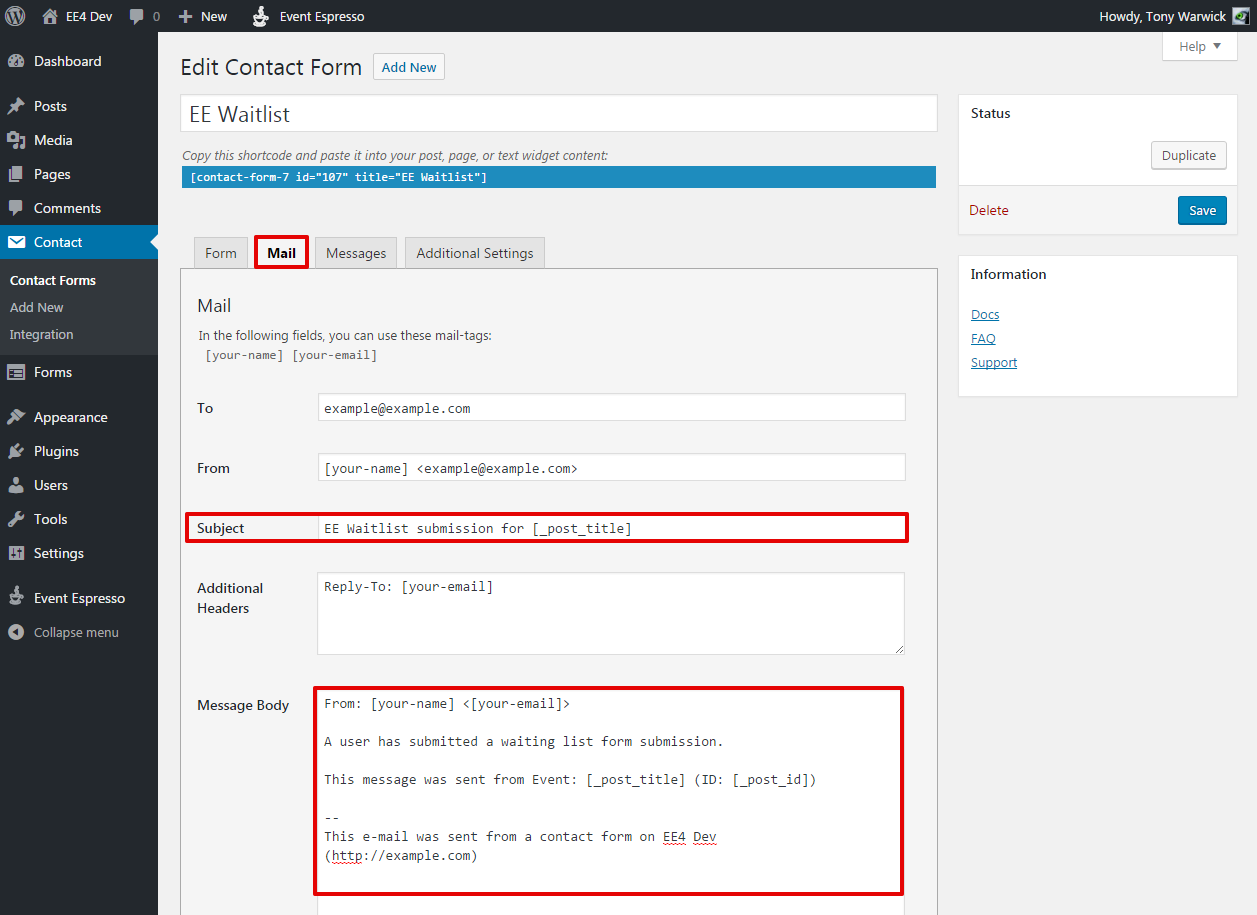
The sections you will need to edit are ‘Subject’ (your form likely does not have a ‘subject’ field so manually set this) and then within the message body you’ll need to include details of the event. You can do this using the Contact Form shortcodes [_post_title] which shows the title of the post the form was submitted from and [_post_id] which shows the ID of the post the form was submitted from. Here is an example:
You may also want to update the text within the ‘Messages’ tab to suit, the text there is shown to users through various steps of the form.
Now you have a waitlist form within Contact Form 7 we need to use a small function to output that form on sold out events. First take note of the shortcode shown at the top of your contact form (the blue box in the screenshots above), you will need this to pull the correct form, in my example this is `[contact-form-7 id=”107″ title=”EE Waitlist”]` so we can use this function:
You can add that function to your themes functions.php file or create a Custom Functions Plugin and place it within that, be sue to use the correct shortcode to pull your form in.
Now on your sold out events you should see something like this:

Whenever a user submits the form you will receive and email from contact form 7 with the users details along with the event title and ID.