By default the ticket selector will have different quantities of tickets available — usually 0 through 10. It may be useful to have the ticket selector set to a certain value for certain events. For example, if you are hosting a training course or an online meeting or webinar, then it would be helpful to have the ticket selector default to a value of 1. This will speed up the registration checkout process since the registrant would not need to adjust the ticket selector from 0 to 1.
In the first part of this tutorial, we’ll create a ticket that has a minimum and maximum quantity and in the second part we’ll setup a code snippet of jQuery to handle removing the 0 value. Once both of these are in place, then the ticket selector will default to a value of 1.
Create a Ticket with a Minimum and Maximum Quantity of 1
Login to your WordPress admin. Then find Event Espresso in your WordPress admin menu and click on Events. Now look for your event in the event overview page and click on it. This will take you to the Event Editor.
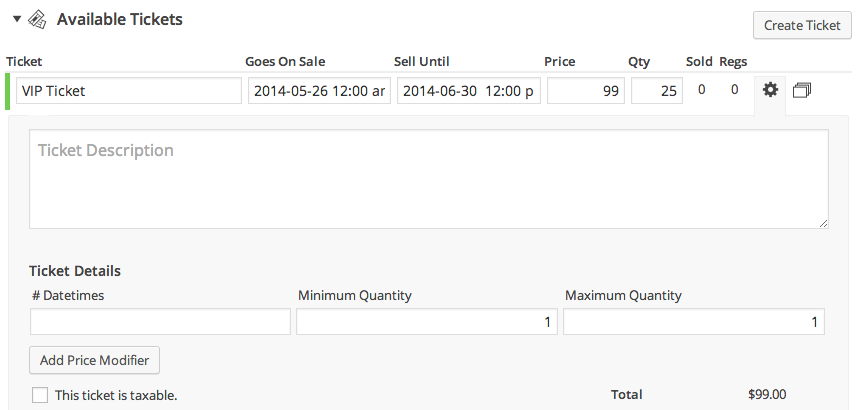
If this is a new event, then go ahead and setup your event by adding a title, description, venue, tickets, etc and then save your event as a draft. If this is an existing event, then scroll down to the Event Tickets & Datetimes area. Then click on the gear to access the advanced options for this ticket. Now set the Minimum Quantity to 1 and set the Maximum Quantity to 1:
Use jQuery to Remove the Value of 0
Next, we need to add some jQuery to remove the value of 0. Below we have some sample code that will do that for you:
function ee_default_ticket_selector_one() {
 $post = get_the_id();
 if( $post == 123 ) {
 ?>
 <script type="text/javascript">
 jQuery(document).ready(function () {
 jQuery("#ticket-selector-tbl-qty-slct-123-1 option[value='0']").remove();
});
 </script>
 <?php
 }
}
add_action( 'wp_footer', 'ee_default_ticket_selector_one' );
It checks to see if you are on a specific single event page. Then it removes the option value of 0.
The sample code above can be copied and pasted into a site specific plugin.
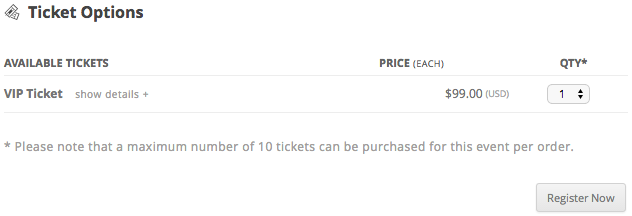
Then change the number 123 (used twice in the sample code above) to the post id of your actual event. The post id appears to the left of the event name when viewing the events overview screen. It also appears at the end of the URL when viewing an event in the event editor. Be sure to save changes after updating the sample code. Then view your event page on the front end and the quantity selector should now default to 1.
Here is what the ticket selector for our example event looks like:
Additional Examples
If you would like to remove the 0 value for an event with a post id of 123 and an additional event with a post id of 456, then you could use the sample code below.
function ee_default_ticket_selector_one_multiple_events() {
 $post = get_the_id();
 ?>
 <script type="text/javascript">
 jQuery(document).ready(function () {
 jQuery("#ticket-selector-tbl-qty-slct-123-1 option[value='0']").remove();
 jQuery("#ticket-selector-tbl-qty-slct-456-1 option[value='0']").remove();
});
 </script>
 <?php
 }
add_action( 'wp_footer', 'ee_default_ticket_selector_one_multiple_events' );
If you would like to remove the 0 value for all events, then you could use the sample code below.
function ee_default_ticket_selector_one_all_events() {
 ?>
 <script type="text/javascript">
 jQuery(document).ready(function () {
 jQuery("option[value='0']").remove();
});
 </script>
 <?php
 }
add_action( 'wp_footer', 'ee_default_ticket_selector_one_all_events' );
Be advised that it will remove the value of 0 from all select menus on your site since the conditional check for a specific single event page and CSS id targetting is no longer in place.