MailChimp is a powerful email marketing tool used by millions (14+ million currently) of people and businesses around the world. MailChimp sends out more than a billion emails a day.
One of the features we love to use with Event Espresso is their campaign scheduling feature. We have received lots of questions regarding an automated messages feature in Event Espresso that will allow our customers to automatically send out email reminders x number of days before an event. Automated Messages from Event Espresso is on our road map, but until it is officially released MailChimp can help you automate communicating to your audience.
With MailChimp, you can set up automated messages to be sent out on specific dates to specific groups or lists of subscribers; in this case, your event attendees. One great feature in the Event Espresso MailChimp add-on is the ability to send subscribers of specific events to specific groups in MailChimp. For instance, if someone registers for Event A, their information can be sent to your MailChimp group that is set up for Event A. This will give you the ability to email only the attendees of Event A.
Here is how you do that:
We assume you have already purchased the Event Espresso MailChimp add-on and installed it in your WordPress dashboard. If you haven’t, then what are you waiting for? Purchase MailChimp for Event Espresso Today!
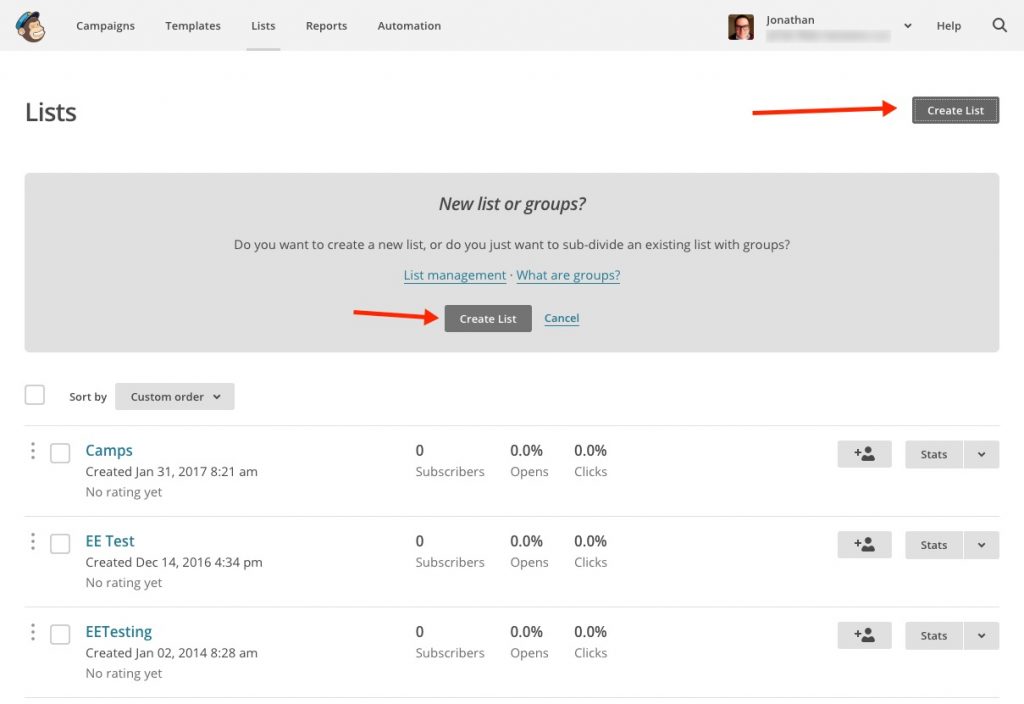
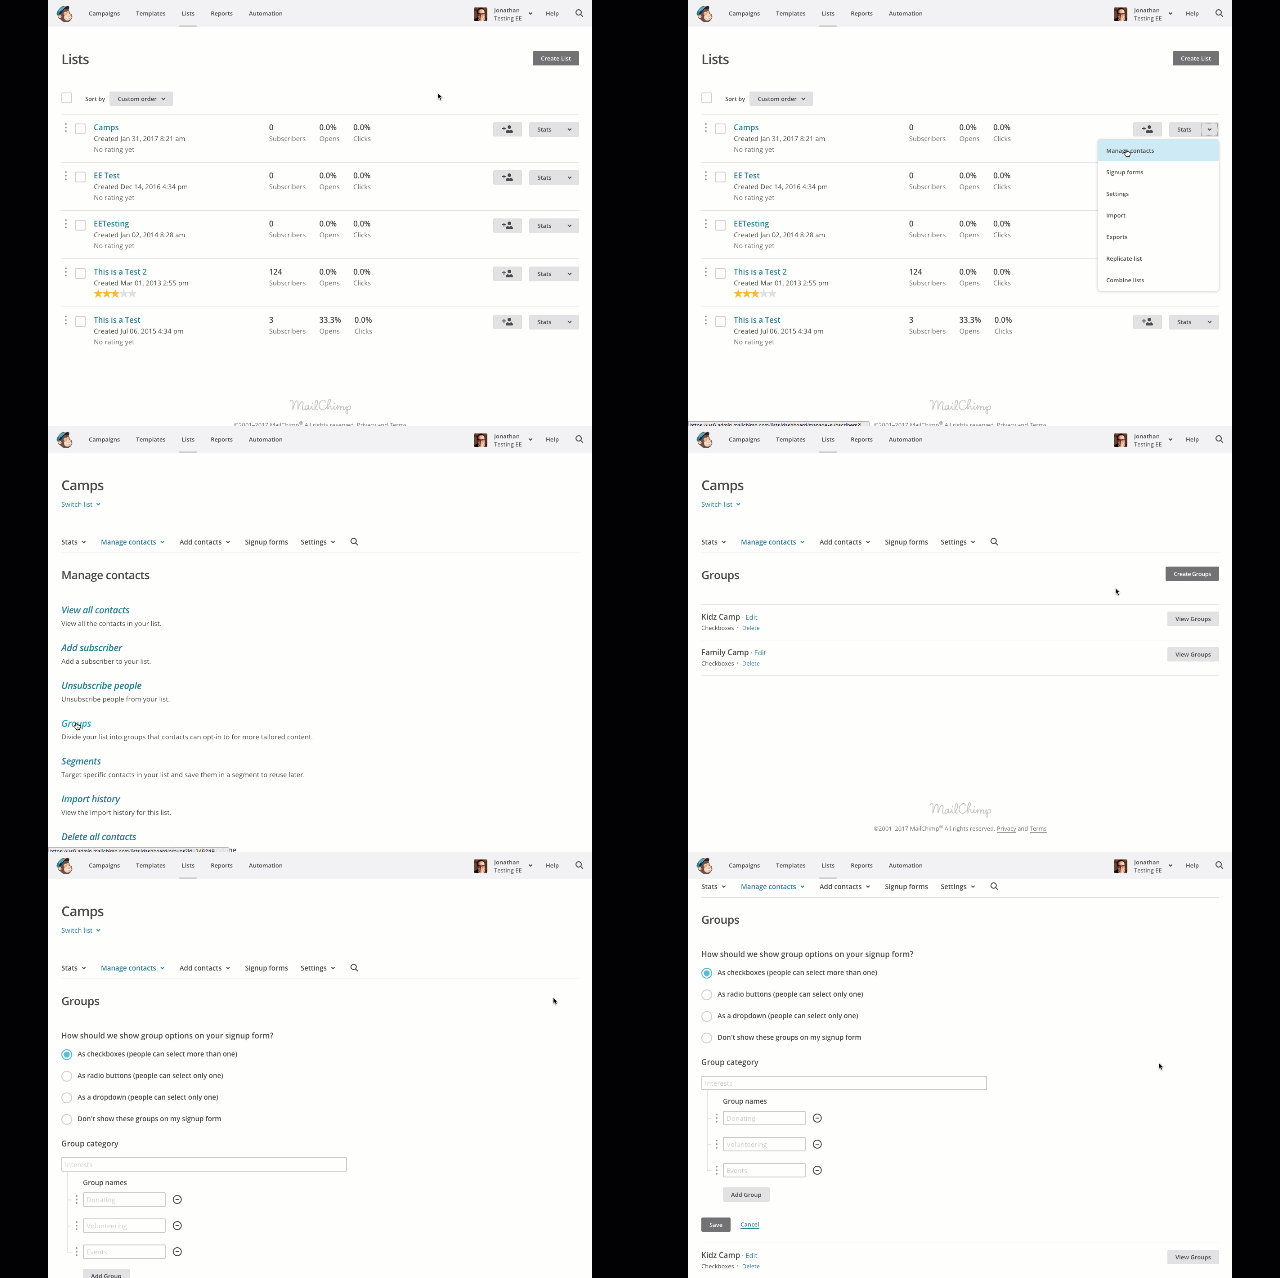
First, you will need to create a list and groups for your events in MailChimp to sort your email lists by event. If you do not need your subscribers to be grouped by specific events, you can skip this step.
Then, in your event editor, you will select the list and group where you want to send the subscribers. This will allow you to send communications specifically for that event.
Note: The Event Espresso MailChimp add-on settings allow you to choose which attendee registration status is sent to the MailChimp list. The options are: subscriber submits information, registration is completed (payment status does not matter), or registration is submitted with an approved status.
Now, back to the MailChimp dashboard. We are going to schedule a message to be sent one week before the event starts reminding the attendees about the event. Our event begins on July 11, 2017, so we want to send the reminder message on July 4th.
You will then need to create a campaign in MailChimp. Be sure to select the correct group for the particular event. MailChimp’s campaign builder will walk you through the campaign setup quite smoothly.

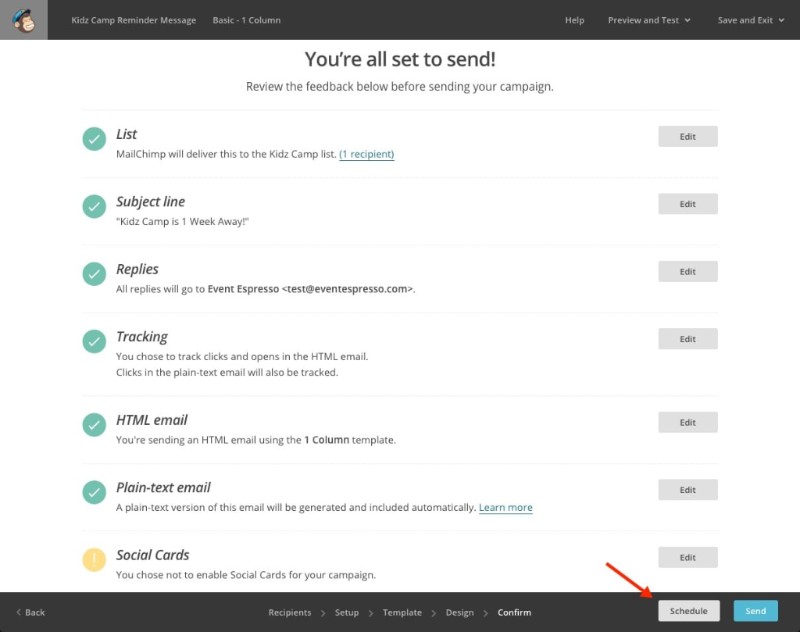
Once you have reached the Confirm step in the campaign builder, and all of the items in the list have been checked off, you want to select Schedule at the bottom.

On the next page, you will configure the date and time you want to send the message to your event attendees.
Once you have done that, click Schedule Campaign, and you are finished! Your message will now be sent out to your attendees at the set time. Pretty nifty huh?


