 In this guide, we’ll setup ticketing for a golf tournament using Event Espresso. Before we begin setting up our event, lets take a look at the information that we will be using for this event.
Venue
Avila Golf and Country Club
943 Guisando De Avila, Tampa, FL 33613
Datetimes
June 22, 2014 from 11AM to 6PM ET
Ticket Options
Golf Teams (Foursome) @ $1000
Individuals @ $250
Hole Sponsor (0-10) @ $200
Additional Casino Party Ticket (0-10) @ $150
Create our Venue with the Venue Editor
Login to the WordPress admin and locate Event Espresso in the admin menu. Then click on Venues. On the next page click on the Add New Venue button which appears at the top of the page.
You’ll now be viewing the Venue Editor and you can begin entering information about the venue that is hosting your event. We recommend entering at least a name, description, and address for your venue. Then enable Google Map for this venue by setting the toggle to Yes and then save changes to your venue.
Create our Golf Tournament with the Event Editor
Now we want to go to the Event Espresso Event Editor so that we can create our golf tournament.
Locate Event Espresso in the WordPress admin menu and then click on Events. Then click on the Add New Event button which appears at the top of the page. You will now be viewing the Event Editor. Begin by entering a title for your event such as Golf Tournament and then a description. You can then select your venue from the Venue Details area:

Next we will setup our datetime for our golf tournament:

The next step is to setup our ticket options. For the first ticket, we need to enter a name, then select a start date and end date for ticket sales. The price should be set to $250. Then click on the advanced options (small gear). Then set the minimum and maximum quantity to 4. This will ensure that only a group of four tickets ($250 multiplied by 4 equals $1000) can be purchased for this specific ticket option.
To create the second ticket, click on the Create Ticket button. This will add an additional ticket. Add a title for this ticket and set the start date and end date for ticket sales. Then we’ll set the price to $250.
We’ll then apply similar steps to create ticket option 3 and ticket option 4. Once we are done, it will appear like this:
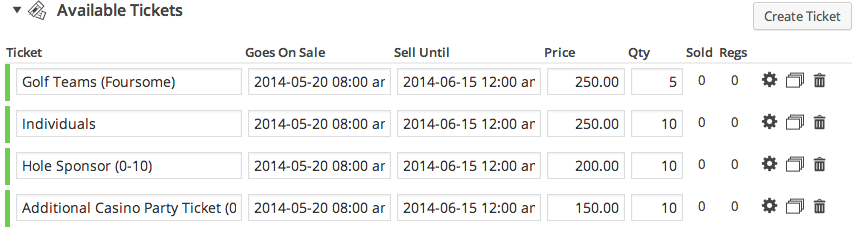
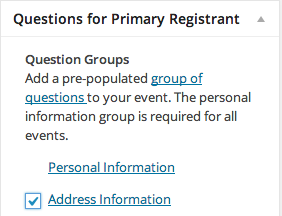
Now that we have finished setting up our tickets, we can select the information that we want to collect from our registrants. For our tournament, we’ll ask for the contact information from the primary registrant and only the name and email for additional registrants:

We’ll then double-check our event to make sure that we haven’t missed anything and then publish our event by clicking on the Publish button in Update Event widget. From here we can go to the front end to view our event. Here is an example of what our tickets appear like on the front end:

Notes:
The first ticket option is restricted to purchasing in a batch of 4. The other ticket options will allow a quantity from 1 through 10.
The primary registrant will be asked for their contact information along with their address. Any additional registrants will only be asked for an name and email.
It is possible to collect additional information from registrants by setting up new questions and question groups.