The Wait List Manager add-on allows you to automate the process of capturing wait list signups when your events sell out.
View quick links for this add-on –>
If the wait list is activated on an event, and the event sells out, a button will automatically display on the event details page that encourages attendees to join a wait list. If an attendee joins the wait list and someone cancels, the wait list attendee can be auto-promoted to the next available spot.
https://eventespresso.com/product/eea-wait-lists/
Wait List Installation
This add-on is a plugin for WordPress and can be installed through your WP dashboard (WP-admin).
Download the latest version of the Wait List add-on from your Event Espresso account.
Then login to your WordPress dashboard (WP-admin) and go to Plugins. Next, click on Add New –> Upload and browse to the plugin on your computer. Then select the zip file and begin the upload process. Wait for the plugin to upload and then click on Activate.
Setup and Configuration
Login to your WP dashboard and go to Event Espresso –> Events –> Choose an event.
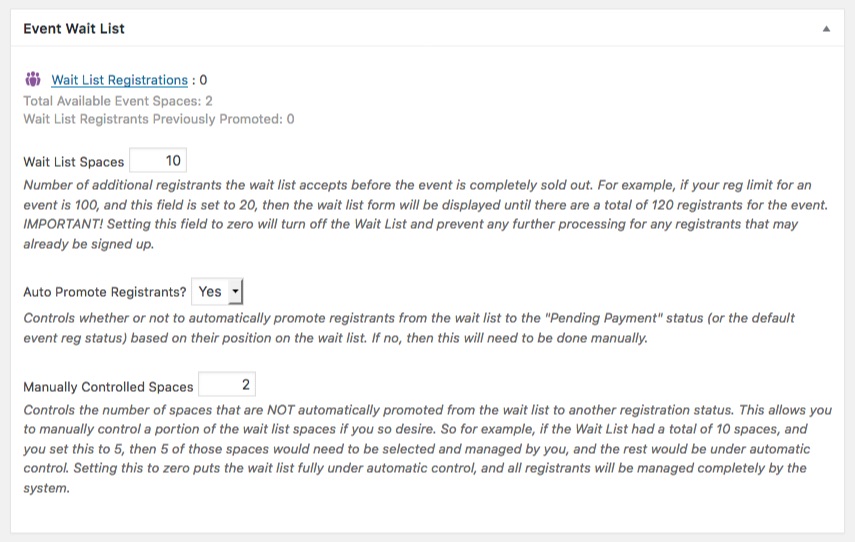
You’ll now be viewing the overview screen for the selected event. Scroll about half way down the page, until you see the Event Wait List settings.
Usage
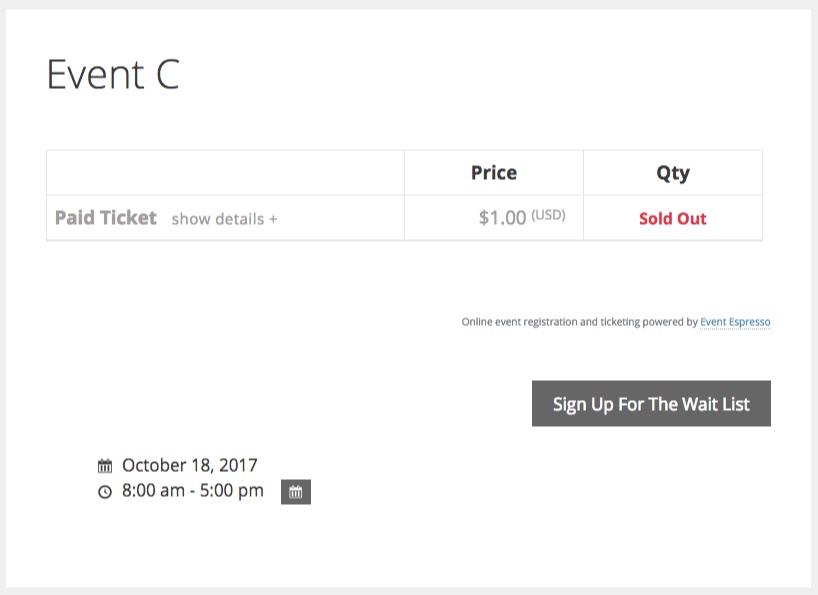
Once you’ve added a wait list to an event by adjusting the value of the “Wait List Spaces” setting and the event sells out, the ticket selector is replaced and a button will be displayed on the event details page. The “Sign Up For The Wait List” button allows potential attendees to sign-up to be on the wait list if spaces open up. Spaces can open up if someone cancels or is removed from the event list.
Wait List Front-end
This image shows a sold out event with the option to sign up for the wait list:
When a registrant uses the button to sign up for the wait list, then a popover is displayed to capture the attendee information:
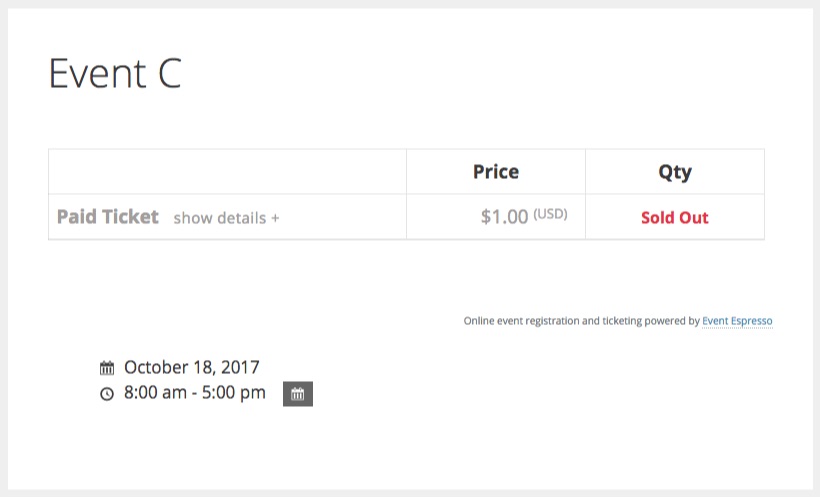
Once all wait list spots are taken, the “Join The Wait List” button goes away:
Manually Processing Standby Registrations
Once registrants are added to the wait list, you can easily follow-up with them or promote their registration to approved, pending payment, and more, if any spaces open up for the event.
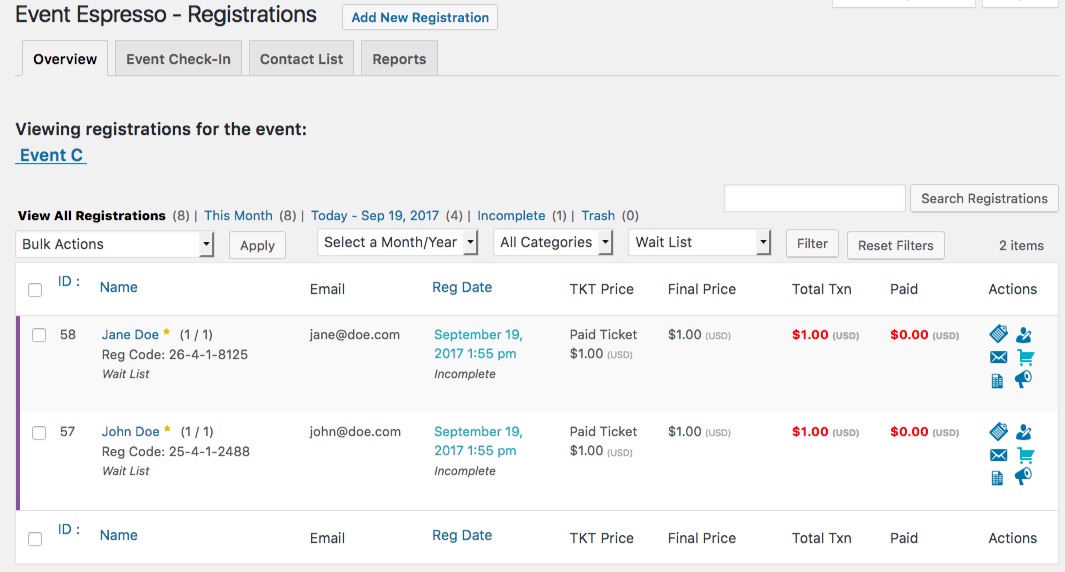
To manually promote registrants, head on over to the Registration List table filtered for the wait list:
Here you can get an overview of wait list registrations, promote registrations, view registrant information, and resend notifications.
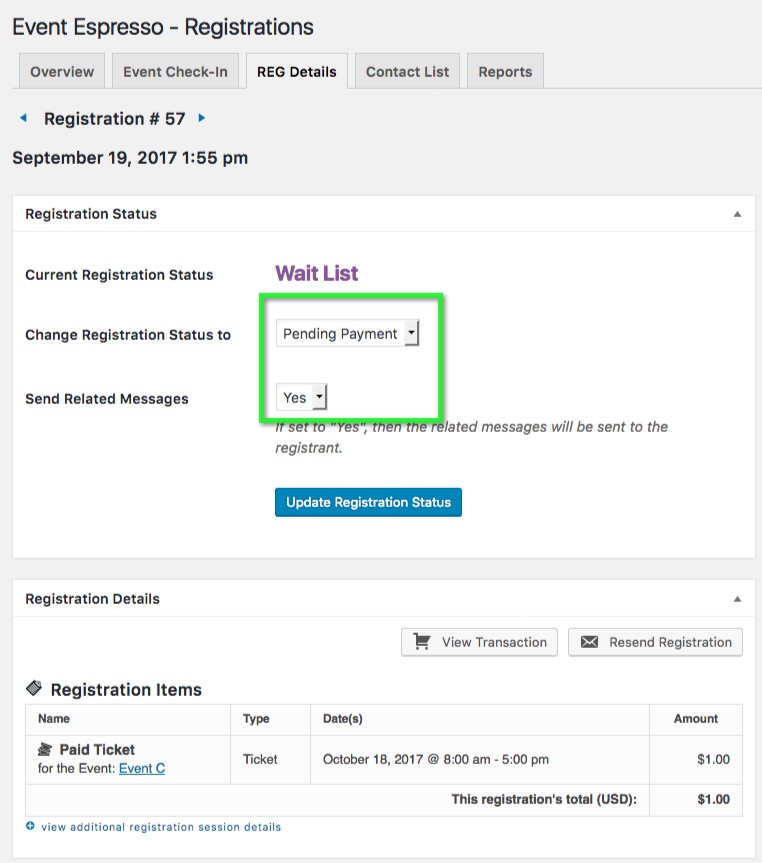
To promote someone on the wait list to an open spot, simply click on the persons name or select the box and use the bulk actions to change the status. For this example, I will click into a single wait list registration to view the details:
From there you can change the registration status and send related messages. If you are running a paid event, you can use the “Pending Payment” option to make sure the attendees pay before taking a spot in the registration list. However, if you’ve promoted multiple attendees to “Pending Payment” and only have a limited number of spaces, then the first attendees to pay will receive their spot on the “Approved” registration list.
Reducing available spaces after promoting registrants should be avoided at all costs.
Auto-promotion Settings
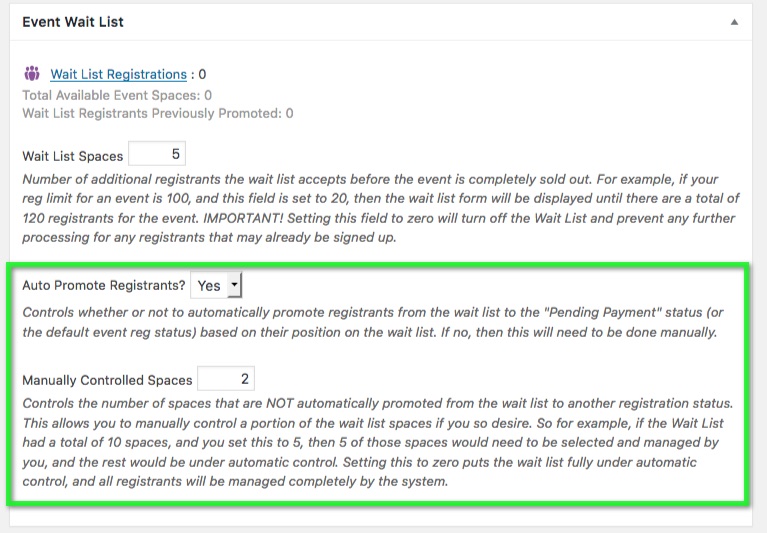
The Wait List Manager auto-promotion setting helps you by making sure wait list registrations are automatically promoted whenever a space opens up in the event.
You can also leave some spaces on manual control if desired.
Wait List Messages
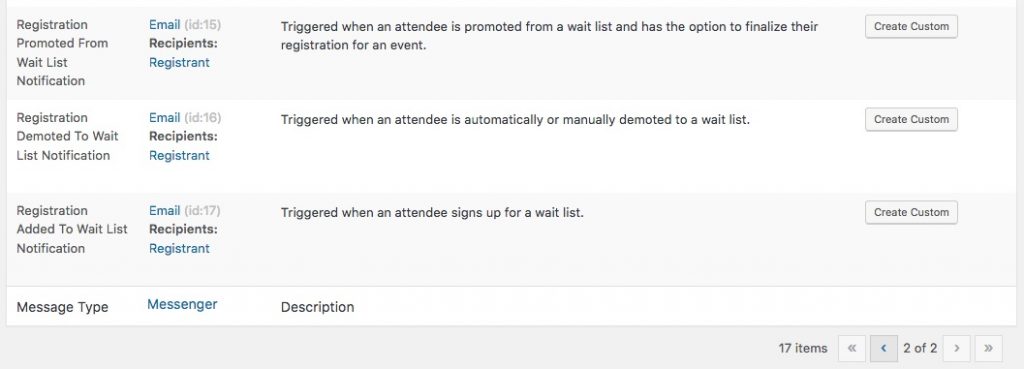
The Wait List Manager creates three additional messages that send when your customers sign-up for a wait list. To edit and manage the Wait List messages, login to your WP dashboard and go to Event Espresso –> Messages –> Default Message Templates.
Once on the Default Message Templates dashboard, you may need to navigate to the second page of messages. Once you are on the second page of the messages overview, you should see the newly added Wait List Messages:
Wait List Messages Overview
From there you can edit the content of each message to meet your needs.
Troubleshooting
The plugin will not activate. Can you help?
Are you running a current version of Event Espresso 4? This add-on needs at least version 4.9.49.p to activate.
Where is the menu screen for this add-on?
This plugin does not create any new menus in the WordPress admin screen. It uses the messages setting screen along with the event editor for Event Espresso.
Customizations
How to change text strings from the Wait List add-on
Below is some example code that shows how to change the wording of some of the text strings from the Wait List add-on:
You can add the above to a functions plugin or into your WordPress child theme’s functions.php file.
How to add a phone number field to the wait list form
Example code that shows how to add the phone number field to the Wait List form:
https://github.com/eventespresso/ee-code-snippet-library/blob/master/addons/eea-wait-lists/tw_ee_add_registrant_phone_to_waitlist_form.php
You can add the above to a functions plugin or into your WordPress child theme’s functions.php file.
https://eventespresso.com/product/eea-wait-lists/
