Overview
There’ll be times that you find you want to customize various elements of Event Espresso 3’s front-end design and interface to suit your own needs. With a bit of knowledge of CSS, HTML and PHP you should be able to hack away at Event Espresso 3 to turn it into whatever type of beast that you need.
This tutorial will give you a very basic introduction to customizing Event Espresso 3. It will introduce you to the basic concepts, and to the steps that you need to carry out a safe customization.
CSS or Templates?
There are two main ways that you can customize Event Espresso 3:
- Using CSS
- Using Template Files
CSS is used if you want to make changes to design elements. We have provided a file called espresso_default.css where you can make style changes specifically for Event Espresso 3. This includes changes to design elements such as fonts, colors and spacing. In this tutorial we will use CSS to change the link colors in our sidebar widget.
Template Files are used for any more complex editing. You can use them, for example, to insert additional elements, or to make changes to the PHP. We will make a very basic change to the widget.php file, using it to add a separating line between events.
If you make any changes to your template files or any of our pre-installed stylesheets it’s important that you copy them to another folder. This will prevent your changes from being overwritten when you update Event Espresso 3.
Let’s get started!
Step 1: Editing Your Styles
To make simple design changes to your events widget you can use CSS. You can do this by adding styles to the espresso_default.css file.
Unless you are using one of Event Espresso 3’s pre-made css templates we recommend that you use espresso_default.css to make any changes to Event Espresso 3 elements. This can be found in the event-espresso/templates/css/ folder. Once you’ve made changes to the css file you will need to copy it to prevent it from being overwritten when you update Event Espresso 3. You’ll see how to do this in step 2.
Note: If you are using a pre-installed Event Espresso template located in Template > Settings such as any of the themeroller styles you should make any changes to your CSS in your child theme’s stylesheet – style.css. This will prevent any potential problems.
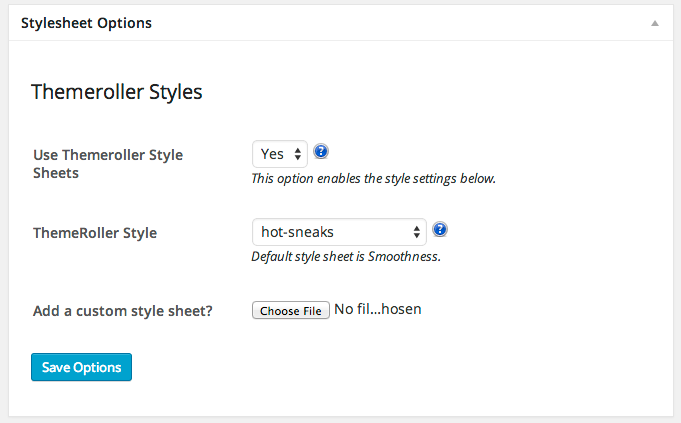
If you are using any of the Themeroller styles you should add custom changes to your child theme’s stylesheet!
Open your espresso_default.css file to make changes to it.
The class you need for styling the elements in your widget is
.widget.events
So to edit the list within the widget you would use
.widget.events ol
To change the links you would use
.widget.events a, .widget.events a:link, .widget.events a:visited,
.widget.events a:hover, .widget.events a:active
If you want to get information about the CSS of individual element you can use Firebug for Firefox, or Chrome’s Developer Tools.
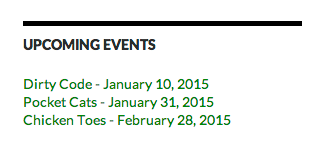
Here’s the sidebar to widget to begin with:
I’m going to apply the following CSS:
.widget.events a, .widget.events a:link, .widget.events a:visited {
	color: #A3173A;
	line-height: 13px;
	padding 4px 0px 6px;
	text-decoration: none;
}

.widget.events a:active {
	color: #2C17A3;
	font-weight: bold;
	line-height: 13px;
	padding: 4px 0 6px;
	text-decoration: none;
}
.widget.events a:hover {
	color: #FFFFFF;
	font-weight: bold;
	line-height: 13px;
	padding: 4px 0 6px;
	text-decoration: none;
	background-color:#A3173A;
}
And here it is with the new CSS:
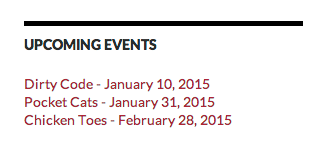
Nice and easy, right?
Step 2: Moving Your Template Files
When you install Event Espresso your template files are stored in wp-content/plugins/event-espresso/templates/
Every time Event Espresso is updated these files are overwritten. To ensure that any changes you make to your template files don’t disappear, you need to copy over any template files you have edited. The correct location for edited templates files is:
wp-content/uploads/espresso/templates
Event Espresso will first check in here to see what it should do, it always takes precedence. If there are no modified files it’ll check out the original templates folder in plugins/event-espresso/templates.
We want to copy over two files:
- espresso_default.css, which we just made changes to. This will be copied into a folder named “css”.
- widget.php, which we will edit in the next step to make changes to the upcoming events widget.
Navigate to wp-content/plugins/event-espresso/templates/ and find the two files.
Copy the files to wp-content/uploads/espresso/templates They should look something like this:
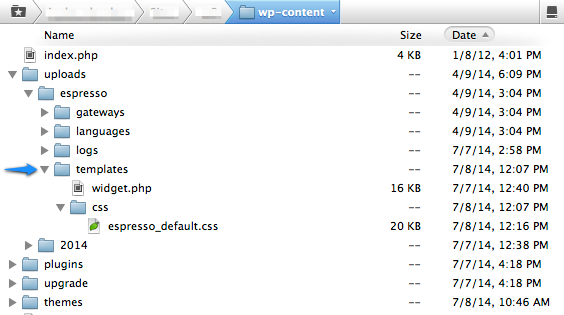
If you do make changes to your template files you will need to check the files in the original templates folder each time you update Event Espresso. It’s important that you check to make sure that nothing has changed. You can use a tool like DiffMerge to compare the two files and update any changes made. We do update the template files occasionally and it can cause problems if you are using an old version.
That’s it! Any changes that you make are now safely tucked away.
Step 3: Editing Your Template File
You’re now ready to edit your template file.
We do expect those who want to customize their template files to have some understanding and experience with PHP programming. Questions to clarify Event Espresso functions or code can be asked in the forums, but if you are not familiar with PHP and anticipate significant help to customize the templates for your website, please submit a Customization Request to our staff.
We’re going to make a very simple edit that shouldn’t cause you many problems. We’ll add a separator so that there is a line between each event in the widget.
Open widget.php in your favorite text editor.
Starting on line 130 you’ll find the following code:
<a href="<?php echo $registration_url; ?>"><?php echo stripslashes_deep($event->event_name) ?> - <span class="widget-event-date"><?php echo event_date_display($event->start_date) ?></span></a>
<?php /* These are custom messages that can be displayed based on the event status. Just comment the one you want to use. */ ?>
    <?php //echo $status_display; //Turn this on to display the overall status of the event.  ?>
    <?php //echo $status_display_ongoing; //Turn this on to display the ongoing message. ?>
    <?php //echo $status_display_deleted; //Turn this on to display the deleted message. ?>
    <?php //echo $status_display_secondary; //Turn this on to display the waitlist message. ?>
    <?php //echo $status_display_reg_closed; //Turn this on to display the secondary message. ?>
    <?php //echo $status_display_not_open; //Turn this on to display the secondary message. ?>
    <?php //echo $status_display_open; //Turn this on to display the secondary message. ?>
    <?php //echo $status_display_custom_closed; //Turn this on to display the secondary message. ?>
</li>
Underneath this we want to add a
<hr />
tag. Like so:
<li><a href="<?php echo $registration_url; ?>"><?php echo stripslashes_deep($event->event_name) ?> - <span class="widget-event-date"><?php echo event_date_display($event->start_date) ?></span></a>
<?php /* These are custom messages that can be displayed based on the event status. Just comment the one you want to use. */ ?>
    <?php //echo $status_display; //Turn this on to display the overall status of the event.  ?>
    <?php //echo $status_display_ongoing; //Turn this on to display the ongoing message. ?>
    <?php //echo $status_display_deleted; //Turn this on to display the deleted message. ?>
    <?php //echo $status_display_secondary; //Turn this on to display the waitlist message. ?>
    <?php //echo $status_display_reg_closed; //Turn this on to display the secondary message. ?>
    <?php //echo $status_display_not_open; //Turn this on to display the secondary message. ?>
    <?php //echo $status_display_open; //Turn this on to display the secondary message. ?>
    <?php //echo $status_display_custom_closed; //Turn this on to display the secondary message. ?>
</li>
<hr />
Then save the file and close it.
Your upcoming events widget should now look like this:

For more information about template files check out this glossary of what they all do.