The Stripe payment gateway will allow your attendees to pay for their event registration with a credit or debit card.
View quick links for this payment gateway –>
Accept event payments with the Stripe payment gateway for Event Espresso
Installation
This payment gateway is a plugin for WordPress and can be installed through your WP dashboard (WP-admin).
Download the latest version of the Stripe payment gateway for Event Espresso 4 from your Event Espresso account page.
Then login to your WordPress dashboard (WP-admin) and go to Plugins. Next, click on Add New –> Upload and browse to the plugin on your computer. Then select the zip file and begin the upload process. Wait for the plugin to upload and then click on Activate.
Connect with Stripe
1. Navigate to: Event Espresso > Payment Methods > Stripe
Scroll half way down the page until you see the blue “Connect with Stripe” button.
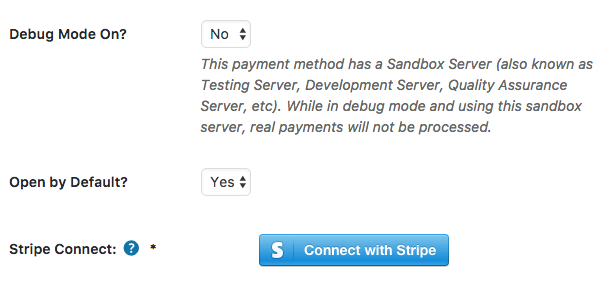
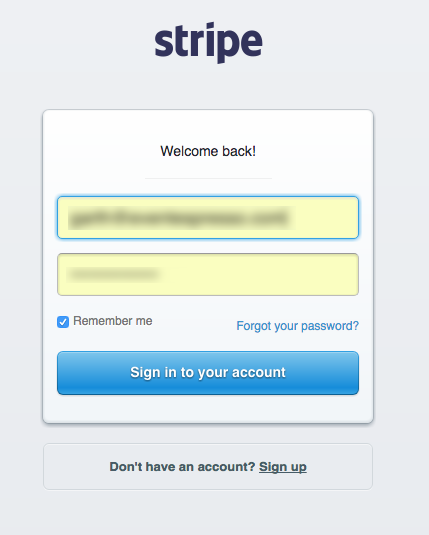
2. When you click that Connect with Stripe, you will receive a popup window with the Stripe login form. Enter your username and password to sign in to your Stripe account.
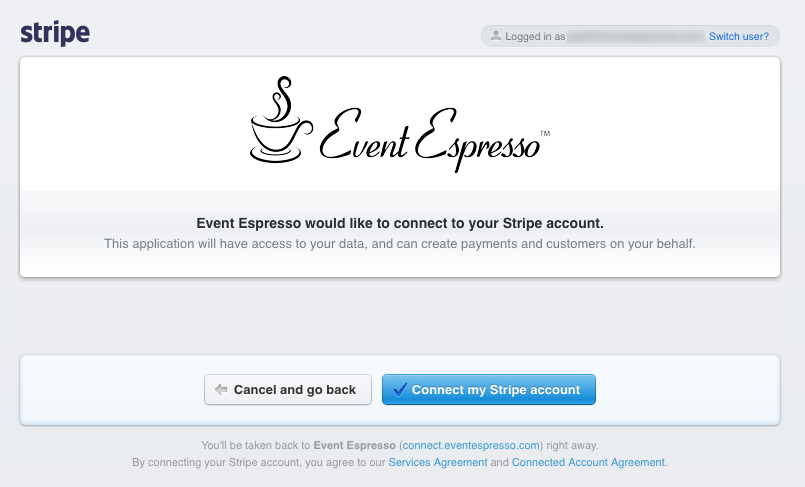
3. You will be told that Event Espresso would like to connect to your Stripe account. This IS what you want so that Event Espresso can create payments and customers on your behalf in your Stripe account. Click the blue “Connect my Stripe account” button.
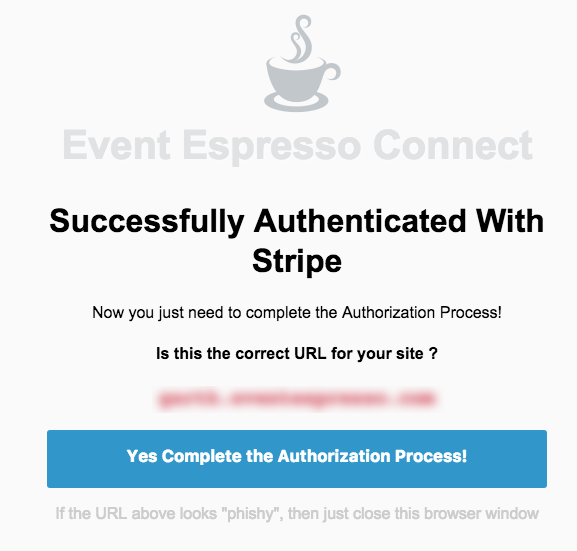
4. You will be asked to complete the verification process by confirming the connection. Be sure that the correct URL for your site is listed in red. If your website address is listed in red, click the blue “Yes Complete the Authorization Process!” button.
5. After you successfully connect Event Espresso to your Stripe account, you will be redirected back to your website on the Stripe settings page. You will see a purple checkbox saying “Connected”. You are now ready to accept payments.
![]()
Setup and Configuration
An account with Stripe is needed to accept payments via Stripe.
A dedicated SSL certificate is recommended to make registration checkout and other areas of your website more secure.
Login to your WP-admin (WP Dashboard) and go to Event Espresso –> General Settings –> Payment Methods. Once on the Payment Methods screen, click on Stripe and click on the button to activate the payment method.
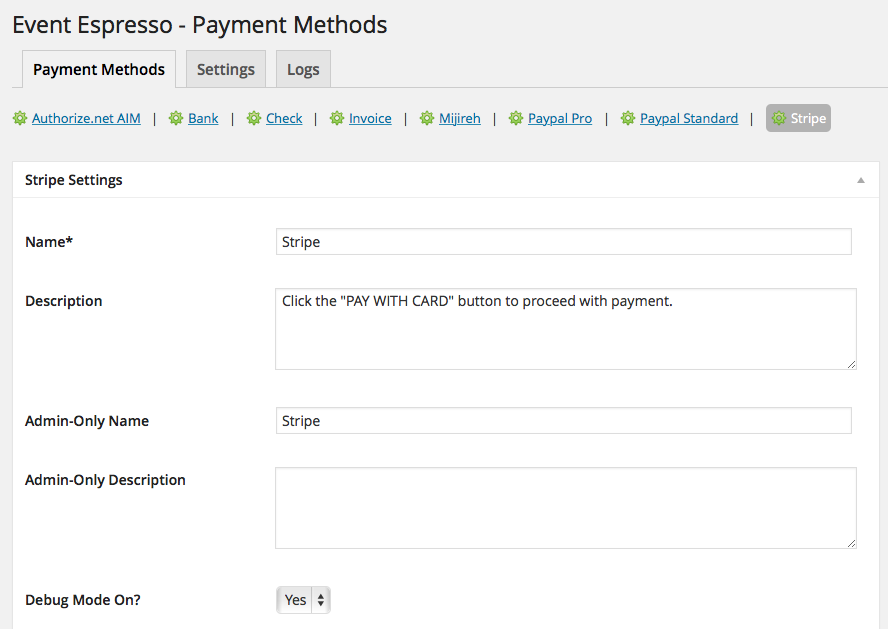
Below are the available fields and explanations for each field.
Name – This is the name of the payment method.
Description – This description is shown during registration checkout.
Admin-Only Name – This is a name of the payment method that will only be shown in the WP Dashboard (WP-admin).
Admin-Only Description – This description is used only in the WP Dashboard (WP-admin).
Debug Mode On? – Enables debugging for this payment method. It should be off (set to no) on a live/production site.
Open by Default? – This sets this payment method to be pre-selected on the registration checkout page.
Integration type – Checkout (legacy) or Elements. Stripe Elements is recommended for all merchants. Payments made by European customers using legacy Stripe Checkout may be rejected because it does not support Strong Customer Authentication (SCA).
Validate the billing ZIP code? – (Checkout integration only) Enabling this option will check that a zip (postal) code matches the bank card.
Collect the user’s billing address? – This will collect the user’s (attendee/registrant) name and billing address.
Logo URL – This is the URL to the logo shown at the top of the Stripe checkout screen (for best results use 125px by 125px).
Button URL – This is the URL to the image that will be used during the payment process of registration checkout.
Alternative Button URL: https://ee-screenshots.s3.amazonaws.com/2015/07/pay-by-credit-card.png
![]()
Usable From? – Select where this payment method should be available for use. This payment method cannot process payments through the WP-admin (WP Dashboard).
PMD Order – The value (number) can be used to sort or arrange this payment option. A lower value means that it should appear first during registration checkout.
Update Settings – Click this button after making any changes to your payment method.
Deactivate Payment Method – Click this button to deactivate this payment method.
Usage
The Stripe payment gateway will let you accept payments via major credit or debit cards.
This is an onsite payment gateway which means that attendees/registrants will process their payment on your site.
An account with Stripe is needed to accept payments via Stripe and an SSL certificate is recommended for securing your website.
Troubleshooting
The Stripe add-on plugin will not activate
You can contact your host and ask them to verify that the server that hosts your website meets these requirements:
- the PHP mbstring extension is enabled
- the PHP json_decode function exists
- the PHP curl_init function exists
I configured Stripe and payments are not being processed
Stripe now requires TLS 1.2 and SHA-2. You’ll find information here:
https://stripe.com/blog/upgrading-tls
You can verify if your server supports TLS 1.2 and SHA-2 with this online SSL server test:
https://www.ssllabs.com/ssltest/index.html
How can I setup a recurring payment or subscription through Stripe?
Recurring or subscription payments are not currently supported in the Stripe payment gateway.
When I refund a payment, does it also refund through Stripe.com?
Refunds in Event Espresso 4 are currently a two step process.
1) Apply the refund through the transactional details screen of Event Espresso in your WP-admin (WP dashboard).
2) Then login to your Stripe merchant account and process the refund.
Is an SSL certificate needed for Stripe?
A dedicated SSL certificate is recommended if you are accepting payments on your website.
Do I need to be PCI compliant?
Compliance with the Payment Card Industry Data Security Standards (PCI DSS) is required if you are processing, storing, or transmitting credit card data. Event Espresso helps you by using Stripe Checkout for processing payments through Stripe and we recommend using a dedicated SSL certificate on your website.
View more information on PCI compliance from Stripe.
Accept event payments with the Stripe payment gateway for Event Espresso