🎉 Introducing Calendar+ a Powerful and Beautiful Events Calendar for WordPress
How to Invite People to an Event on Facebook: A Step-by-Step Guide
How to invite people to an event on Facebook? This how-to guide will teach you the basic steps and some helpful tips.
Posted by Chinny Verana
Inviting people to your event page on Facebook is one good strategy to boost awareness for your event and engagement with your target audience. With over 2 billion active users, Facebook is a powerful platform for event promotion and has a built-in feature that allows you to create events and invite and promote the event to people directly through the social media platform.
According to a report by HubSpot, Facebook is the most effective social media platform for event marketing, with 49% of marketers saying that Facebook is their most important platform for promoting events.
Facebook features allow you to target specific users in a particular location, interest, and demographics relevant to your event’s target audience. Connecting your website and selling tickets is also convenient with the app.
This article will give you a step-by-step guide on how to promote and invite people to your event on Facebook and other social media platforms.
- How to Create Your Facebook Event
- How to Invite People to Your Facebook Event
- How to Invite People Who are Not Your Facebook friends
- How to Invite Members of a Facebook Group to Your Event
- How to Invite People from Your Business Page to an Event Posted on Facebook
- Other Ways to Promote Your Facebook Event for Free
- Inviting People to Your Event on Other Social Platforms
- How to create your event on LinkedIn
- Host Your Events with Event Espresso and Easily Promote Them on Your Social Media
How to Create Your Facebook Event
Creating an event on Facebook is an easy and straightforward process. Follow these steps:
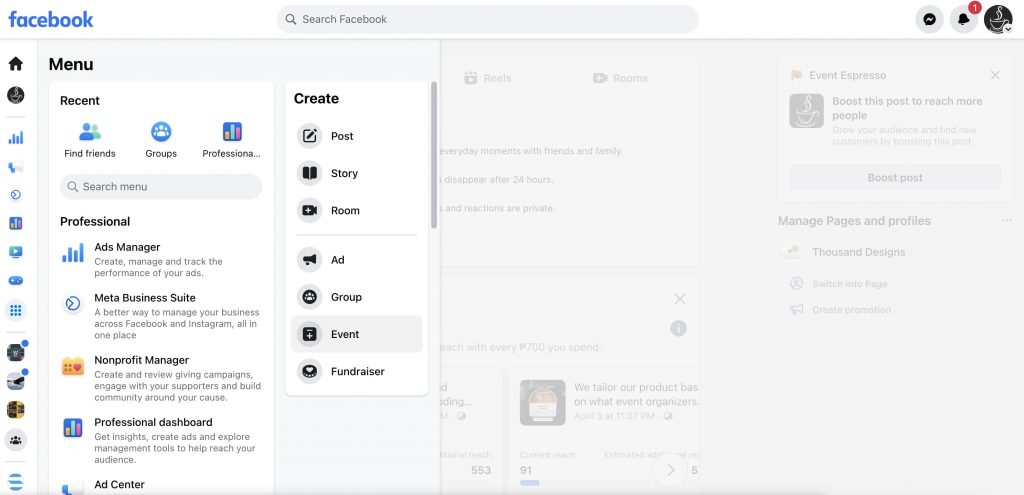
1. On the left side of your Facebook page, click on “Event”
2. A pop-up will appear where you can fill in the necessary information about your event. Fill in your event name, date and time, privacy settings, and description. Tip: Make sure to make an optimized event header on your event.
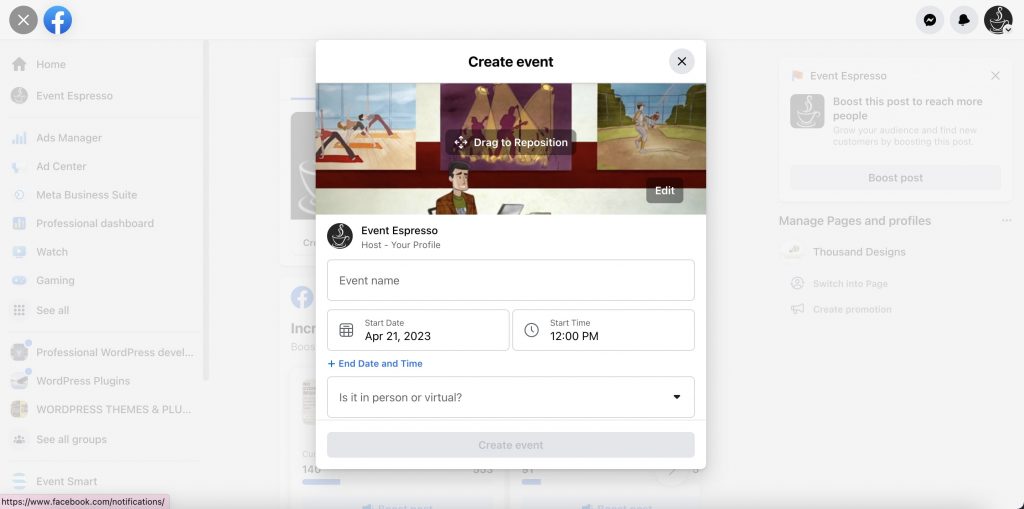
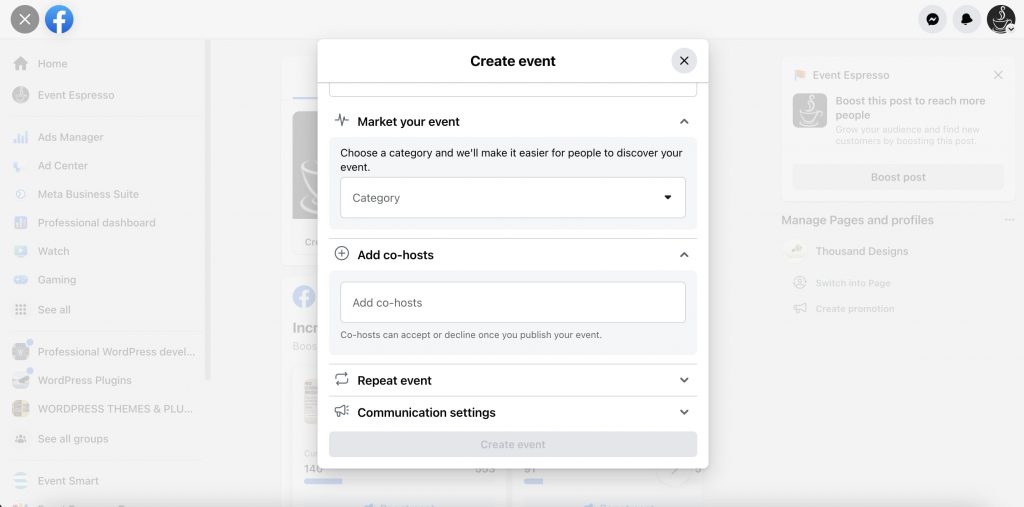
Fill up other supporting details about the event like co-host and other communication settings.
3. Click Create Event and publish it in public.
4. Once your event is live, you can share posts, invite guests, add a cover photo, and edit event details.
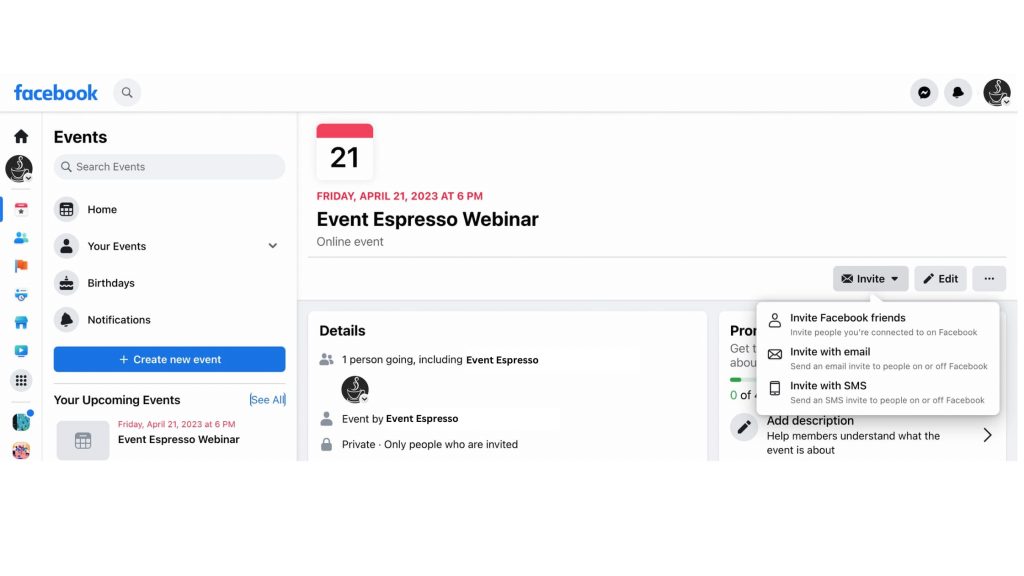
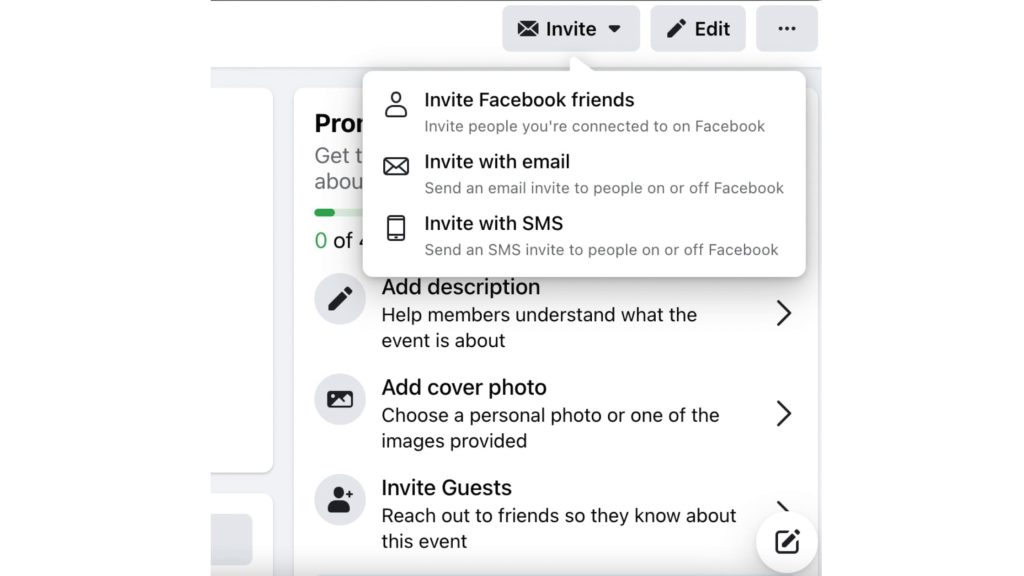
How to Invite People to Your Facebook Event
Once you click on your event, click on the lower right corner and click the button “Invite”. You will be given the option to invite people from your Facebook friend list, via email, or through mobile numbers.
How to Invite People Who are Not Your Facebook friends
To invite non-friends to a Facebook event, click on “Invite” on the event page, choose “Choose Friends,” search for the person by name or enter their email or phone number, and click “Invite.”
If the event is private, only invited people can see the details and RSVP
Take note that Facebook limits the number of invites each person can send to 500 per event because events with large invite lists may be reported as spam.
Furthermore, if you send a large number of invites that people are not responding to, Facebook may limit the number of invites for a short period of time.
Other ways to let people know about your event:
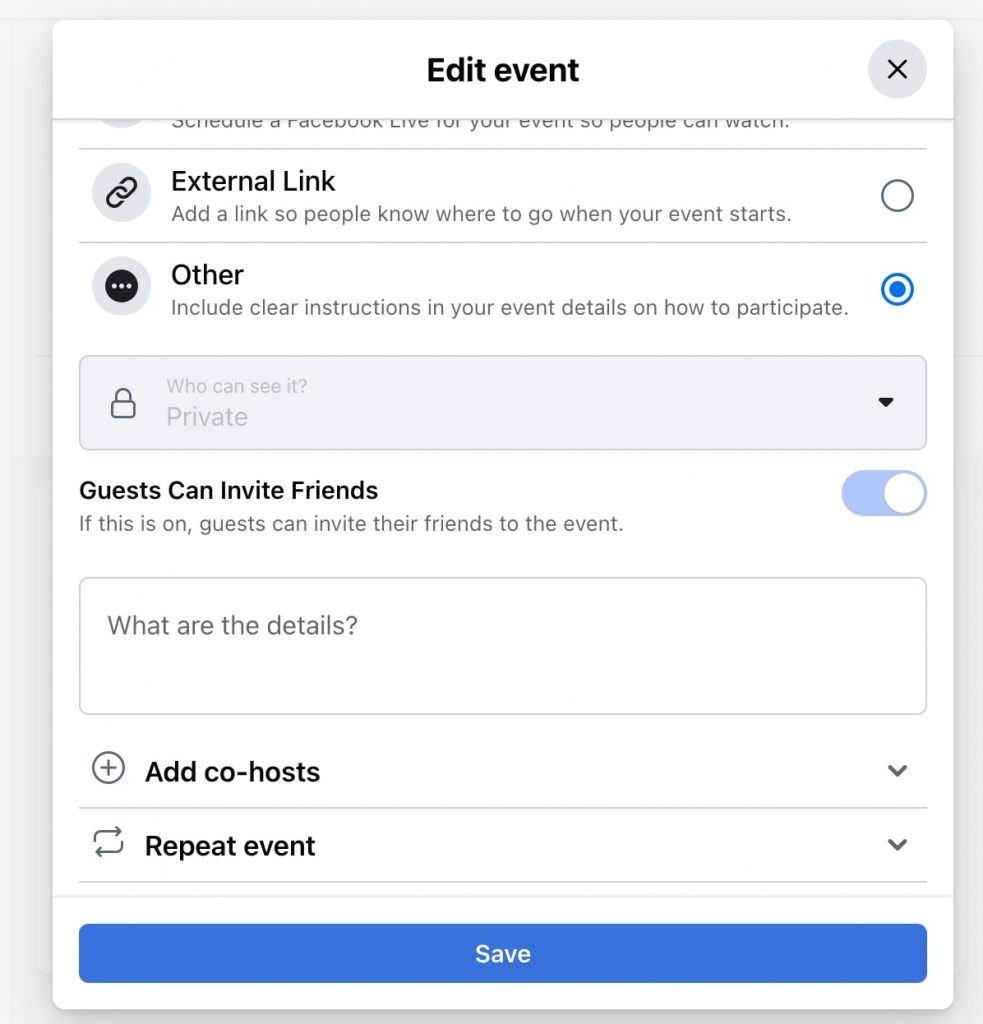
- Private events: You can turn on “Guests Can Invite Friends” when creating your event. Keep in mind that you can’t change this setting later. You can also add a co-host who can invite more guests.
- Public events: Let people know about your event by sharing it on your timeline or your Page’s timeline.
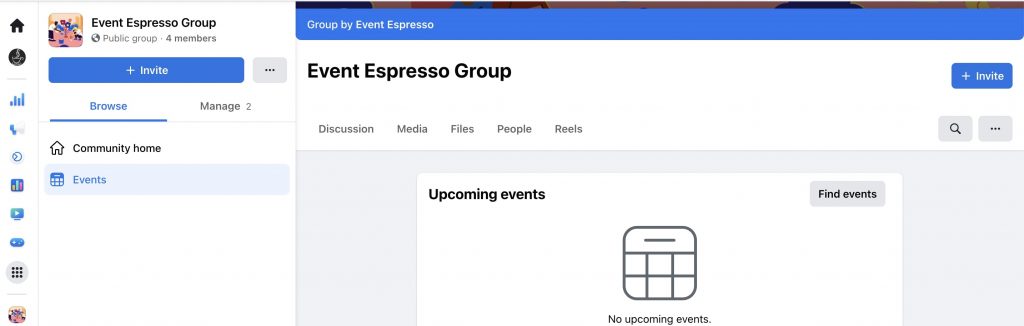
How to Invite Members of a Facebook Group to Your Event
This is applicable once you make an event on your Facebook group.
- From your Feed, click Groups in the left menu and select your group. If you don’t see Groups, click “See More”.
- Click “Events”.
- Select the event and click Invite.
- Select the group members to invite, then click “Send invites”.
- When a group event is created, it appears in the group’s discussion and members can choose to join.
- Keep in mind that if someone removes themselves from a group event, they can’t be added again.
How to Invite People from Your Business Page to an Event Posted on Facebook
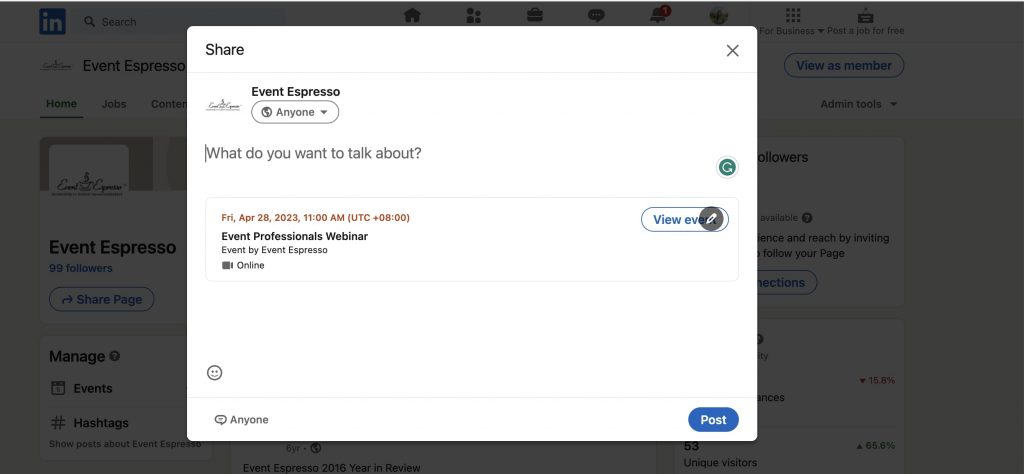
There are different ways you can invite people from your Business Page to an event on Facebook. If your event is created on your Business Page, your event is automatically set to Public. You can click on the share button and share it on your business page so your followers can see the event page.
Other Ways to Promote Your Facebook Event for Free
The easiest way to get your event to reach as many people as possible is to do paid media to boost your event. However, there are free ways in which you can still promote your events.
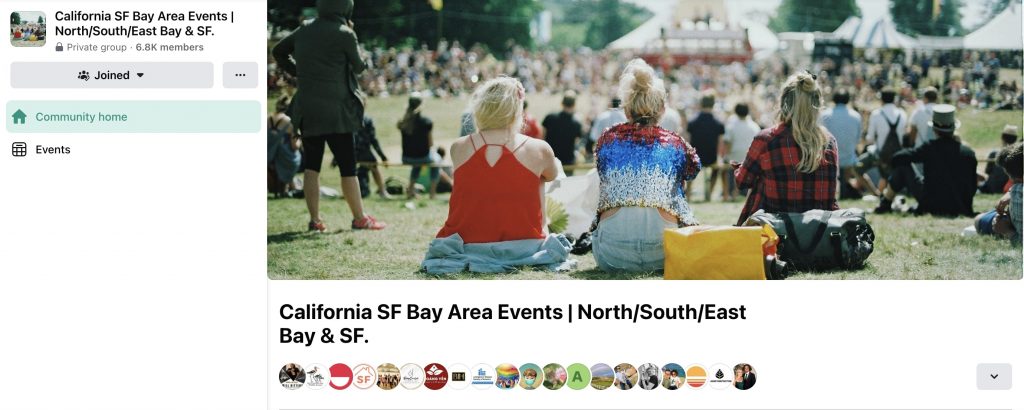
1. Share your Facebook event with niched groups
There are different Facebook groups for almost everything in your area or niche. If you’re hosting a summer workshop on baking, you can probably search for local Facebook groups of baking enthusiasts and post your Facebook event there.
Below is an example of a localized group for events:
2. Adjust your Facebook event settings to let your guests invite other people
For private events created by event organizers, you can turn on the settings so that personal friends or invitees can invite their friends (who might not be on their Facebook list). Doing this is like the digital form of word of mouth and can help boost the reach of your event without additional cost.
This is part of the settings when you create your Facebook event as discussed above.
3. Hosting a giveaway to existing people who expressed interest to boost awareness
Once you have people responding to your event, you can do low-cost promotional activities to boost your event’s reach.
Examples of giveaways could be asking your attendees to share the event in exchange for free merch. You can create a scheme or promotional activity by asking them to tag their friends or circle and a random commenter will be selected for a free ticket upgrade, etc.
4. Sharing the Facebook link to your direct messages
Finally, you can still invite your friends manually by sending the event link on Facebook Messenger.

Inviting People to Your Event on Other Social Platforms
How to create your event on LinkedIn
- On your created LinkedIn Business page, go to “Events” in the left corner of your screen.
Once you click on it, a pop-up will appear where you can fill in the details of your event. This is similar to when you created your event on Facebook.
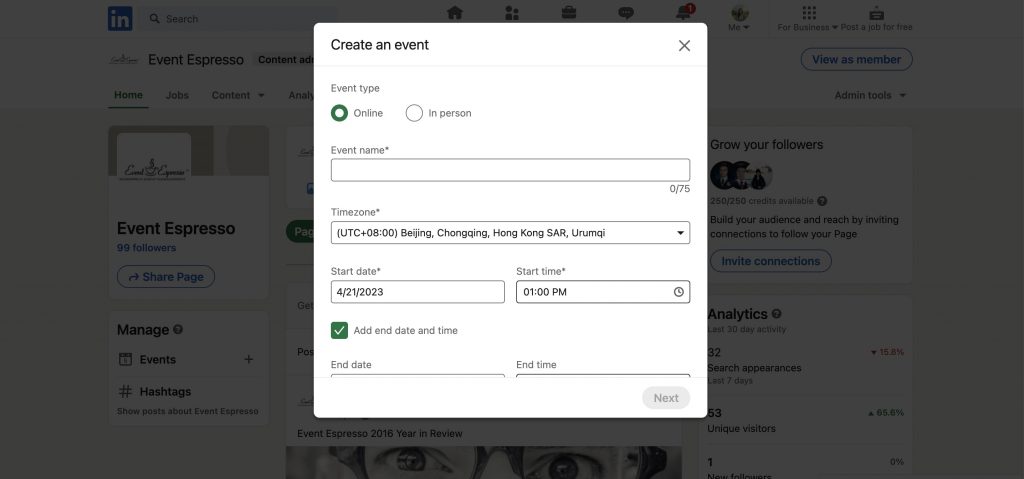
After that, add a clear and persuasive description of your upcoming event and publish.
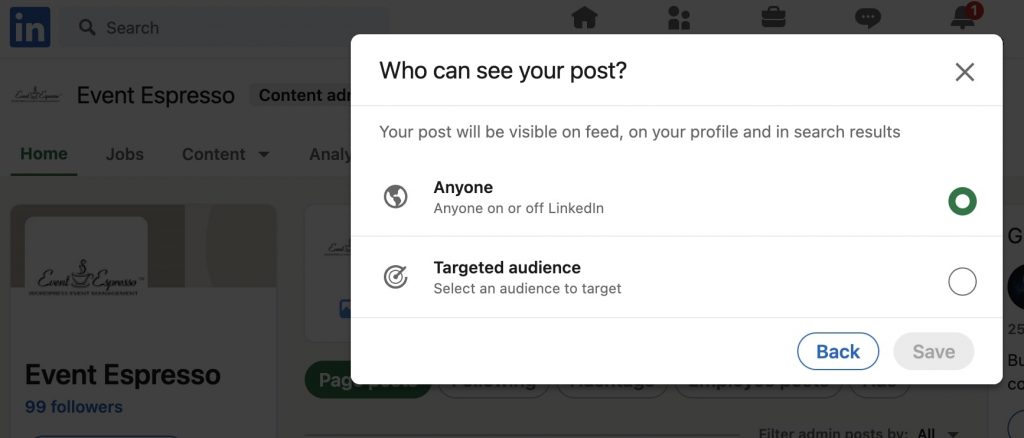
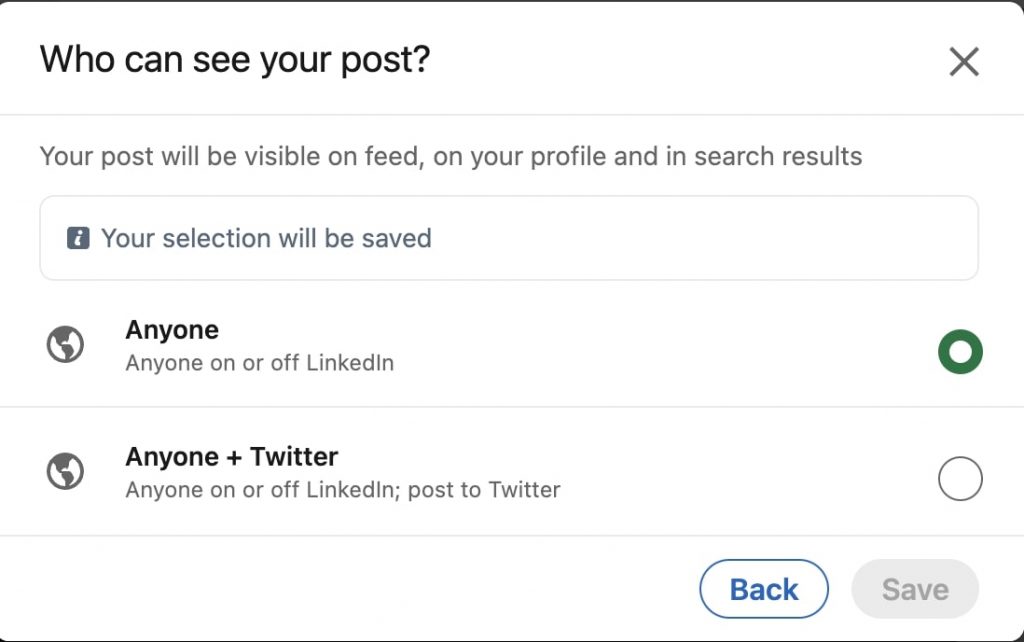
You also have the option of adjusting your settings and making it visible not just on LinkedIn but also to a targeted audience.
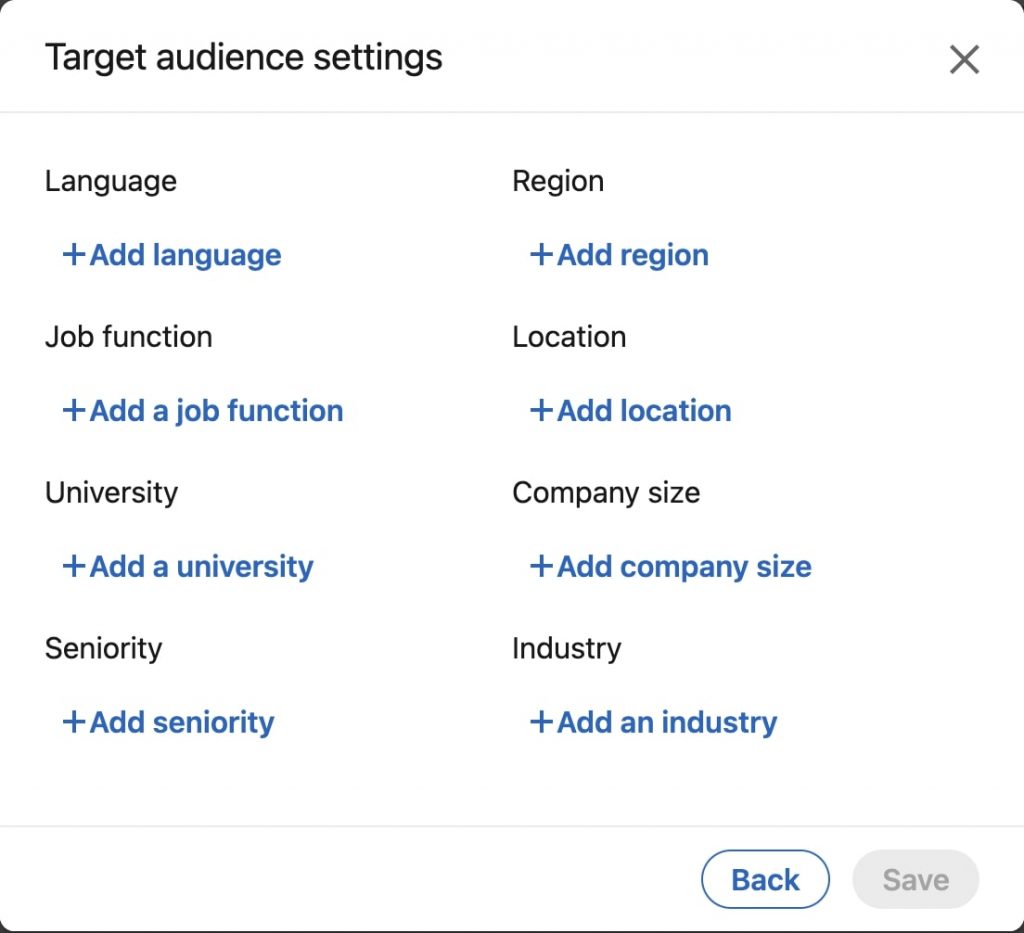
The feature to target specific audiences will be very useful for you because of its ability to filter through different categories of the person (see below). You can easily target an audience based on their language, job function, university, region, company size, industry, and seniority. Say for example you’re creating a sports fest in your area, you can easily target people who are likely to register like University students within your city.
If you are creating your event using a personal LinkedIn profile, these are the options that are available to you. You can share the link to your LinkedIn and Twitter profiles.
Host Your Events with Event Espresso and Easily Promote Them on Your Social Media
With a WordPress site, creating your events can be a breeze with Event Espresso. It’s a WordPress plugin and Event Management Software. With Event Espresso, you can fully customize details, themes, fonts, and more in your events page.
With social media integrated into your strategy, you can easily track analytics and conversion from social media too.
The best part is that there is a $0 commission fee on an unlimited number of tickets sold. You don’t have to worry about losing money on ticket platform fees with Event Espresso.
Try our FREE demo today and get a 30-day money-back guarantee.
If you do not have a WordPress website, you can use our sister platform called Event Smart, where you can host an event website for you.