The Event Espresso 4 mobile app for Android and Apple allows you to transform your existing mobile device into an onsite attendee management tool. These mobile apps are available for free in the app stores and they will allow you quickly check-in attendees and view information about your events and attendees. Built-in ticket scanning capabilities allow you to scan tickets at your classes, meetings, conventions, concerts, and everything in between.
Jump to Android or Apple Event App Documentation
You will need Event Espresso version 4.8.41+ and WordPress 4.5+ to connect your mobile device to your website.
Installation for Apple Devices
The EE4 app can be downloaded and installed on your iPad and iPhone devices from the iTunes store:

Logging in
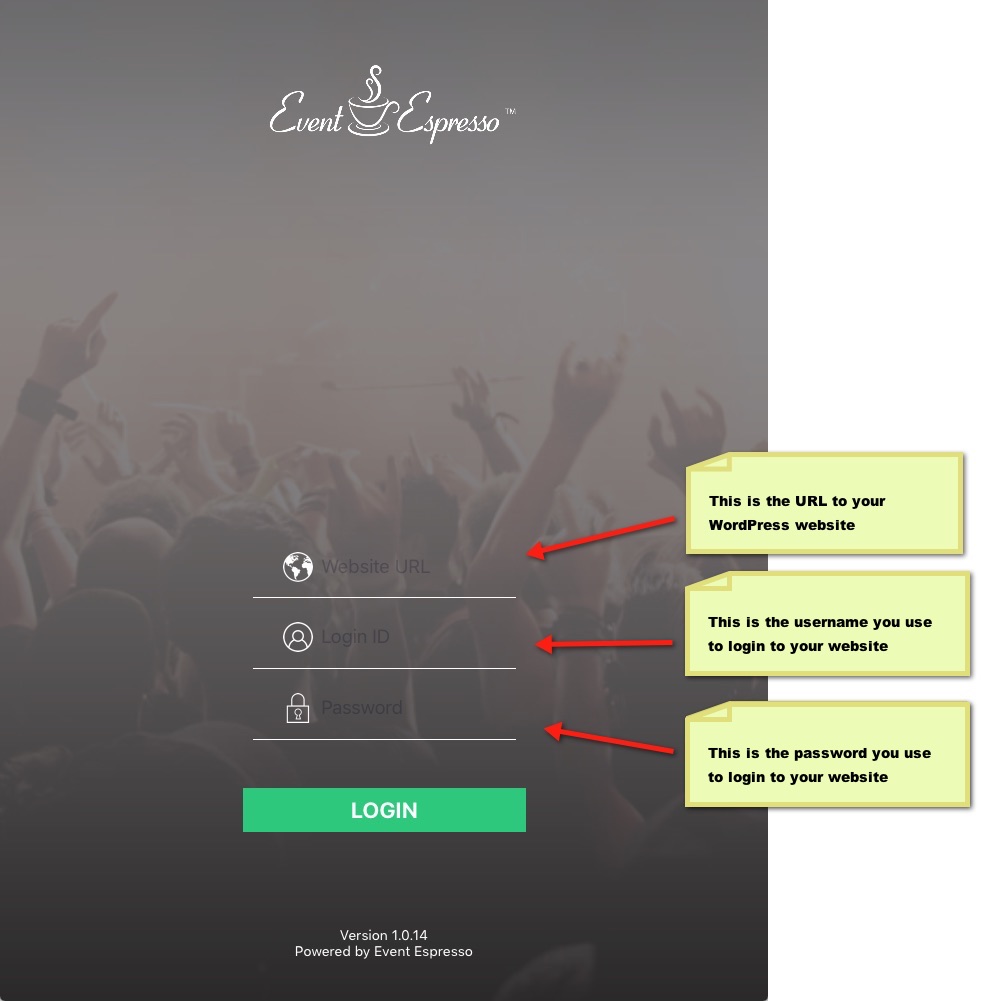
1. Once the app is installed on your iOS device, click on the “Event Espresso” icon.
![]()
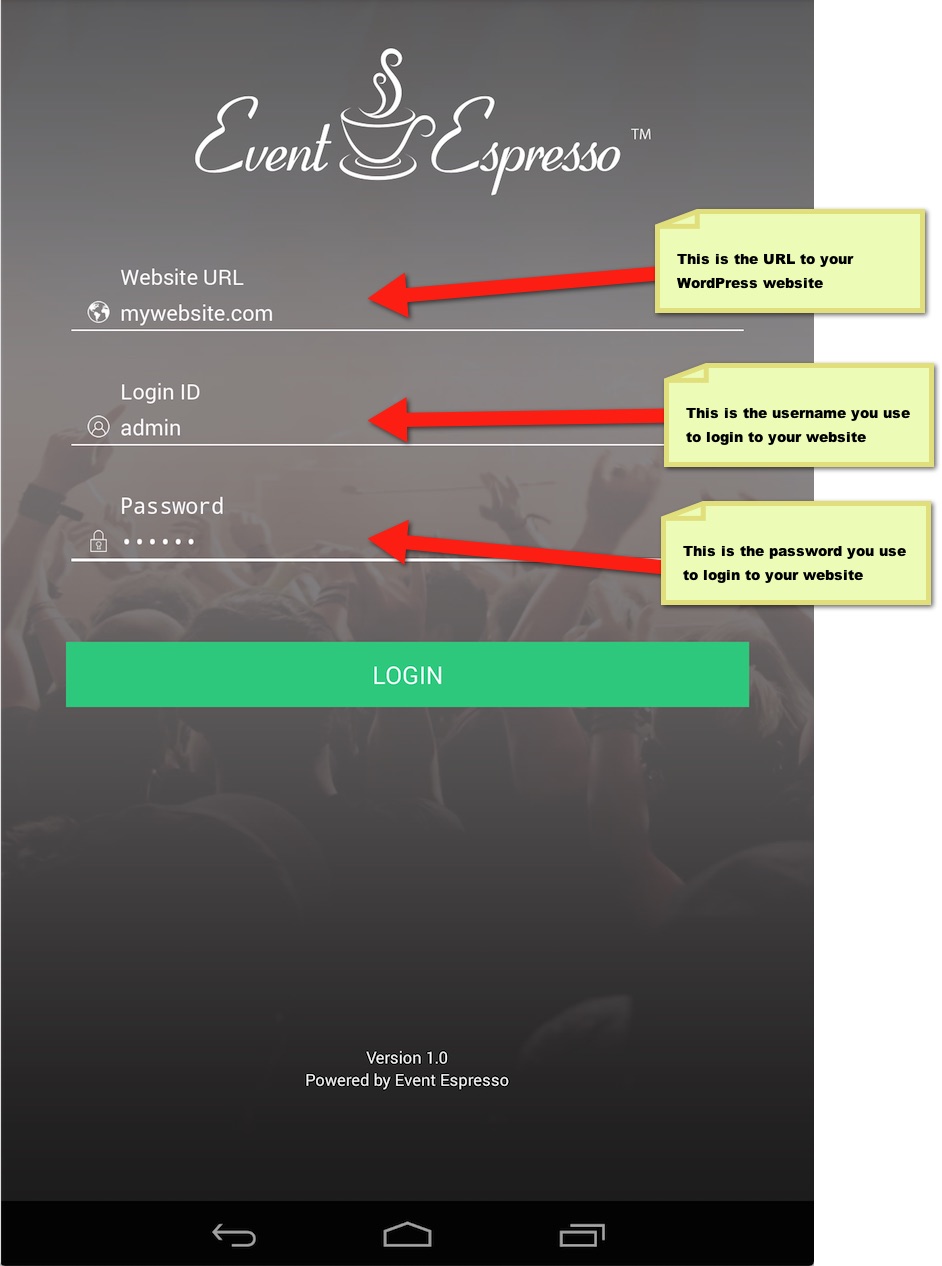
2. Enter the your WordPress login credentials (username & password) into the login screen:
Scanning Tickets
You have two options when scanning tickets. You can scan tickets for a specific event, or any event. Please note, the EE4 Ticketing add-on is required for scanning tickets.
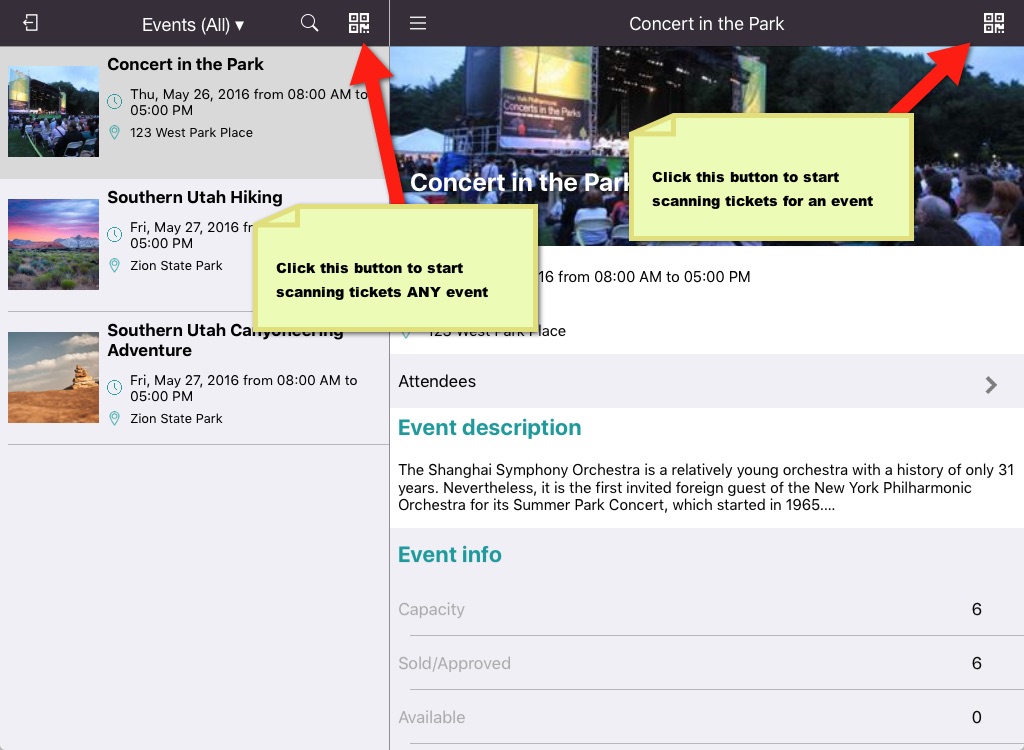
Scanning tickets for a specific event:
Click the “Scan” button in the top-right corner of the selected event screen to start scanning tickets for that event.
Scanning tickets for ANY event:
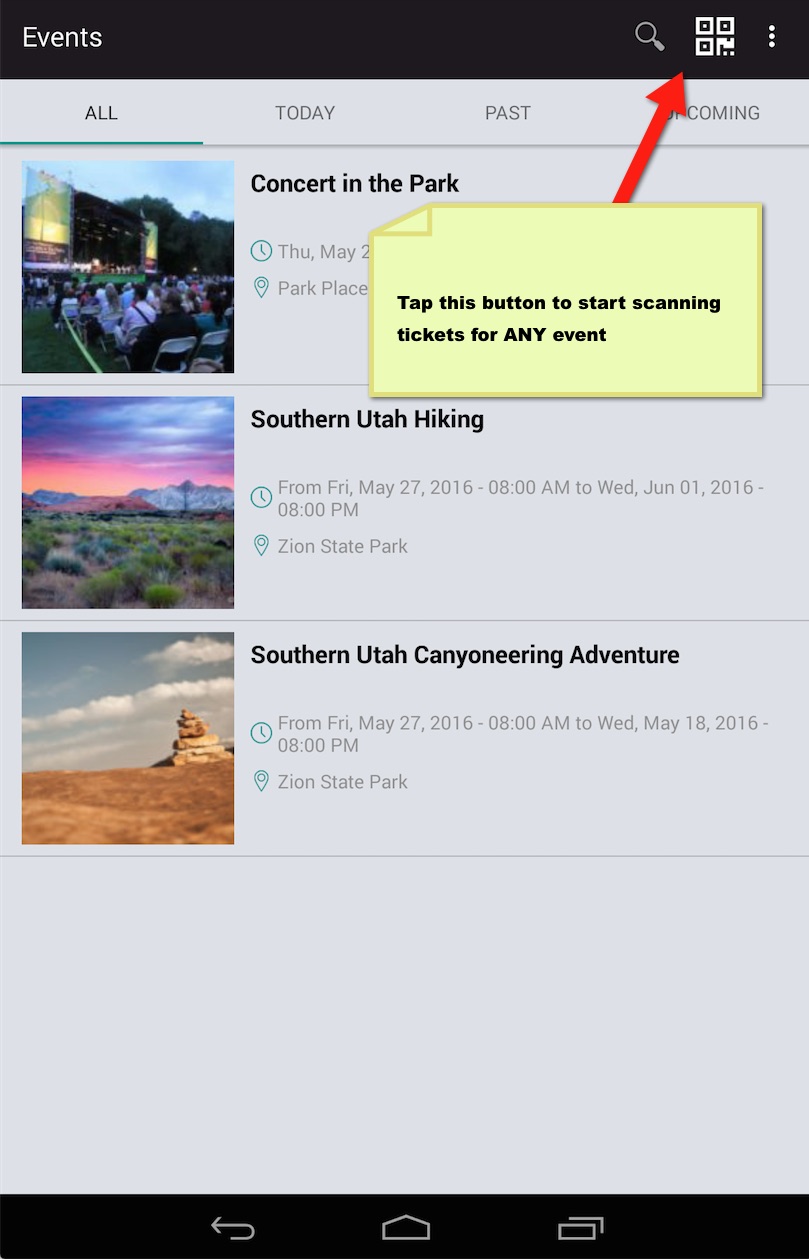
Click the “Scan” button in the top-left corner of the screen to start scanning tickets for an event.
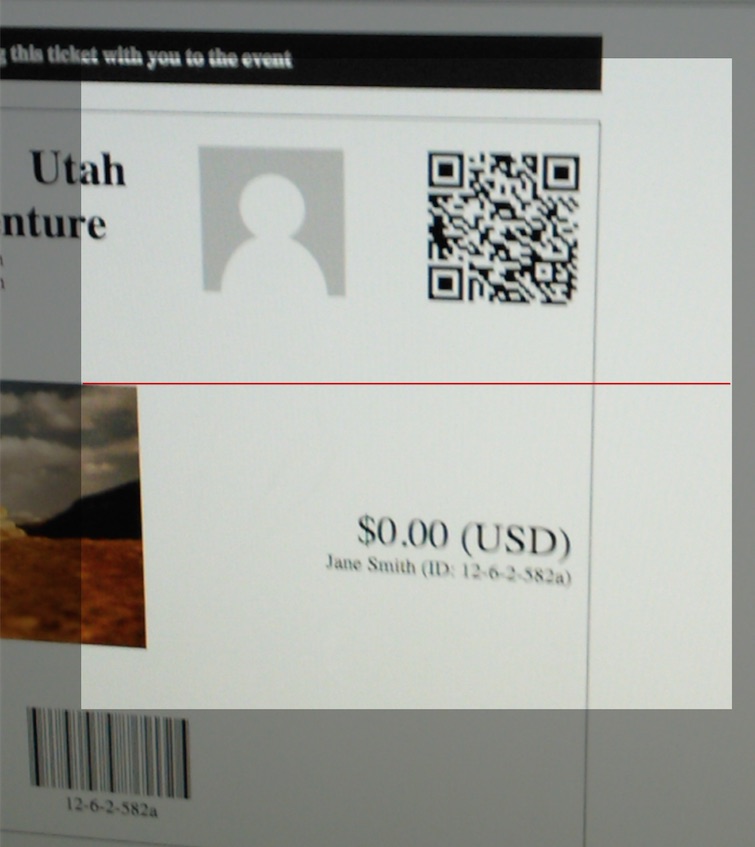
Next, you will see the “Camera View” within a modal window when the “Scan” button is pressed. Just place the device’s camera over the ticket, centered above the Barcode or QR code:
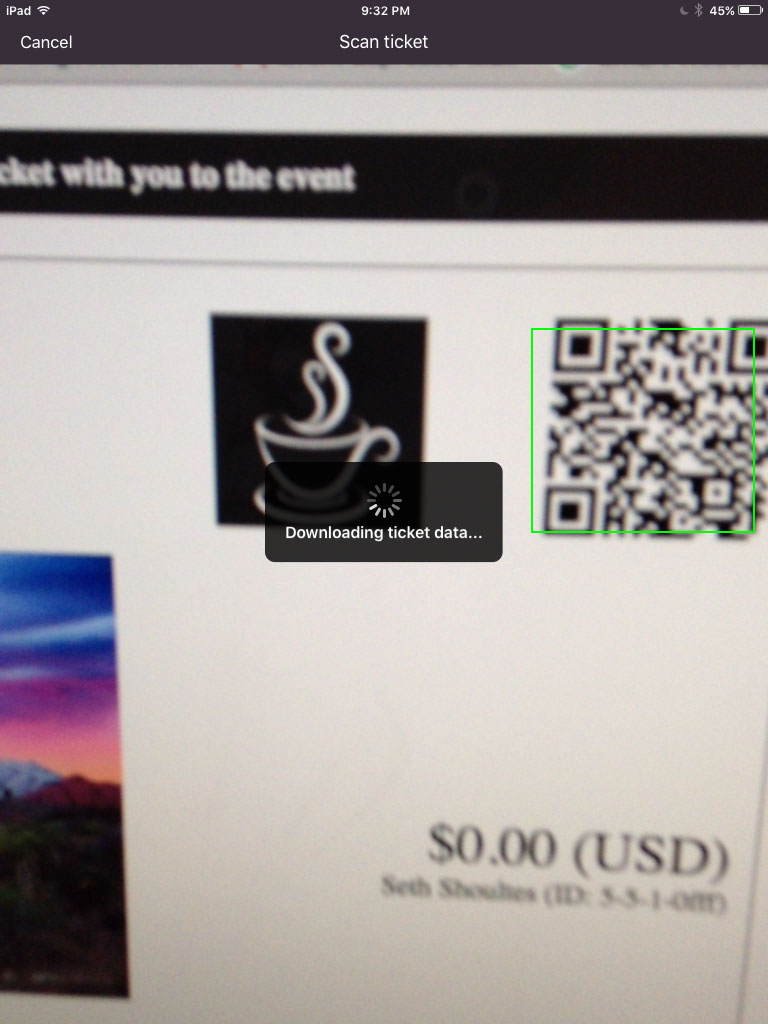
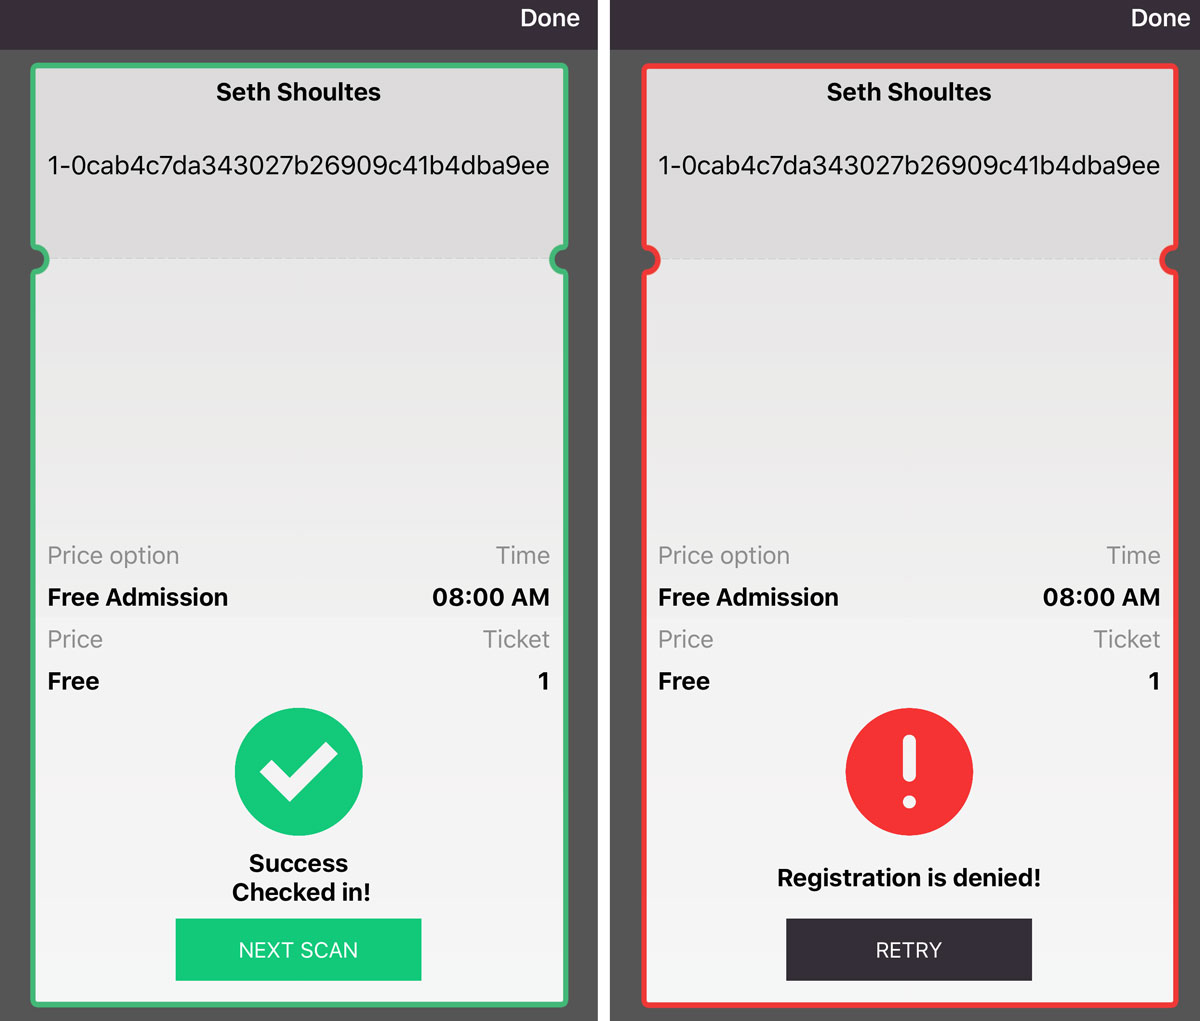
When a ticket is successfully (or unsuccessfully) scanned, the camera view will change to show the info about the attendee and display a green (or a red) image:

Manually Tracking Attendance
Manually Checking In/Out Attendees
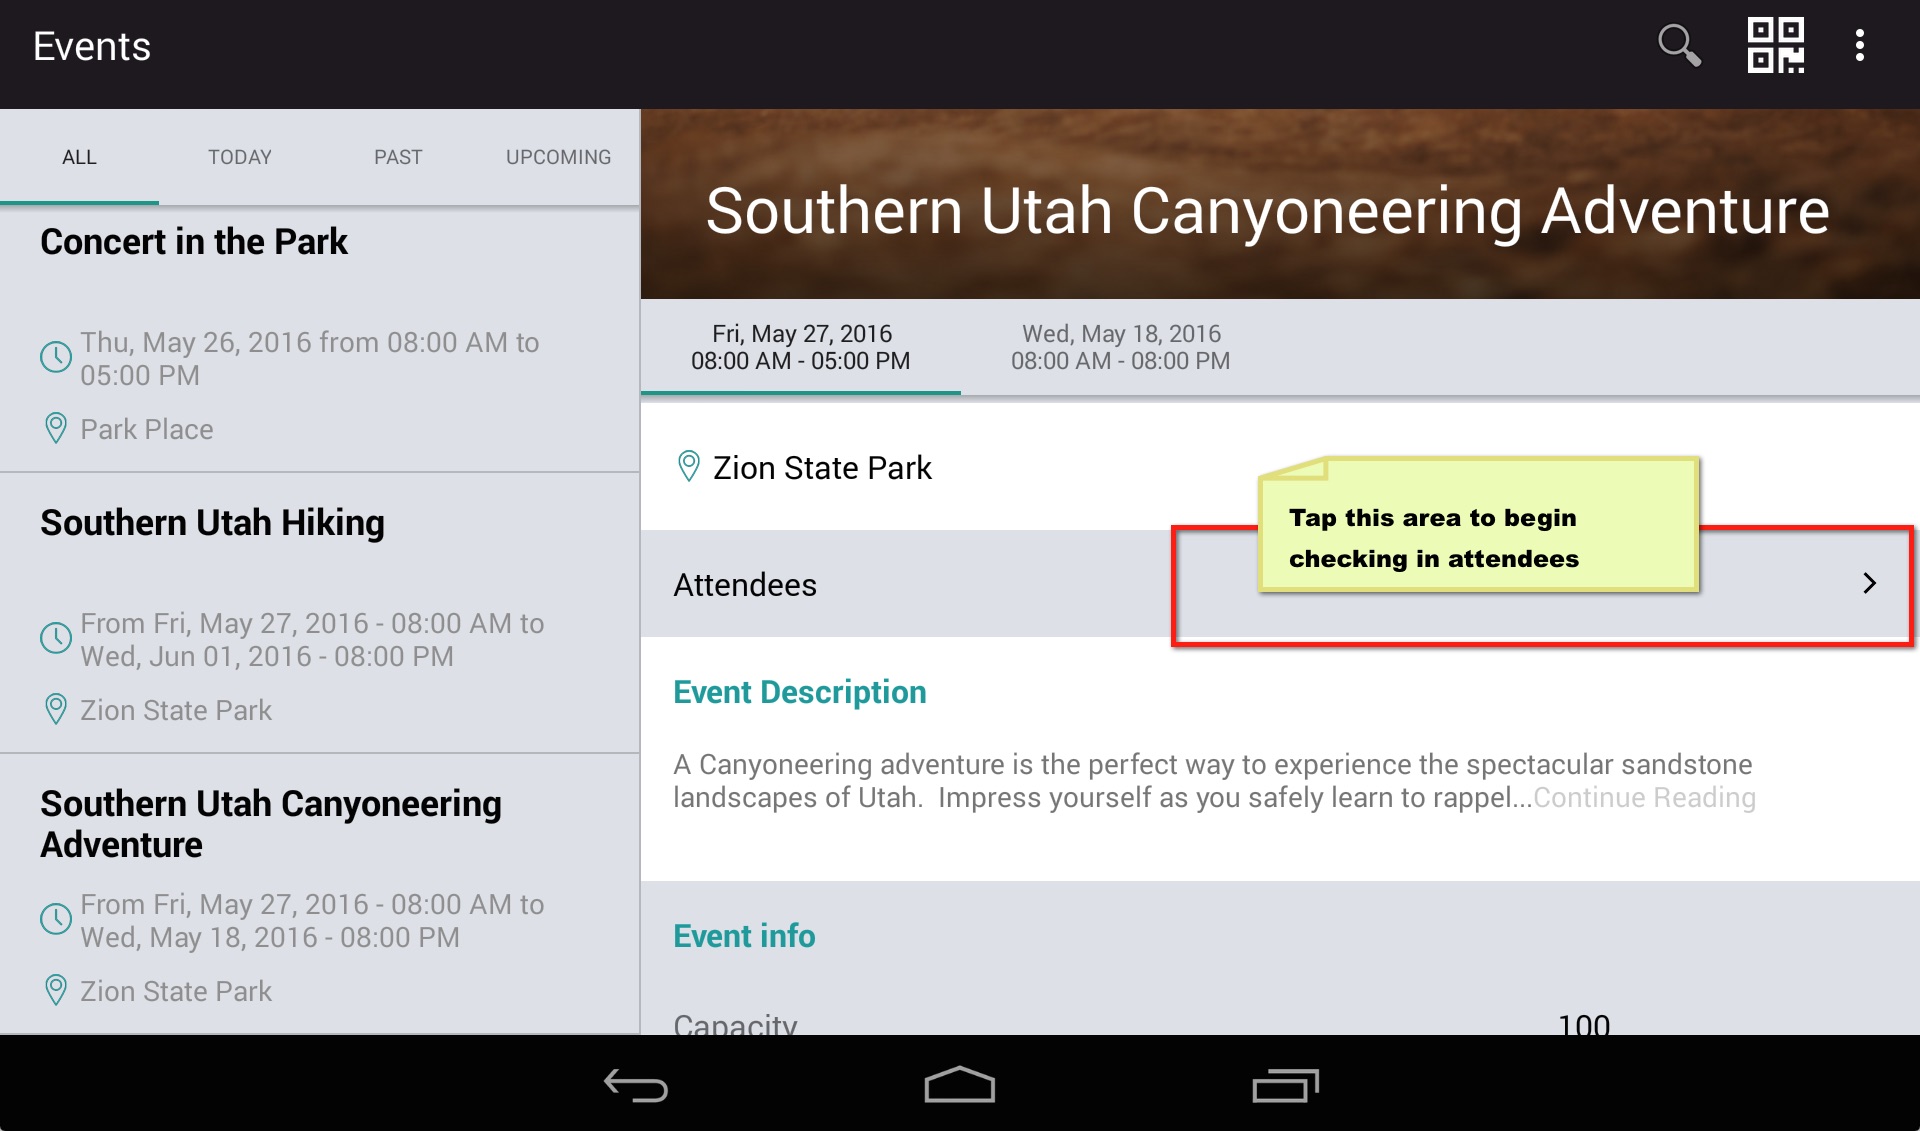
1. From the Event Overview Screen, tap the “Attendees” row to view the list of registrations:

2. You’ll then be taken to the Attendee Overview Screen where you can begin manually checking in attendees. Just click on an attendees name and the view will change to show the registration info:
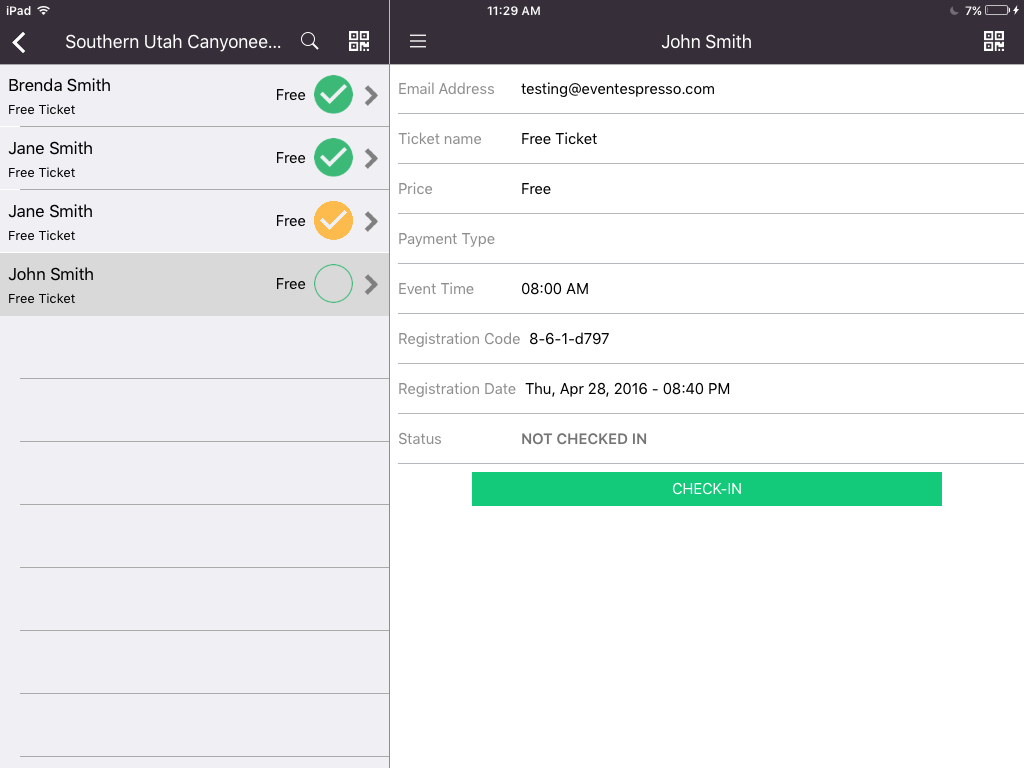
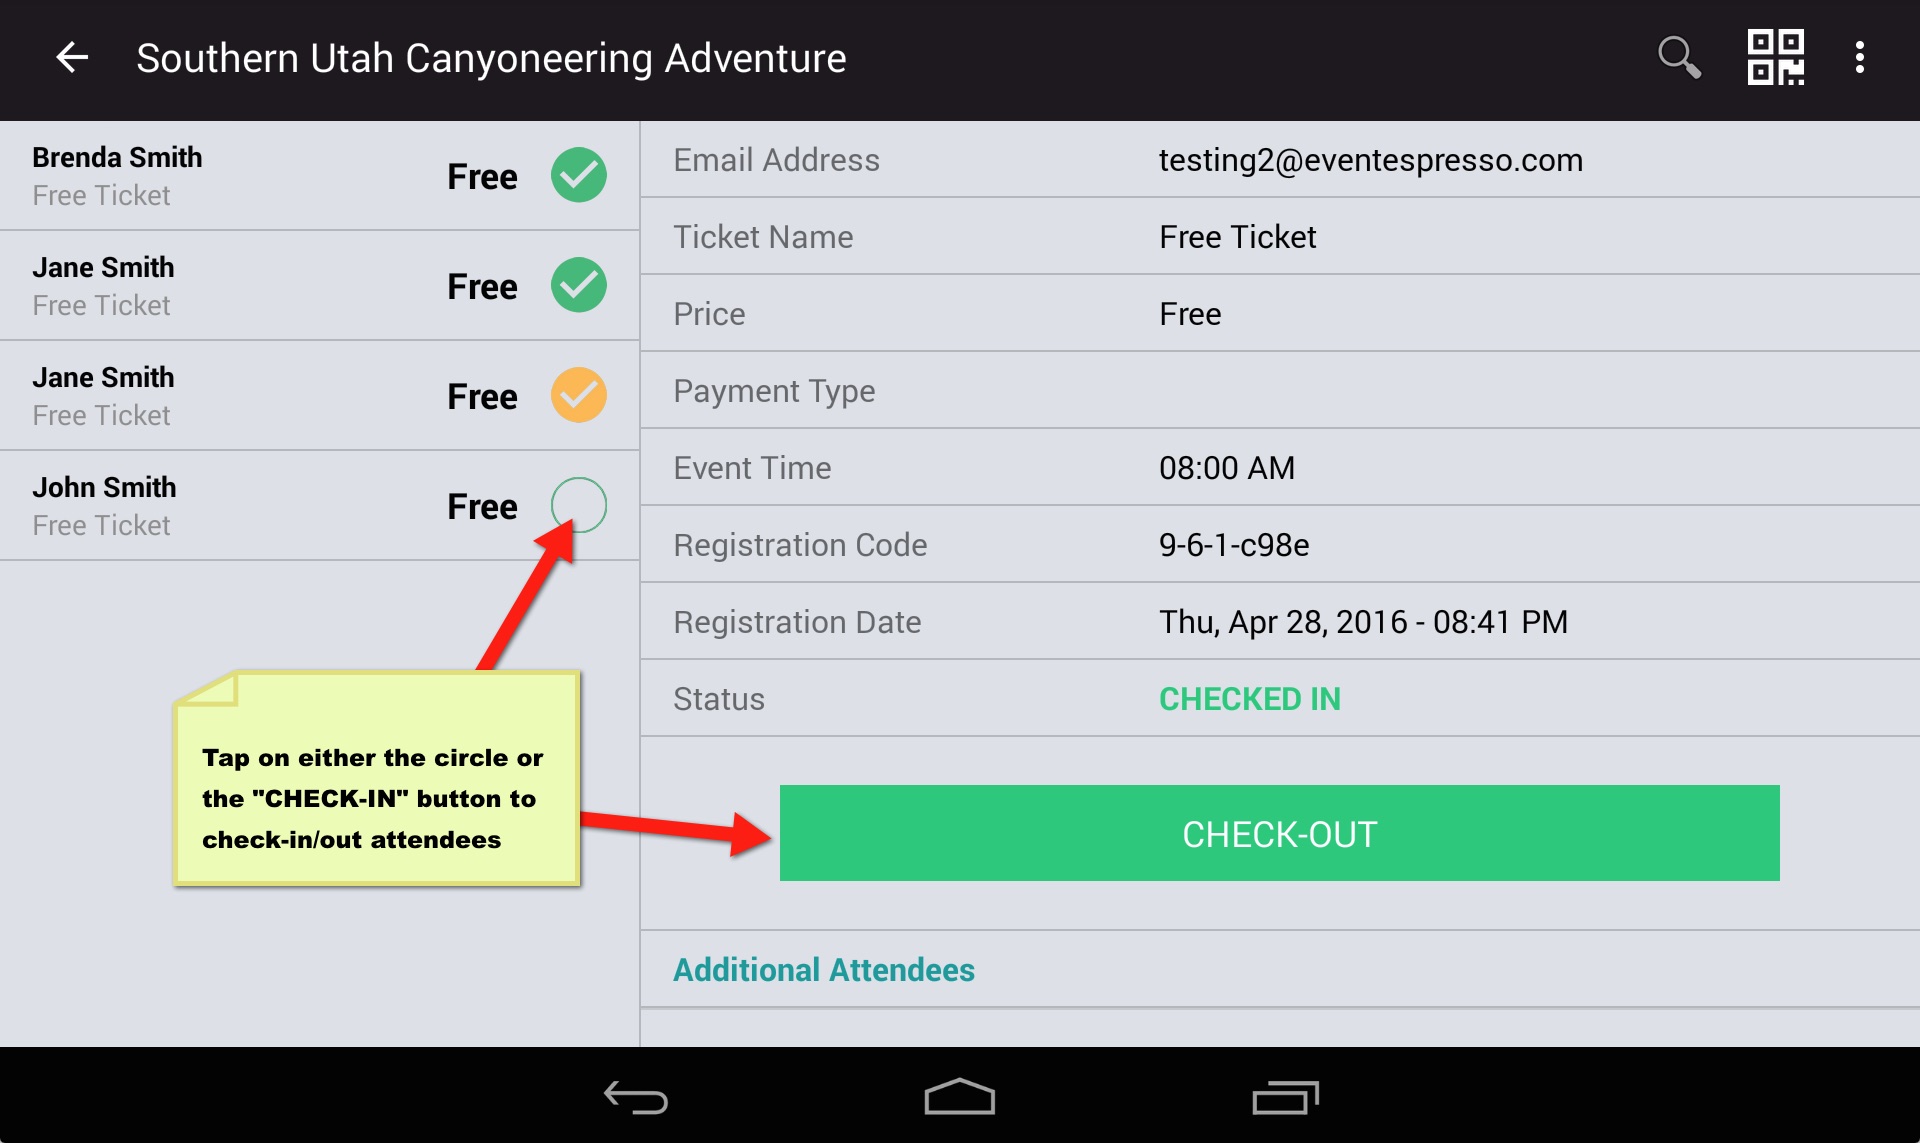
3. Next tap the Check-in (or Check-out) button in the Attendee Info View or click one of the circles in the Attendee Overview Screen:
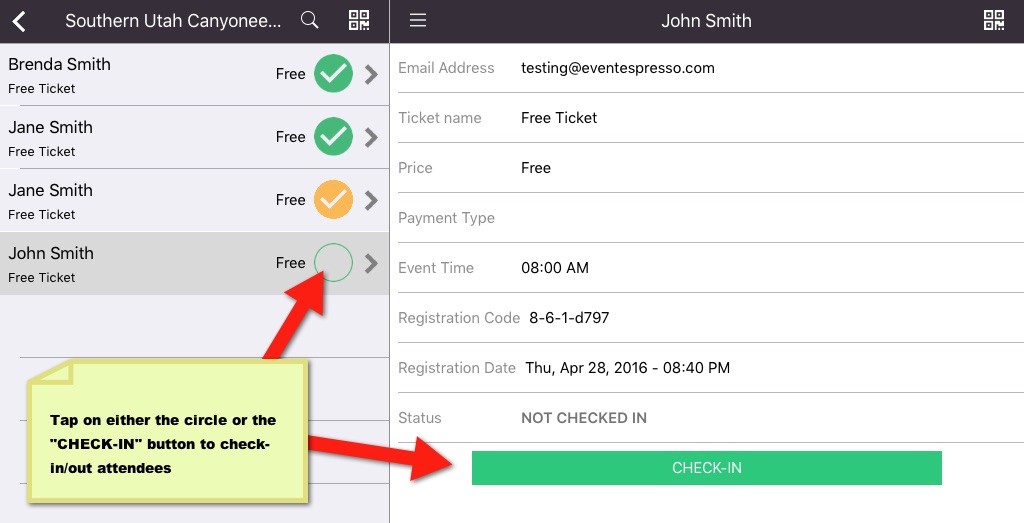
4. When the attendee is successfully checked-in, the “Check-in” button will change to “Check-out” and the “Status” row will change to show the current status.
Attendance Status
The green, yellow, and blank check-mark/circles represent the attendee’s current check-in status:
- Green : Checked-in
- Yellow : Checked-out
- No Check-mark : No Check-in Record
Event managers can also login to the website to view attendance records, generate an attendance list and export the list to a report in CSV format.
Manually Refreshing a View
Not seeing recent registrations or newly added events? Just pull down on any view (“Events View”, “Attendee View”, “Attendee Info View”) to refresh.
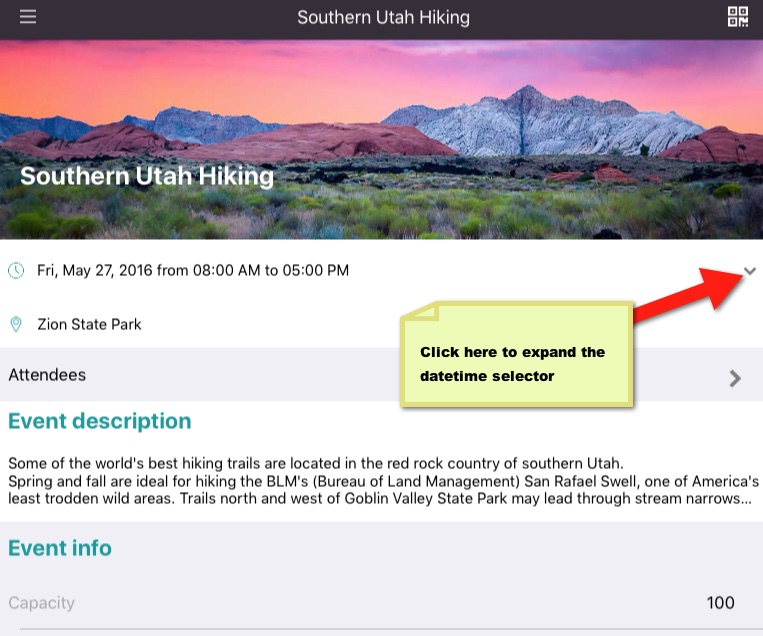
Events with Multiple Datetimes
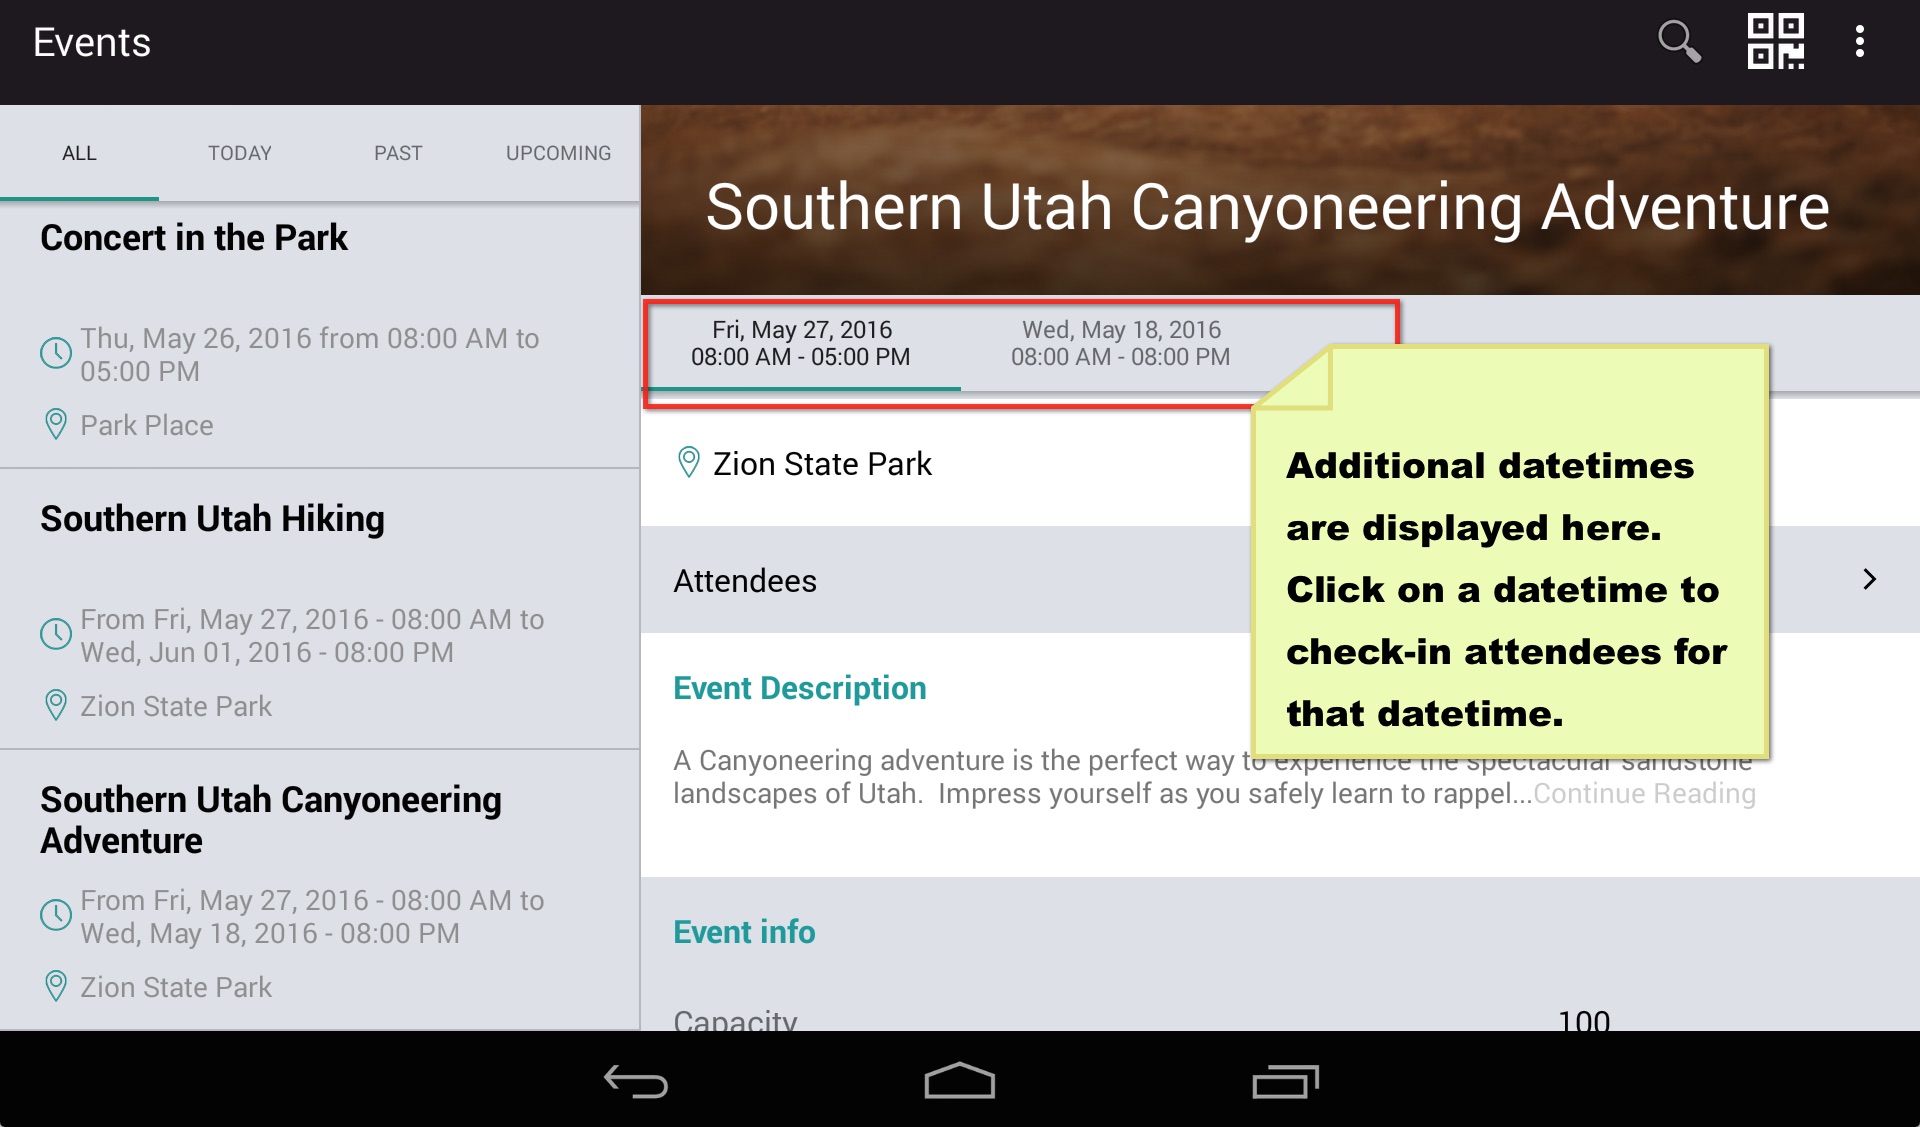
If you have an event with multiple datetimes assigned to it, you can easily select the desired datetime to check-in attendees. Just tap on the arrow in the datetime row, as shown below:
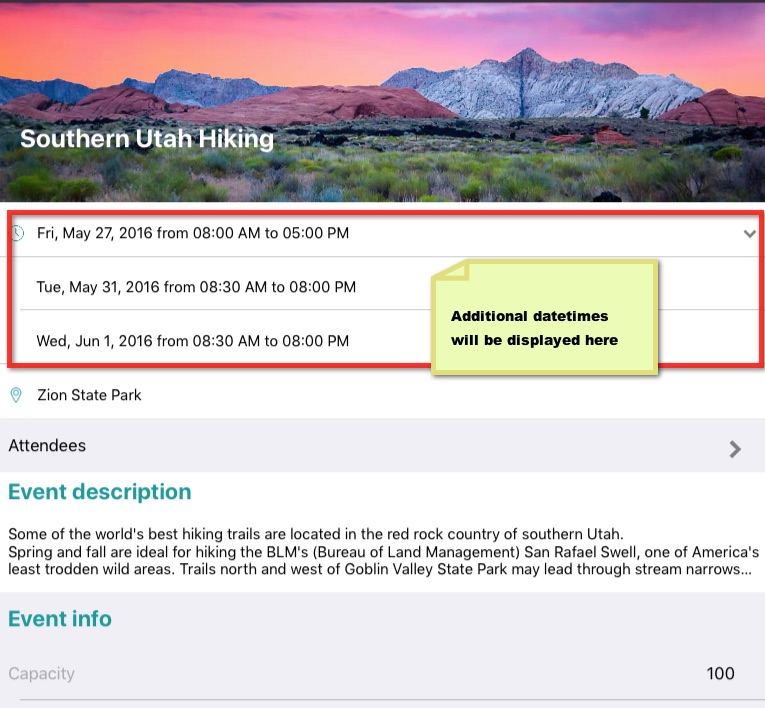
Additional datetimes are displayed under the datetime row. Select the desired datetime to begin checking in atttendees.
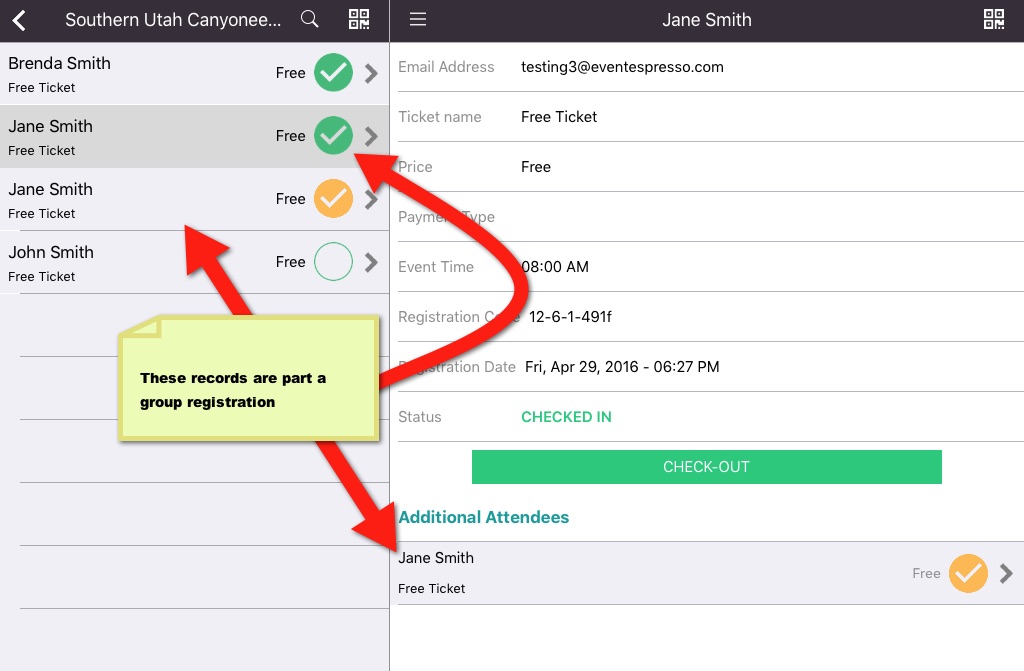
Group Registrations
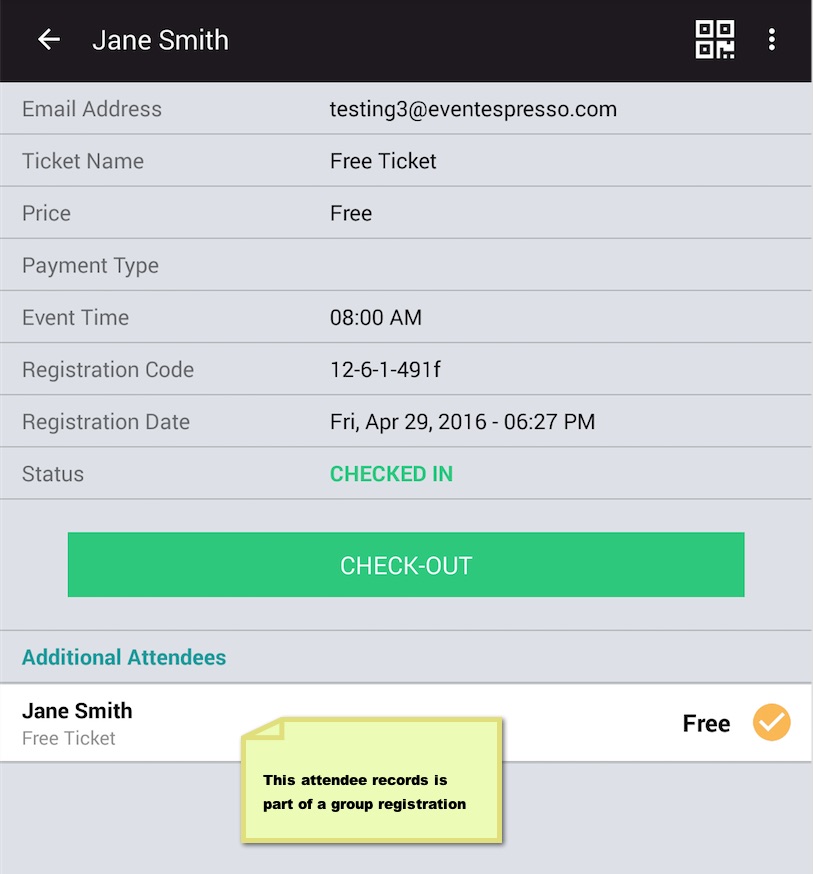
If you allow multiple people to register for a single event (group registration), the additional, related registrations will be shown below the currently selected registration. The additional registrations can be checked-in independently from within the current record shown on the screen:
Installation for Android Devices
The EE4 mobile event app can be downloaded and installed on your Android devices from the Google Play store:
Logging in
1. Once the app is installed on your iOS device, click on the “Event Espresso” icon.
2. Enter the your WordPress login credentials (username & password) into the login screen:
Scanning Tickets
You have two options when scanning tickets. You can scan tickets for a specific event, or any event. Please note, the EE4 Ticketing add-on is required for scanning tickets.
Scanning tickets for a specific event:
With the device is in landscape mode, tap the “Scan” button in the top-right corner of the selected event screen to start scanning tickets for that event.

Scanning tickets for ANY event:
For this, you will need to have your device in portrait mode, then click the “Scan” button in the top-left corner of the screen to start scanning tickets for an event.
Next, you will see the “Camera View” within a modal window when the “Scan” button is pressed. Just place the device’s camera over the ticket, centered above the bar code or QR Code:
When a ticket is successfully (or unsuccessfully) scanned, the camera view will change to show the info about the attendee and display a green (or a red) image:
Manually Tracking Attendance
Manually Checking In/Out Attendees
1. From the Event Overview Screen, tap the “Attendees” row to view the list of registrations:
2. You’ll then be taken to the Attendee Overview Screen where you can begin manually checking in attendees. Just click on an attendees name and the view will change to show the registration info:
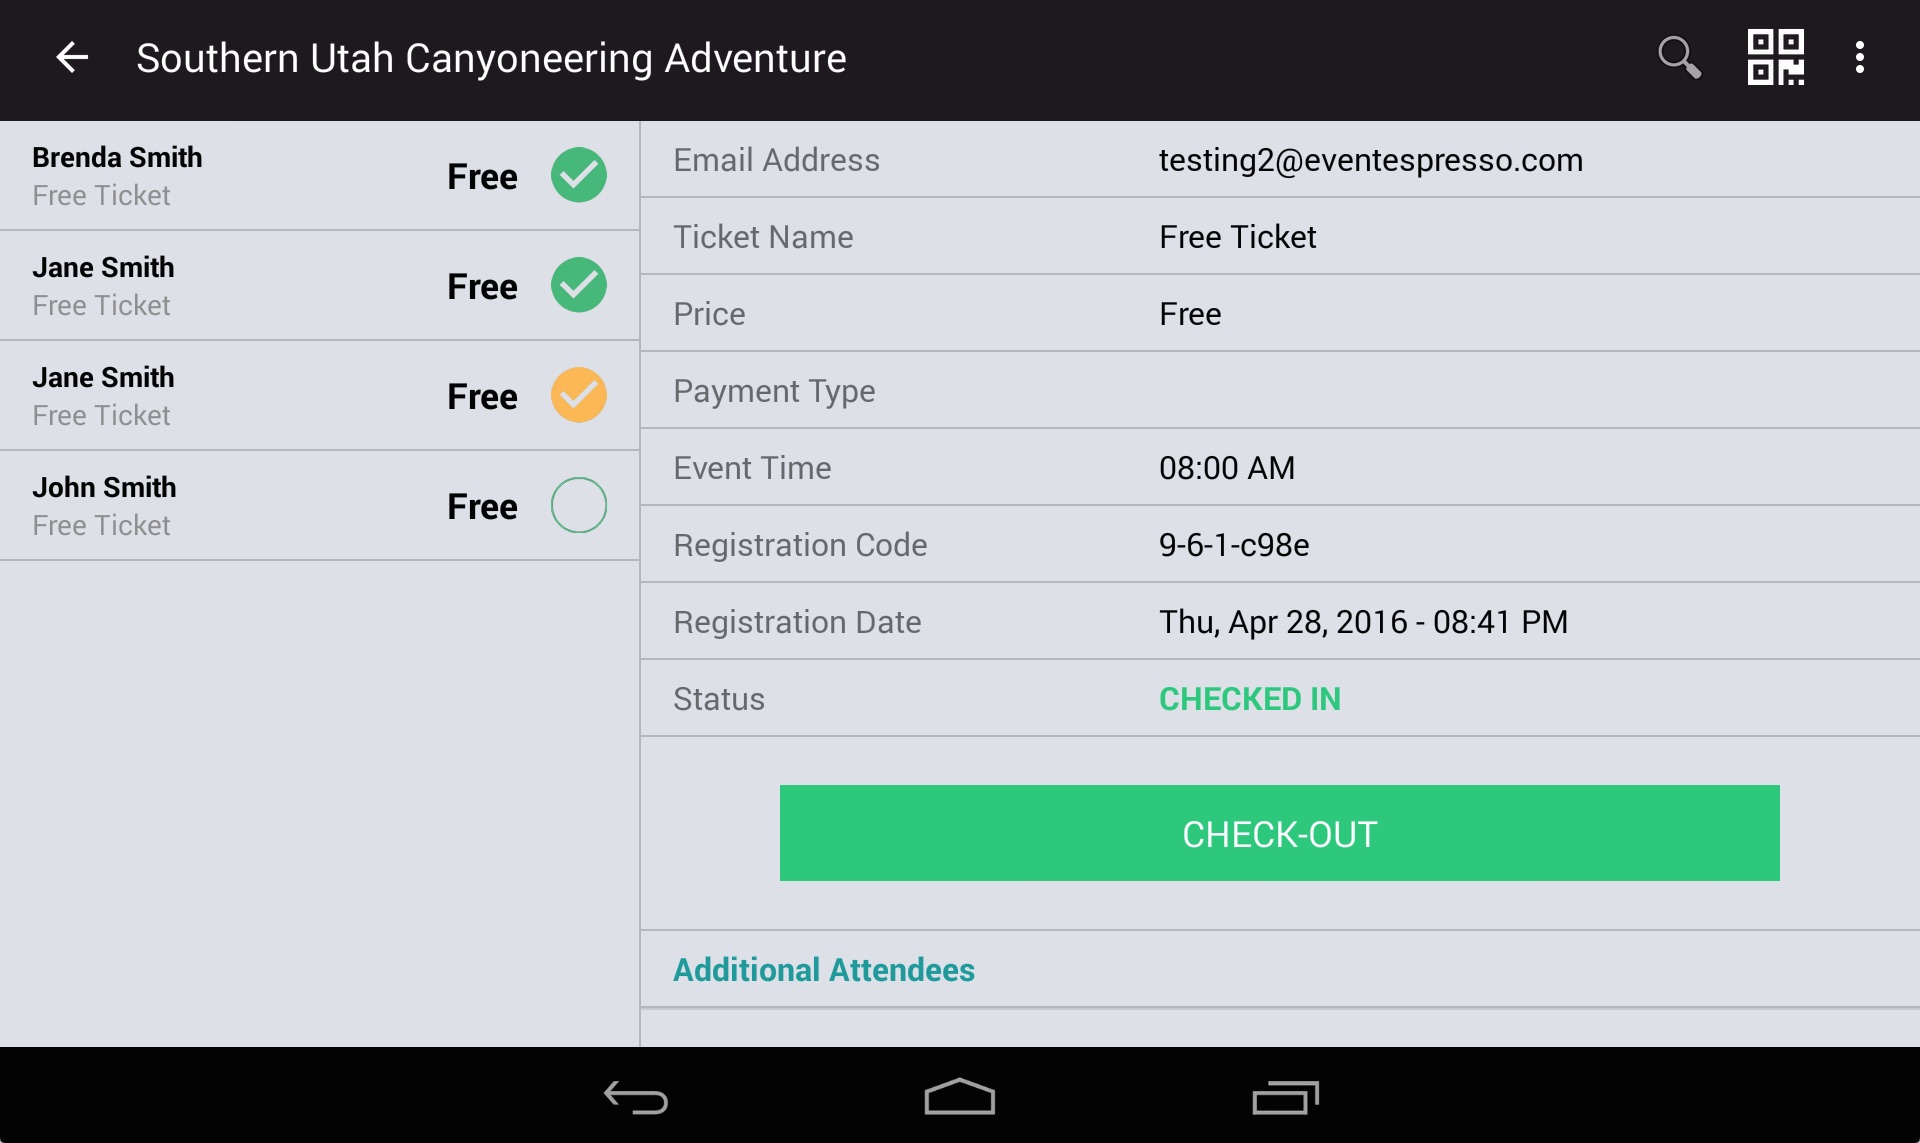
3. Next tap the Check-in (or Check-out) button in the Attendee Info View or click one of the circles in the Attendee Overview Screen:
4. When the attendee is successfully checked-in, the “Check-in” button will change to “Check-out” and the “Status” row will change to show the current status.
Tracking Attendance
The green, yellow, and blank check-mark/circles represent the attendee’s current check-in status:
- Green : Checked-in
- Yellow : Checked-out
- No Check-mark : No Check-in Record
Event managers can also login to the website to view attendance records, generate an attendance list and export the list to a report in .CSV format.
Manually Refreshing a View
Not seeing recent registrations or newly added events? Just pull down on any view (“Events View”, “Attendee View”, “Attendee Info View”) to refresh.
Events with Multiple Datetimes
If you have an event with multiple datetimes assigned to it, you can easily select the desired datetime to check-in attendees. Just tap on the desired datetime in the datetime row, as shown below:
Group Registrations
If you allow multiple people to register for a single event (group registration), the additional, related registrations will be shown below the currently selected registration. The additional registrations can be checked-in independently from within the current record shown on the screen:
Authentication Options
Since Event Espresso is built on top of existing WordPress functionality, we have opted to use the following methods of authentication. Only one method of authentication is required. However, we highly recommend using Application Passwords with the EE4 mobile apps.
Application Passwords
With Application Passwords you are able to authenticate a user without providing that user’s password directly, instead you will use your username and an application password. This is the currently recommend solution for logging into the EE4 Mobile Apps.
As a bonus, application passwords allows you to create multiple, different passwords for each user. For instance, you can allow non-members of your personal event website to login to the EE4 mobile event apps using an application password generated for your admin account. That way you don’t have to share your personal password, or your own application password.
The Application Passwords WordPress plugin is required and must be installed on your WordPress powered website.
Getting Started | View Screenshots
- Install the Application Passwords plugin from within your WordPress admin or follow the instructions from the Github project.
- Go to the User Profile page of the user that you want to generate a new application password for. To do so, click Users on the left side of the WordPress admin, then click on the user that you want to manage.
- Scroll down until you see the Application Passwords section. This is typically at the bottom of the page.
- Within the input field, type in a name for your new application password, then click Add New. Note: The application password name is only used to describe your password for easy management later. It will not affect your password in any way. Be descriptive, as it will lead to easier management if you ever need to change it later.
- Once the Add New button is clicked, your new application password will appear. Be sure to keep this somewhere safe, as it will not be displayed to you again. If you lose this password, it cannot be obtained again.
- Login into the EE4 mobile apps using your website username and new application password to login into the EE4 mobile app.
Application Passwords doesn’t work with CGI/FCGI servers by default; if it doesn’t work you should contact your hosting provider and request they allow the ‘Authorization’ header through on requests. If your host is not receptive to adding this, you will need to use the Basic Auth plugin (bundled into Event Espresso 4 core) which has a workaround for CGI/FCGI servers.
WP API Basic Authentication
Getting Started
- Log into the EE4 mobile apps using your username and password from your WordPress site’s user account.
oAuth
Not supported at this time. We may consider adding oAuth login support as an authentication option in the app if we get a lot of requests for this method.
Required User Capabilities
Using the built-in WordPress user management system as a foundation, the EE4 Roles and Capabilities system allows you to create roles and capabilities for your members/users on your website. That means, as a site owner, you can manage member/user access to administrative tasks, such as creating events, viewing registrations, writing content, approving content, and more.
What this means for EE4 customers is that you can allow members/users of your website admin access to the mobile apps, such as scanning tickets and checking-in attendees, without giving them access to other areas of your admin.
These are the minimum capabilities to scan tickets and check in attendees for a WordPress user account:
- ee_edit_checkin
- ee_edit_checkins
- ee_read_checkin
- ee_read_checkins
- ee_read_contact
- ee_read_contacts
- ee_read_events
- ee_read_private_events
- ee_read_registration
- ee_read_registrations
- ee_read_transaction
- ee_read_transactions
These are optional capabilities that will allow checking in tickets for events not authored by the current user:
- ee_read_others_registrations
- ee_read_others_events
- ee_read_others_checkins
- ee_edit_others_checkins
You can grant these capabilities to a specific user role or user account by using the Members or User Role Editor plugins.
Troubleshooting
You may receive the following error messages. This is what they mean and this is what to do about them.
- “No Data to display” or “No available data” – this means you successfully connected to your event website, but you do not have any published events. You need to publish your first event in order to see the data.
- “The requested resource could not be found…” or “No route was found matching the URL and request method” – Please doublecheck the URL input into the first field of the app home screen. If the URL matches the home page URL of your site, it could be that you do not have Event Espresso activated or you do not have the minimum version of Event Espresso and/or WordPress installed. You will need Event Espresso version 4.8.41+ and WordPress 4.5+ to connect your mobile device to your website. If your site meets the above requirements, you can try resetting the site’s rewrite rules. You go to the WordPress > Settings > Permalinks page from your WordPress dashboard and WordPress will automatically reset the rewrite rules when the page loads.
- “The data is not in the correct format.” or “Connection error. Unable to load data.”
- The Mobile apps require that the permalinks are set to Post Name or similar scheme that uses %postname% (also known as Pretty Permalinks). The plain permalinks structure is not compatible with the API.
- WP_DEBUG must be set to false. You can verify that WP_DEBUG is set to false by opening the wp-config.php file in a code editor.
- “Connection error. Unable to load data”
or “The URI provided was too long for the server to process…” iThemes Security plugin users: The Filter Long URL Strings option under Settings > System Tweaks must be turned off. - The Event Espresso JSON API is now included in Event Espresso core. Any older Event Espresso JSON API plugins need to be deactivated.
- If the above steps do not resolve the issue you can temporarily deactivate all plugins except Event Espresso, switch to the default theme, then try the app again.
- Sorry, you are not allowed to list events. Missing permissions:…”
or
The server was acting as a gateway or proxy and received an invalid response from the upstream server.
For Shield Security plugin users, you can disable the plugin’s Hack Guard Module to allow the app to communicate with your website.
For Apache servers with FCGI: Open up your .htaccess file in a code editor and make an edit. You add the following:# Begin Custom htaccess SetEnvIf Authorization "(.*)" HTTP_AUTHORIZATION=$1 # End Custom htaccess
Immediately before the line that has
# BEGIN WordPress
- For ngnix servers with FCGI: You will need to specify that the Authorization header should be passed. You can try adding the following directive to your nginx configuration:
fastcgi_pass_header Authorization;
Other reported conflicts
- The SSL Insecure Content Fixer plugin was reported to cause issues with the mobile apps for one site
- WPML Multilingual CMS conflicts with the WP REST API requests from the EE4 mobile apps