Your attendees can pay for their event registration with a credit or debit card by using Payflow Pro.
View quick links for this payment gateway –>
Accept event payments with the Payflow Pro payment gateway for Event Espresso
Installation
This payment gateway is a plugin for WordPress and can be installed through your WP dashboard (WP-admin).
Download the latest version of the Payflow Pro payment gateway for Event Espresso 4 from your Event Espresso account.
Then login to your WordPress dashboard (WP-admin) and go to Plugins. Next, click on Add New –> Upload and browse to the plugin on your computer. Then select the zip file and begin the upload process. Wait for the plugin to upload and then click on Activate.
Locate your Credentials for Payflow Pro
Your credentials for Payflow Pro are provided to you when you setup your merchant account.
Setup and Configuration
A Payflow Pro account with PayPal is needed to accept payments via Payflow. Need an account? Call this number to get started: 1-855-456-1338.
A dedicated SSL certificate is recommended to make registration checkout and other areas of your website more secure.
Login to your WP-admin (WP Dashboard) and go to Event Espresso –> General Settings –> Payment Methods. Once on the Payment Methods screen, click on Playflow Pro and click on the button to activate the payment method.
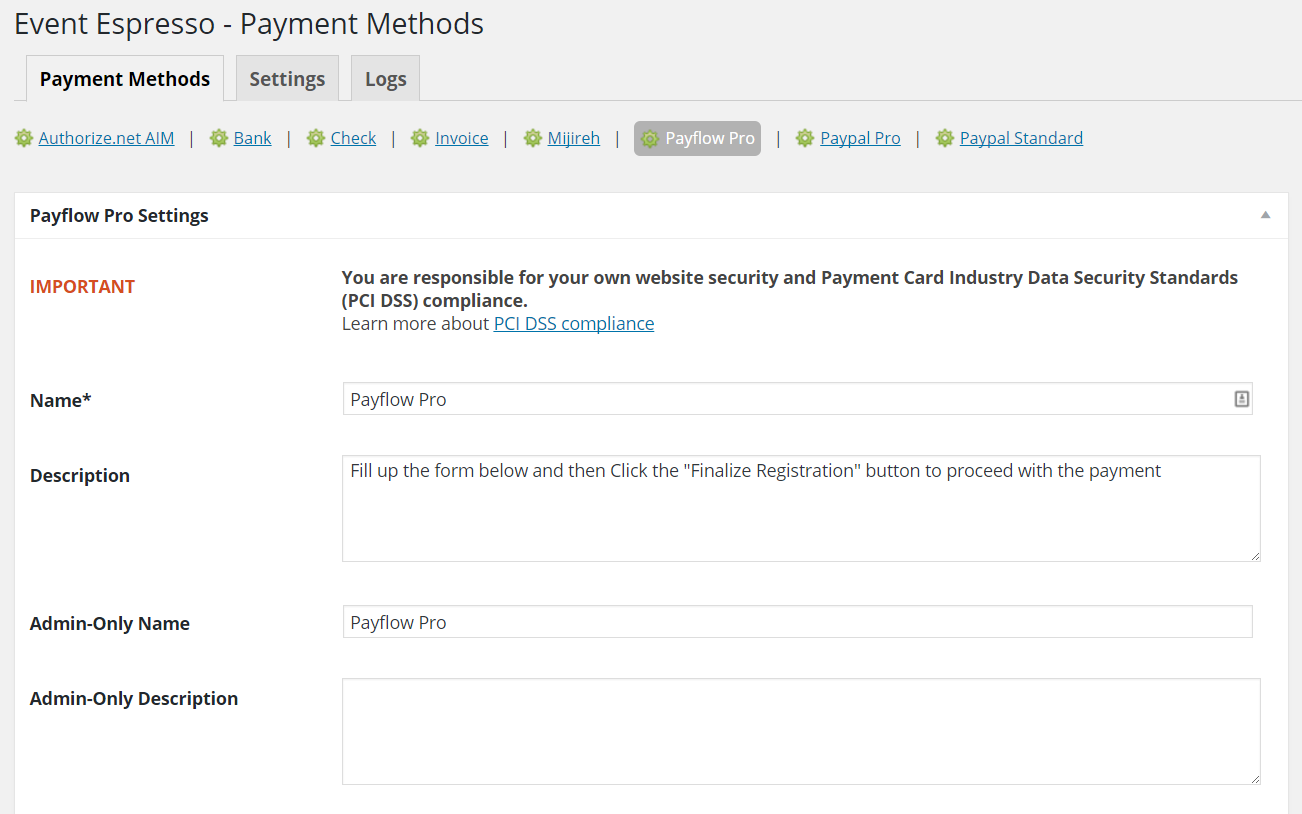
Below are the available fields and explanations for each field.
Name – This is the name of the payment method.
Description – This description is shown during registration checkout.
Admin-Only Name – This is a name of the payment method that will only be shown in the WP Dashboard (WP-admin).
Admin-Only Description – This description is used only in the WP Dashboard (WP-admin).
Debug Mode On? – Enables debugging for this payment method. It should be off (set to no) on a live/production site.
Open by Default? – This sets this payment method to be pre-selected on the registration checkout page.
Vendor ID – This credential is needed to process payments and will be provided when you set up you Payflow account.
User ID – If you have created multiple users within your Payflow account then each user will have a unique user ID, this can be input here. If you have not created multiple users this will match your Vendor ID.
Password – This is the password for your Payflow account.
Partner ID – if your Payflow account was acquired through a reseller, then use your reseller’s ID. Otherwise, leave blank, and the default option of “PayPal” will be used.
Button URL – This is the URL to the image that will be used during the payment process of registration checkout.
Alternative Button URL: http://ee-screenshots.s3.amazonaws.com/2015/07/pay-by-credit-card.png
![]()
Usable From? – Select where this payment method should be available for use. This payment method cannot process payments through the WP-admin (WP Dashboard).
PMD Order – The value (number) can be used to sort or arrange this payment option. A lower value means that it should appear first during registration checkout.
Update Settings – Click this button after making any changes to your payment method.
Deactivate Payment Method – Click this button to deactivate this payment method.
Usage
The Payflow Pro payment gateway will let you accept payments via major credit or debit cards.
This is an onsite payment gateway which means that attendees/registrants will process their payment on your site.
A Payflow Pro account with PayPal is needed to accept payments via Payflow Pro, and an SSL certificate is recommended for securing your website.
When signing up for your account, be sure to sign up for PayFlow Pro:

This gateway will not work with a ‘PayFlow Link’ account.
Troubleshooting
I configured Payflow Pro and payments are not being processed. Can you help?
Double-check your credentials to make sure that you are using the live credentials which are for production mode. Also, ensure that there is no extra spacing before or after the credentials in the payment methods page of Event Espresso.
How can I set up a recurring payment or subscription through Payflow Pro?
Recurring or subscription payments are not currently supported in the Payflow Pro payment gateway.
When I refund a payment, does it also refund through Payflow Pro?
Refunds in Event Espresso 4 are currently a two-step process.
1) Apply the refund through the transactional details screen of Event Espresso in your WP-admin (WP dashboard).
2) Then login to your Payflow Pro account and process the refund.
Is an SSL certificate needed for Payflow Pro?
A dedicated SSL certificate is recommended if you are accepting payments on your website.
Do I need to be PCI compliant?
Compliance with the Payment Card Industry Data Security Standards (PCI DSS) is required if you are processing, storing, or transmitting credit card data. Event Espresso recommends using a dedicated SSL certificate on your website.
View more information on PCI compliance from PayPal.
Customizations
- None at this time.
Accept event payments with the Payflow Pro payment gateway for Event Espresso